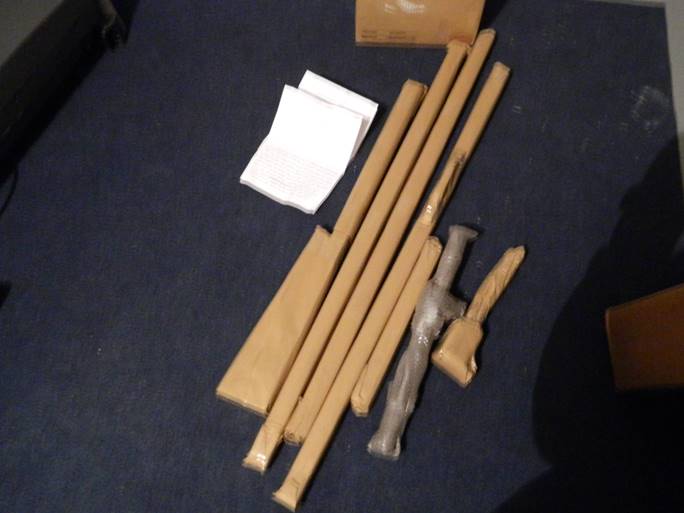
Quantcast
Channel: Articles
Viewing all 245 articles
Browse latest View live

Astrotrac TP3065 Pier Review

$
0
0

Astrotrac TP3065 Pier Review

I purchased the Astrotrac TP3065 pier because of its carrying capacity and design. The pier performs well, is stable, well made and has a padded shoulder carrying bag. It can also carry a heavy load. I can run the power lines for the Astrotrac, my camera and USB cable for my camera through the interior of the pier to reduce wire clutter. I discovered I can increase its stability by placing 10 to 15 pounds of weight inside the pier when in use. Info here:
http://www.rogerzellmer.com/generic_htm/astrotrac_pier_ballast.pdf


What I liked


  • Somewhat easy assembly and disassembly.
  • Padded shoulder bag and inner bag to carry the pier legs. Zipper compartment in the shoulder bag.
  • Overall design, finish, stability and carrying capacity.
  • Holes in its base and top plate to run wires and cables.
  • Tensioning screws for the 3 support cables.

What I didn’t like

  • There wasn’t sufficient vertical adjustment in the pier. More vertical adjustment is needed in the 3 feet when used on uneven ground. (See Figure 1)
  • If you screw the leveling feet out too far they tend to wobble. (See Figure 1)
  • You need to be careful if you store the Astrotrac and the pier legs in the same carrying case. In my opinion there’s insufficient room and you may damage the Astrotrac during transport.
  • Over time the 3 hooks holding the top plate will nick the paint on the pier. Placing small pads of Velcro at these locations will prevent this. (See Figure 2)
  • The lip on the ‘top mounting plate’ locking it into place is a little small.
  • The pier price point is a little high.


Figure 1 – Pier Vertical Adjustment Issue


There needs to be greater vertical adjustment for uneven ground.

When the feet are screwed about two thirds of the way then tend to wobble.

Figure 2 – Marks on Pier Due To Clamps


Small nicks on paint due to the 3 hooks. Use Velcro to protect these areas.

Bottom line

The Astrotrac Pier does an adequate job and will meet the user needs in most conditions. However the pier must be used on ground that requires little vertical adjustment or ground that’s almost level to start with. I found myself having to remove one of the feet or placing an object under one of the feet to level the pier on many occasions. On one occasion I had to screw one of the feet to its limit and stack 3 quarters under it to level the pier. The feet also tend to wobble if screwed out about two thirds of the way. Another 2 inches of ‘stable vertical adjustment’ is needed. This section of the pier needs a redesign. This is a MUST FIX item for Astrotrac. The internal soft carrying case for the pier legs has a 4th compartment. The Astrotrac TT320X-AG can fit here but I wouldn’t recommends it. In my opinion there’s insufficient room and the TT320X-AG may be damaged during transport. I have seen one post about this where the Astrotrac was damaged during transport. I only use this for my power and data cables.

If the user wants the stability and versatility of a tripod they should look into using a Vixen Hal tripod or something similar. The Astrotrac TW3100 Wedge would have to securely attach to the tripod. From what I have been told several users have gone this way. This would save the user about $100 dollars and have the ability to be used on very uneven ground.


Would I purchase the Astrotrac Pier again…?


Perhaps…, but Astrotrac would have to provide greater vertical adjustment in the pier. At a minimum 1 additional inch. Ideally more. Currently the pier must be used on ground that’s nearly level. They also must provide greater stability in the feet when screwing them out. The screws tend to wobble side to side. These issues have been sent to Astrotrac. I would likely look into the Vixen Hal tripod solution.

JTW / Nov ’15

Note: All pictures were from the internet.


Blue Skies, Red Sunsets & Company: Part 5 -...

$
0
0

Blue Skies, Red Sunsets & Company:

The Beauty of Light and the Air
Part 1
Part 2
Part 3
Part 4
Part 5
Green Flashes


by Derek Wallentinsen


Green Flashes


If you watch enough sunsets, you'll eventually see one where, just as the last sliver of sun slips away, it turns green or reappears for an instant as a flash of greenish light. Congratulate yourself - you have just seen the famous green flash!

Fig. 5-1: Green flash and Santa Barbara Island, California. Note the island's ends are upturned from the inferior mirage that helped create the green flash.

Green flashes involve several phenomena: refraction, dispersion and mirages. The flashes don't occur at every sunset, yet don't need a unique set of circumstances to occur. They are not as rare as popularly believed, and can be seen more than occasionally by an attentive sky watcher.


Fig. 5-2: Water in billions of tiny droplets refracts and disperses sunlight into a spectrum, the familiar to everyone natural phenomenon of the rainbow. Rainbow and farmhouse, Pagosa Springs, Colorado.

Refraction bends light according to its wavelength, an effect called dispersion. White light can be dispersed into its colors - the spectrum - by refracting through a prism. Since the air refracts light, the air disperses sunlight into a spectrum, too. The separation of colors by air is weak, so the separately-colored solar disks that might be seen mainly overlap with just the rims of the blue and red light left above and below the disk. The separation between the sun's blue light and red light dispersed by the air is too small to be visible. When at the horizon, this angular dispersion is less than a thirtieth the diameter of the sun, so the colored fringes or rims are lost in the glare of the light from the rest of the disk. And the blue, upper rim is greatly weakened by scattering, so the green rim is the shortest wavelength that usually makes it through.


(In detail G: Dispersion and flashes.)


Fig. 5-3: Refraction separates or disperses sunlight into different colors as well as distorting shape and changing the sun's position in the sky. Atmospheric dispersion of the solar disk into separate colored images is too small to be seen by the eye under normal circumstances.


With all these negative factors, why do green flashes happen? Because mirages can magnify the size and brightness of the rim so it is visible. Even then, having most of the sun below the horizon is usually necessary to see the flash.

Fig. 5-4: A mirage magnifies the size and brightness of the green rim to make the green flash visible during the brief interval after most of the sun has set but before the rim itself has set.


Fig. 5-5: This is her view of the sliver of  green sun that is visible only for a flash of time.


Most green flashes are associated with an inferior mirage right on the visible horizon that magnifies and intensifies the setting green rim. The rim is so narrow that the light of its erect and inverted images goes below the horizon in seconds. Thus, under favorable circumstances the green flash briefly appears, the ultimate moment of sunset.


Fig. 5-6: A green-rimmed solar segment that soon evolved into a green flash. San Pedro, CA.


Fig. 5-7: Green Flash – The Movie. Animation of the sunset in the preceding figure showing the evolution of the flash over a 10-second interval.

Green flashes can also be seen when the layered types of mirages are visible, those associated with temperature inversions and a highly distorted solar disk. In these cases, the mirage also acts to separate the rim's image from that of the sun, so the rim is a segment above the rest of the solar disk. The green flash appears when the horizon blocks the rest of the sun from view. With a neutral density solar filter, the segment can also be seen earlier in the sunset when the disk is still up.


Fig. 5-8: A mock mirage green flash with most of the sun above the horizon. The silhouetted landmass is Santa Barbara Island, California.


What are some other "flashy" phenomena? Multiple flashes and blue flashes can also occur, most frequently with the layered mirage conditions. Green flashes can happen when the sun sets behind a low hill. Despite claims to the contrary, flashes can occur in less than perfectly clear skies, though they may be less striking. The flashes can also be seen when the sun goes down over a low cloud bank.

Through a telescope, bright stars and planets will show coruscating colors as they reach very low altitudes and set. These colors are also caused by dispersion; since a planet or star is small to very small in apparent size compared to the angular dispersion, the effect of overlapping is lessened and multiple colors can be more readily seen together or in sequence than during a sunset.


Visually, green flashes look greener than they are as the eye is fatigued by the reddish color of the rest of the sunset. A photograph of a flash that looked green may come out yellow, and a flash appearing blue may appear green to the camera.


Fig. 5-9: Green flashes are greener visually than photographically. This visual green flash looked much yellower to the camera.


Because they depend on mirages that are created by temperature gradients and these temperature gradients are often only a few feet thick and aligned along the line of sight to the horizon, you can actually get an "instant replay" of a green flash by quickly running up to a higher elevation on a hill, bluff, or up the stairs in a house or on a ship. Then you are looking at the green rim using a spot slightly farther away in the gradient and recreating the conditions you had for your first flash.


Conclusion to Blue Skies, Red Sunsets and Company


The sky above us is a part of our natural surroundings, offering its own fascinations and phenomena. Blue skies, sunsets, sunrises, lunar eclipses, twilight, crepuscular rays, terrestrial and celestial mirages and the green flash can be seen from almost anywhere on the globe. Never miss an opportunity to go outside and look out and up!

**********************************************************************************************************


In Detail

G. Dispersion and flashes


Refraction bends light as it passes into and through the air. However, because refraction depends on the wavelength of light, air can disperse light of many wavelengths (sunlight) into a spectrum, just like a glass prism or the drops of water in a rainbow. Blue light is refracted more strongly than red light and the angle between the two colors of light is the dispersion of the medium.

A common technological example of dispersion is chromatic aberration by a simple single element lens like those used for eyeglasses or magnifiers. Because of dispersion in the glass, red and blue fringes will appear away from the center of view of these lenses with the blue fringes the farthest out. (With eyeglasses, visual accommodation usually causes you to ignore the fringes, since the brain knows what a view without fringes looks like and quickly and automatically adjusts the colors of the view.) If you wear glasses, consciously look for them around brightly lit openings. The fringes can also be clearly seen for a short time if you change to a new, stronger prescription.


Fig 5-10: Glass of all kinds (including the best camera lenses and telescopes) disperses light to a greater or lesser extent. In this picture, refraction of sunlight forms caustic (non-image) arcs when passing through wavy transparent glass blocks in a house wall. Blue and red edges along the arcs are caused by dispersion.


Air has a low index of refraction, so the effects of dispersion aren't nearly as easy to see as for water and glass. In air, blue light has a refractive index of 1.000279 while the index for red light is 1.000276, a difference of only 3 parts in a million. Using Snell's law, the difference between the two angles (the angular dispersion) of the light after it has entered the air can be calculated. Straight up it is zero, it reaches one arc-second (1”) at 30 degrees altitude and is only 26” (under a half arc-minute) at the horizon. This horizon value is several times smaller than the smallest angle easily seen by most people.


Table 5-1: Angular dispersion of red and blue light as calculated from Snell's law for different altitudes. (Measured in degree-minutes-seconds of arc,  º ' “)


The duration of the green flash can be roughly estimated as follows. The setting sun is a set of vertically-stacked, angularly-dispersed images enlarged by about the amount of the angular dispersion between the two colors of light (the flattening effects of the overall refraction at the horizon would decrease the stack size somewhat). Usually the blue fringe is too faint to see. If the dispersion for green light is taken as roughly the same as for blue (it is similar), the green fringe sticks out at the stack top by about 13” and the red fringe off the bottom by about 13”. For most sunsets from most locations, sunset takes approximately 2 minutes time, the solar disk descending at a rate of 15” per second. For this simple scenario,  a green flash is indeed that - visible for less than a second.

In many cases, the green flash actually appears for longer intervals. Why? Because the air and the mirage effects aren't uniform and can significantly enlarge the effective size of the green fringe. And the visual physiological effects of saturation and fatigue from the overwhelming reddened colors of sunset add in complementary contrast, making yellowish parts of the disk appear green.

The red fringe at the bottom of the sun can sometimes be observed by using a neutral-density solar filter (one that doesn’t change the color of the filtered light) shortly before sunset begins. It too can be affected by mirages, though without the drama of its being the last visible segment of the solar disk.


Selected Further Reading


Books:

Naylor, John, Out of the Blue: A 24-hour Skywatcher's Guide. Cambridge University Press, Cambridge, 2002. Features good chapters on daylight, mirages, sunset and sunset phenomena.

Hoeppe, Götz, Why the Sky is Blue: Discovering the Color of Life. Princeton University Press, Princeton, 2007. A fascinating historical overview of the development of topics about light and the air from the ancient Greeks to 21st-centruy planetary probes.


Minnaert, M., The Nature of Light & Color in the Open Air. Dover, New York, 1954. A classic 20th-century reference on light and aerial phenomena.

Smart, W. M., Textbook on Spherical Astronomy (Sixth Edition), Cambridge University Press, Cambridge, 1977. Classic text on astronomical geometry and topics such as horizontal refraction.

Day, John A. and Schaefer, Vincent J., Peterson First Guide to Clouds and Weather. Houghton Mifflin, Boston, 1991. Good summary of basic clouds and meteorology.


Websites:

Atmospheric Optics. Located at (March 2015):

http://www.atoptics.co.uk/

Compendium of topics and images about meteorology and light in the air.


An Introduction to Mirages, Andrew T. Young. Located at (March 2015)

http://mintaka.sdsu.edu/GF/mirages/mirintro.html
Includes discussion of topics like ducts and mock mirages with ray traces in the atmosphere.

Wikipedia
http://www.wikipedia.org/
Quick, varied quality reference on various physical and optical topics.


--------------------------------------------------------------------------------


All photographs and drawings in Blue Skies, Red Sunsets and Company by the author (except as noted for Figs. 1-11 and 2-1). Photographs include both native film and native digital images.


Contact the author for custom prints or use of any image in Blue Skies, Red Sunsets and Company:
americaneclipse2017@gmail.com


--------------------------------------------------------------------------------

There's a Catch!

$
0
0

THERE’S A CATCH!

An Eyepiece - Adapter Compatibility Study

by Ray Taylor 11-11-15

For at least 10 years, observers have complained in forums about eyepiece barrel undercuts causing various problems, but especially catches.  Because of my own experiences with catches occurring during insertion or extraction of an eyepiece when used with an adapter, I decided to do some investigation as to why.  Catches, I found, are not a one sided issue.
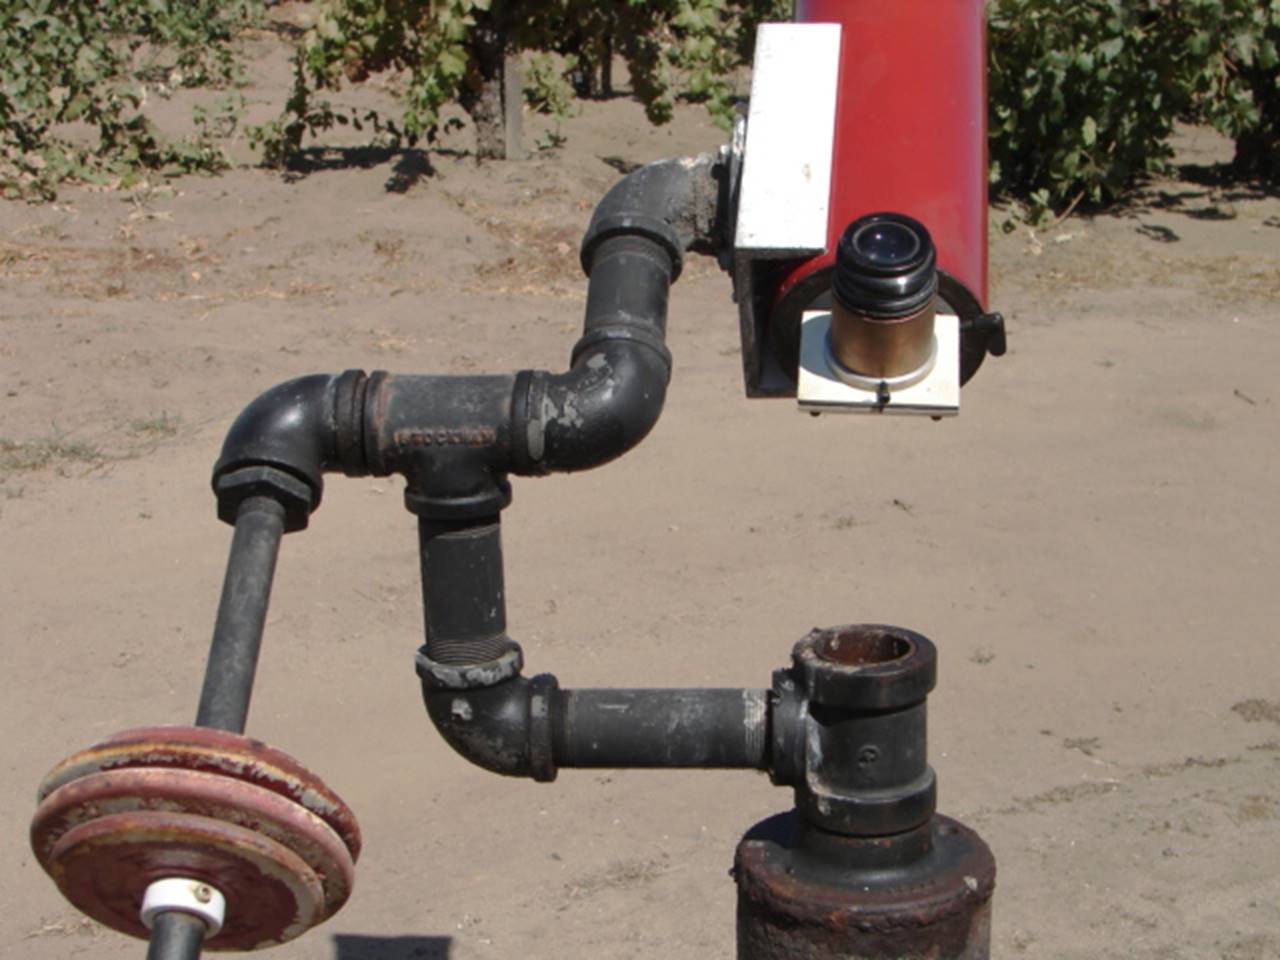
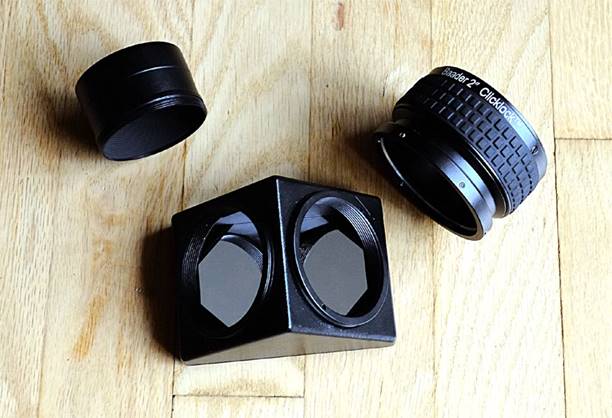
 

This photo distinguishes the various forms of undercuts with one possible remedy for those who are troubled with catches.  These eyepieces were used as part of the testing process.


HISTORY

For many decades, eyepiece barrels were made smooth.  A single thumbscrew was employed in the adapter or focuser to tighten or clamp the eyepiece in place.  A very short rotation, just a few degrees, of the thumbscrew was sufficient to tighten or release an eyepiece barrel. 

An eyepiece maker then cut a groove (referred to here as an “undercut”) into the circumference of the eyepiece barrel where the thumbscrew comes to rest.  This was designed to ensure that the eyepiece remained in place even if the thumbscrew was slightly loosened because the tip of the screw would remain within the confines of the undercut, even if the eyepiece slipped.  The only intent of the barrel undercut was to prevent an unintended eyepiece ejection.  Unscrewing the thumbscrew less than one rotation would usually release the eyepiece.  The number of degrees of thumbscrew rotation for tightening or loosening was slightly increased from that required by a smooth barrel because of the extra depth of the undercut.

Older 1.25” adapters employed a smooth bore and single thumbscrew.  Some years after the undercut was made popular for use with thumbscrews, a telescope/focuser maker added a metal compression ring (usually brass) to the inside of the adapter.  This ring is inset in a groove, milled inside the 1.25” bore and is necessarily close to the top of the adapter because that is where the thumbscrew must be located.  In this arrangement, the thumbscrew applies pressure to the brass ring, which in turn presses against the eyepiece.  The sole purpose of the metal compression ring is to prevent thumbscrew dimples on the eyepiece barrel; preventing aesthetic marring of the barrel.  The compression ring does not grasp the circumference of the eyepiece; the thumbscrew is still the mechanism for clamping the eyepiece against the opposing inside wall of the adapter.  The pressure applied by the thumbscrew on the eyepiece barrel is spread very little by the malleable, thin brass ring.  Holding power or grasping strength is still determined by the tightness of the thumbscrew.  To work most effectively, the compression ring and the undercut must align perfectly.

More recently, new adapters have been designed using a collet mechanism instead of a thumbscrew to hold an eyepiece.  A collet eyepiece adapter changes the direction of pressure that is applied.   By rotating a threaded collar, downward force is applied at the top of a rigid split ring which is forced down upon a bevel.  The bevel engagement forces the ring to compress,  changing the direction of force inward to tighten against the eyepiece barrel.  The collar threads, but mainly, the angle of the bevel, determine how fast pressure is applied by the compression ring to the eyepiece barrel.  Because the bevel is at one end of the compression ring, the split compression ring must be very rigid to provide relatively even pressure from the top to the bottom of the ring’s contact with the eyepiece barrel.  Other recent collet style adapters have been designed using a bevel at both the top and bottom of the compression ring.  Still others use the collet system to apply pressure through encapsulated plastic or metal pins to hold the eyepiece barrel.  The collet mechanism has been employed for many decades in metal machining and woodturning tools.


These are the ten adapters used during the testing process.  Although they are all designed to hold a 1.25” eyepiece, some adapters have an edge at eliminating catches.


A few eyepiece makers have supplanted the barrel undercut with an inverted conical taper, cut into the top of the eyepiece barrel.  I have not read any technical data concerning this mechanism when used with existing adapter designs, but advertising claims that it prevents catches. I will explain some inherent mechanical issues when I discuss advantages and problems. 

In an attempt to mitigate catches, two companies who formerly used barrel undercuts, have eliminated them on new eyepiece barrels; and at least one company now uses smooth barrels on some models and barrels with undercuts on other models.

There has been a slow progression of change in both eyepiece barrels and adapters over the past 40 years or so.  It is important to note that optics designers often have no control over how an adapter might be designed… just as telescope and focuser manufacturers may have no control over how an optical designer builds a new eyepiece.  This means that the various “improvements” in the design of adapters and eyepiece barrels, have been created without necessarily considering how they would perform together.  Each new feature might actually work very well when isolated, but may not work with other features equally well. 


CATCH CAUSES

Almost all catches are caused by a single issue.  They occur when two opposing right-angle shoulders contact each other.  On eyepiece barrels with no undercut, there is one shoulder; it is the base of the eyepiece barrel.  On an eyepiece with an undercut there are 3 shoulders; the barrel base and each side of the undercut, described here as the lower shoulder (closest to the bottom of the eyepiece barrel) and the upper shoulder (closest to the top of the barrel where the eyepiece body attaches).  The undercut shoulders oppose each other; one facing up and the other down.

A 1.25” adapter also has at least one shoulder at the top of the 1.25” bore; two more shoulders if it contains a compression ring.  The depth of the compression ring groove and the thickness of the brass compression ring determine how much of the compression ring groove shoulder is exposed inside the 1.25” bored adapter.  The more a shoulder is exposed, the greater the chance that one of the opposing eyepiece barrel shoulders will catch. 

With a smooth eyepiece barrel and a smooth adapter bore, there are only two shoulders that can catch; the bottom of the barrel and the top of the adapter.  This can only happen when initiating insertion and represents the first possible catch.  Once insertion is started, the wall of the adapter guides the eyepiece in smoothly (depending on clearance).  When extracting the eyepiece, there are no opposing shoulders to come into contact with each other.

Adapter thumbscrews are located very near the top of an eyepiece adapter, usually within 1/8”.  Adding height to the adapter to place the thumbscrew lower on the eyepiece barrel would, in turn, require more in-travel of the focuser.  Since the compression ring is located under the thumbscrew, it is also very near the top of the adapter, inside the 1.25” bore.  Almost all compression ring grooves are cut deeper than the thickness of the metal compression ring so that the edges (top and bottom) of the compression ring do not protrude into the path of an eyepiece barrel.  If they did, the compression ring itself would cause a catch.  But when the groove is deeper than the thickness of the ring, the difference exposes the shoulders of the compression ring groove.  That difference creates a larger inside diameter than the 1.25” adapter bore which allows the eyepiece to tilt.  The 1/8” of adapter wall above the compression ring is insufficient to keep the eyepiece guided into the adapter.  Instead, that rim of the adapter acts as a fulcrum; the eyepiece barrel below is allowed to enter the larger diameter (groove)  adjacent to the compression ring; the eyepiece barrel above tilts slightly and the second possible catch occurs when the bottom edge of the eyepiece barrel makes contact with the  lower shoulder of the compression ring groove.  If the compression ring was located much lower inside the bore, there would be sufficient length for the bore to guide the eyepiece barrel in without a catch.  But the thumbscrew, as we know, must be located high on the adapter to avoid additional focuser in-travel.  This second catch is why some equipment combinations require that the eyepiece be wiggled or rotated to seat properly in the adapter.

Extracting an eyepiece with an undercut from an adapter with a compression ring may allow a third catch to occur when the lower shoulder on an eyepiece barrel undercut comes in contact with the upper shoulder on a compression ring groove. These are generally considered the most dangerous, because the catch can cause a user to loose grip of the eyepiece just at the moment of extraction resulting in a dropped eyepiece.  Extraction catches are exacerbated by other potential issues such as a protruding (deformed) compression ring, very wide, exposed shoulders on the compression ring groove, or excessively deep undercut on the eyepiece barrel.


ADVANTAGES AND PROBLEMS

Barrel undercuts were originally designed to be used with thumbscrews.  The mechanical advantage was to provide additional eyepiece security in case the thumbscrew loosened.  For that reason, they are often referred to as “safety undercuts.”  The value of the barrel undercut only exists if the adapter is facing down, preventing the eyepiece from succumbing to gravity and falling to the ground.  There are some situations when adapters/eyepieces do face downward.  On Schmidt Cassegrain telescopes, screw-on diagonals can become loose and rotate counter-clockwise, allowing the adapter to fall into an upside-down position.  The same can occur to a diagonal with a screw-on nose.  And it can happen when the combined weight of a bino-viewer and eyepieces exceed the holding power of the focuser or adapter.  Also, eyepieces held in a turret on any kind to telescope are upside down at some point when rotating the turret.  An observer may intentionally rotate a diagonal downward to allow a child to observe.  And, diagonals on refractor or Newtonian telescopes mounted on an equatorial mount can get into odd positions when trying to observe certain areas of the sky, again, pointing the diagonal or focuser toward the ground.  But any diagonal, except the Denkmeier IVB Star Diagonal, if not firmly secured in a focuser, can rotate. These are the primary situations in which an undercut provides an advantage when a thumbscrew is insufficiently tight.  For Dobsonians, the focuser is usually held at some angle closer to horizontal than vertical.  Unless by accident, it would be very unusual for a Dobsonian adapter to face downward. 

Thumbscrew compression rings provide only one benefit; they do not allow the thumbscrew to mark an eyepiece barrel.  There are other ways to avoid marring barrels.  Nylon or plastic thumb screws, or Nylon tipped metal thumbscrews used in a smooth bore adapter do not mark barrels.  Collet type mechanisms do not mark barrels.  These alternatives eliminate two shoulders in the adapter, both of which can cause catches. 

A catch during insertion or extraction requires a user to move the eyepiece until it is parallel to the adapter bore and perfectly centered so that opposing shoulders can clear one another, allowing the eyepiece to be fully seated or extracted.  But this maneuver (usually wiggling or rotating the eyepiece) must take place in the dark or semi-dark for nighttime astronomers.  If using an alt/az or Dobsonian mount, targets are often lost and must be re-acquired with a   wide-field eyepiece, switching to a higher magnification starts the process again.  Losing a target after acquisition several times in a session becomes frustrating.  Catches can move the scope so the target is lost, but catches also slow the process of changing eyepieces.  When observing double stars, moving to higher magnification means a smaller field of view and mere seconds of time to switch eyepieces and refocus before the target is lost.

Incompatibility between brands of eyepieces and adapters is also responsible for performance related issues.  When a thumbscrew or a compression ring does not precisely align with an eyepiece barrel undercut, the thumbscrew/compression ring can hit the shoulder of the undercut.  If it hits the upper shoulder, it can lift that side of the eyepiece, tilting the eyepiece in the adapter and preventing registration with the adapter and focuser.  This prevents critical focus across the field of view.  Tilting eyepieces also adversely affects focus and image merging in bino-viewers. 

Not all compression rings are equal.  Some 1.25” adapters use a brass compression ring measuring less than 1/4” wide, but some are as much as 3/8” wide.  And their location in the adapter bore is not standard.  Almost all 1.25” barrel undercuts are close to 1/4” wide but a few newer ones are 9/16” wide.  When a compression ring or thumbscrew does not fit into the undercut, the purpose of the undercut (preventing unintended ejections) is defeated.  When a wider compression ring spans all of the undercut, a significant percentage of its gripping strength is also defeated.  Worse, if a wide compression ring spans only part of the undercut, tightening the thumbscrew can deform a malleable brass ring, forcing part of the ring into the undercut.  This can lock an eyepiece in the adapter, requiring special tools to unseat the eyepiece and deformed compression ring. 

Tele Vue and Explore Scientific have acknowledged that issues exist with catches and have modified their products in different ways to address the problems.  Tele Vue has modified new eyepiece barrel undercuts to include a short bevel at the lower shoulder.  They have put the same bevel on the lower shoulder of the compression ring groove.  These bevels are designed to work together to eliminate potential catches during insertion and extraction.  Think of a marble being dropped into a funnel… the bevel (inside of the funnel) guides the marble to the smaller outlet hole at the bottom of the funnel.  The beveled shoulders are designed to slide along an opposing shoulder, keeping the eyepiece centered for insertion or extraction without catching.  This remedy was designed specifically to work among various Tele Vue products.

Explore Scientific is using a new eyepiece barrel with an inverted conical taper at the top, adjacent to the eyepiece housing.  The taper is designed to eliminate 90 degree shoulders that can catch.  In this design, when a typical brass compression ring is closed against the inverted conical taper, the bottom of the compression ring makes first contact with the most shallow part of the taper.  Tightening a thumbscrew further, forces a brass compression ring to deform in two directions until it seats against the tapered barrel.  To compensate for the malleable qualities of brass, Explore Scientific employed a stainless steel compression ring which is much more rigid and less malleable.  When the stainless steel compression ring is tightened, it is difficult to deform with the thumbscrew unless inordinate pressure is applied.  This system does function to eliminate extraction catches but introduces new issues.  First, only the bottom edge of the stainless steel compression ring is used to grasp the bevel.  Second, the bevel is not designed to be used with brass compression rings.  And, this remedy does not address insertion catches; the bottom shoulder of eyepiece barrels can still catch on the lower shoulder of the compression ring groove.  And, if the eyepiece is not firmly seated in an adapter, the pressure from the compression ring could cause the eyepiece to tilt in the adapter because the deepest part of the taper is at the top of the barrel.  The inverted conical taper does work well with a plain thumbscrew because tightening the thumbscrew against the inverted taper pulls the eyepiece in a downward direction (into the adapter) while locking it against the outer wall of the bore in which the eyepiece is held.  A collet adapter would hold it well, but would lose its grasping strength over the length of the taper. 

To my knowledge, public testing of the comparative effectiveness of these two concepts has not been conducted. 

As a result of these issues, some users have relied on home remedies to eliminate problems peculiar to their equipment.  Some have found smooth barreled eyepieces that meet their need to avoid catches or lifting/tilting issues.  Some have wrapped plastic or metal foil tape around undercuts, filling their voids to make them smooth again, an effort to eliminate shoulders that catch.  Some have machined new adapters that do not employ compression rings but rely on a single thumbscrew instead; AGAIN, an effort to eliminate opposing shoulders.  Others have  purchased older style diagonals and adapters that work better with their newer eyepieces; or, new style adapters, including collet style adapters, that work better with their eyepieces. 

Collet adapters do not use a metal compression ring or thumbscrew.  Instead, they use a wide, rigid-plastic, split-ring that compresses around the circumference of the eyepiece barrel, applying even pressure.  Some collet style compression rings are segmented and use pins on the circumference to grasp the eyepiece barrel.  But if the eyepiece has an undercut, the portion of the compression ring covering the undercut loses its friction resistance.  A 1/4” undercut reduces the gripping surface area of a 5/8” wide compression ring by 40%.  This could be critical if the collet mechanism is holding a heavy eyepiece, bino-viewer, or camera… especially if held parallel to the ground.  Gripping strength is based on the coefficient of friction between the eyepiece and adapter.  The greater the weight (or in this case, pressure) between two surfaces, the more energy or pressure is needed to initiate movement (static friction).  So the tighter a thumbscrew or collet is made, the more resistant to unintended movement the eyepiece, turret or binoviewer becomes.  Users typically know this intuitively, adding pressure on thumbscrews that hold eyepieces in a turret more firmly than if the eyepiece is in a Dobsonian focuser or a refractor diagonal… because they know the eyepieces that are upside down in the turret can fall out.  Existing collet style adapters may not be fully compatible with dual barrel eyepieces which have an inner 1.25” barrel and an outer 2” skirt, because the skirt rests on top of the collar, preventing full insertion of the 1.25” barrel.  Most dual barrel eyepieces are longer and heavier, which makes the partial insertion of the 1.25” barrel even more precarious.  Dual barrel eyepieces were not the focus of this study and were not included.

Compatibility of components may rely on close tolerance or special clearance to function properly.  But to date, there are no industry-wide specifications to guarantee that eyepiece barrels and adapters will work together. 


ADAPTERS AND EYEPIECES USED FOR TESTING

For testing/comparison purposes, I used ten 1.25” adapters.  However similar they appear, they all presented different details, found in my descriptions or in Table A (weights & measures), below.  Three are distinct because in addition to holding the eyepiece, they provide additional weight to compensate between heavy 2” eyepieces and lighter weight 1.25” eyepieces.

The listed weights and measures for each adapter, were taken by me, using a non-certified home digital scale and non-certified electronic calipers.  For convenience and to avoid confusion between fractional inch measurements and decimal inch measurements, I chose to use metric units instead.

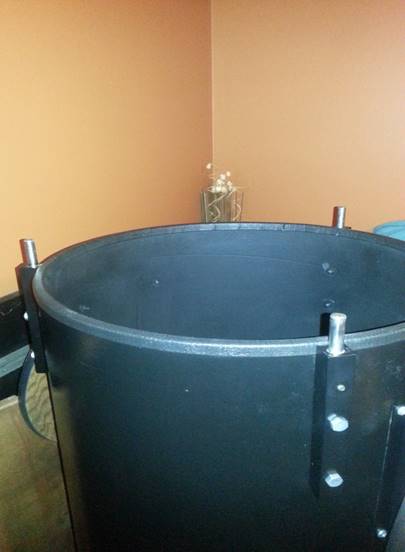
1.    The Explore Scientific adapter is a new model.  It is nicely finished, anodized aluminum and uses a wide, stainless steel compression ring which is a good deal more rigid than brass; the compression ring is quite difficult to remove from its groove.  The stainless steel ring should hold its shape very well and it has much better memory than brass.  A substantial shoulder is visible at the compression ring groove; both the upper and lower shoulders have a small chamfer.  It is threaded to accept 2” filters.  This image shows its compression ring groove shoulders for visual comparison to others.


2.    The Orion adapter with a wide, brass compression ring is an older model; the outside 2”  barrel is smooth (no undercut).  This adapter has a very smooth transition between the inner 1.25” bore and the brass compression ring; exposed shoulders are minimal.  It is threaded for filters.


3.    The Orion adapter with single thumbscrew binding is also older and very similar to the brass compression ring model (#2, above), but has a smooth 1.25” bore with no compression ring.  This adapter has a 1/4” undercut on the outside, 2” barrel.  The thumbscrew is very small with fine threads.  It is threaded for 2” filters.


4.    The Tele Vue Hi-Hat adapter with 1/4” brass compression ring and 1/2” undercut on the outside 2” barrel was purchased 3 years ago and is different from current models which have a bevel cut on the lower shoulder of the compression ring groove (see description of #6, “New Tele Vue Equalizer”).  This adapter is aluminum, anodized satin black; it does not have filter threads.  The aluminum thumbscrew is captive.  Most of this adapter’s measurements mimicked the “Old Tele Vue Equalizer”, #7 below, before it was modified.  The photos show the compression ring with exposed shoulders and the captive set screw with the ring removed (see “FINDINGS” for further explanation of the Hi-Hat compression ring groove).


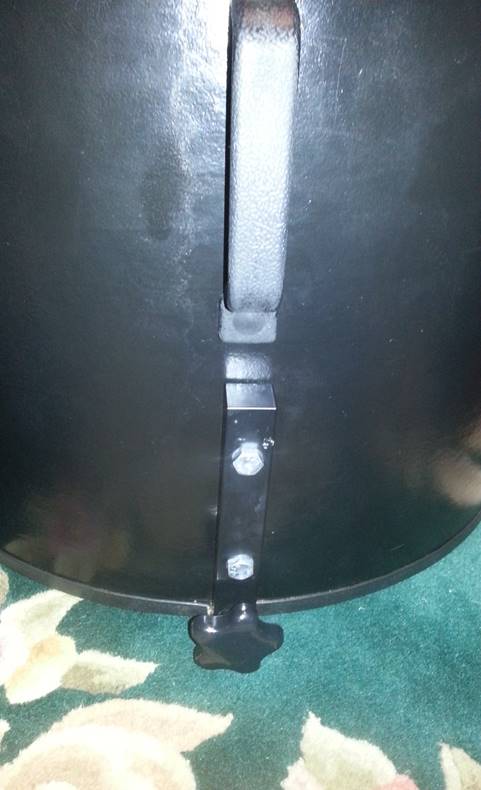
5.    The Astro Tech “MODIFIED” adapter is 4 years old, uses a very wide and rigid (thicker) brass compression ring and a non-captive aluminum thumbscrew in a satin, black anodized aluminum body.  This adapter had very substantial shoulders above and below the compression ring.  This adapter was shop modified to eliminate the majority of both shoulders by machining a 3/16” long bevel at the bottom shoulder and a larger chamfer at the top shoulder.  This was one of two adapters that was so modified prior to this comparison (the “Old Tele Vue Equalizer”, #7, was the other).


6.    The “New Tele Vue Equalizer” was updated over one year ago, when Tele Vue added: a bevel on the lower shoulder of the undercut on the outside 2” barrel; a bevel to the lower shoulder of the compression ring groove in the 1.25” bore; and a thumbscrew change from a captive 10-24 to a non-captive 8-32.  The new thumbscrew is supported by a black metal collar.  The Equalizer is bronze and weighs 12 oz. to compensate for weight differences between heavy 2” and lightweight 1.25” eyepieces.  It is not threaded for filters.


7.  The older model Tele Vue Equalizer was manufactured with 90 degree undercuts and it had substantial exposed shoulders (+/- .40mm), similar to the Tele Vue Hi-Hat above (#4).  Because it suffered from many catches, I MODIFIED this adapter to replace the shoulders with a bevel in an effort to reduce catches during insertion and extraction.  My bevel is more gradual (1/4” long) than the Tele Vue bevel that is incorporated in eyepiece undercuts and adapter compression ring grooves.  I gave the upper shoulder a gentle radius to reduce catches during extraction. I purchased this Equalizer about 2004; it is well used.  It has no filter threads and the brass thumbscrew is captive.  This adapter was one of two adapters so modified, the other being #5, the Astro Tech adapter listed above.


8.    The Shop Made Stainless Steel adapter was my design, produced in a local machine shop, for use with a stainless steel or a nylon 10-24 tpi thumbscrew, no compression ring or external undercut on the 2” barrel and no filter threads.  It was designed to be 14 oz. for balance control when changing from Ethos to lightweight orthoscopic eyepieces. 


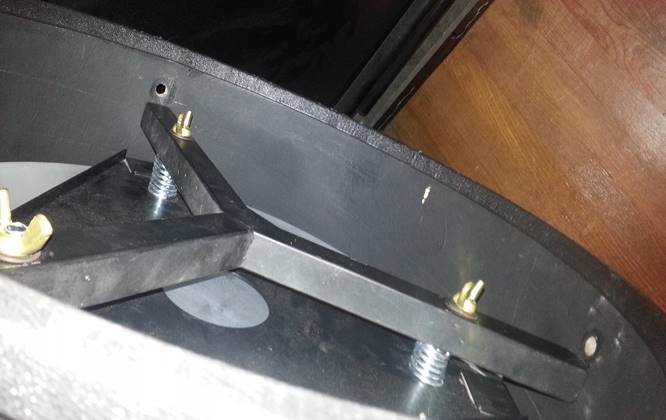
9.    The Antares Twist Lock adapter is aluminum and uses a threaded collar to compress the rigid plastic compression ring against an internal bevel.  The 5/8” wide compression ring extends to the very top of the 1.25” opening; the eyepiece does not contact any metal during initial insertion.  This ring has a shoulder cut on its top, outside edge to allow the collar to seat properly and push the ring down upon the bevel as the collar is rotated clockwise.  There is a 2mm gap below the compression ring to allow the ring to be forced down onto the internal bevel during compression.  The aluminum barrel below the gap is 11mm wide and 31.8mm in diameter; allowing .05mm clearance for the eyepiece.  The adapter is threaded for use with filters. I removed silkscreened labeling from the top of the collar with acetone and chamfered the lower outside edge of the 2” barrel because that edge was quite sharp.  The chamfer also eased insertion into diagonal.


10.  The Blue Fireball Twist Lock adapter is satin anodized aluminum and uses the same      principal for gripping an eyepiece as #9 (the Antares model).  But the collar on the Blue Fireball completely covers the top edge of the rigid plastic compression ring.  All external edges on this adapter are chamfered for smooth handling and the transition between the 5/8” wide compression ring and the lower aluminum barrel inside the 1.25” bore is very smooth; there are no exposed shoulders inside the 1.25” bore.  There was a difference    between the compression ring construction of this adapter when compared to the ring in the Antares model.  And the rate at which the compression ring closed around an eyepiece   barrel was slower than the Antares model when tightening the collar. 


TABLE A:  ADAPTER WEIGHTS & MEASURES


weight

(oz.)

height of 1.25” extension (mm)

compression ring width (mm)

protruding shoulders (mm)

compression ring material

NEW Explore Scientific CR

3.4

9.2

6.6

1.1

stainless steel

Orion CR

3.3

9.9

8.9

0.21

brass

Orion Thumbscrew

3.3

9.9

n/a

n/a

n/a

Tele Vue Hi-Hat

Aluminum

3.4

15.8

4.7

0.42

brass

Astro Tech Modified CR

3.2

10.2

8.9

0.18

brass

NEW Tele Vue

Equalizer CR

11.9

16.6

4.7

0.11

brass

TV Equalizer

CR Modified

12.0

15.3

4.7

0.10

brass

Shop Made SS Thumbscrew

14.0

13.0

n/a

n/a

n/a

Antares

Twist Lock

3.2

10.2

15.2

n/a

rigid plastic

Blue Fireball

Twist Lock

2.7

11.2

16.5

n/a

rigid plastic

In Table A, “CR” stands for Compression Ring.

“Height of 1.25” extension” is the height of the 1.25” barrel that extends above the 2” barrel stop… this measurement represents the additional focuser in-travel that is needed to compensate for the added height of the adapter.

“Protruding shoulders” is the width of the compression ring groove shoulders, measured from the compression ring to the edge of the exposed shoulder (depth of the groove minus the thickness of the compression ring).  I consider these measurements approximate.  First, they include hundredths of a millimeter, a very fine unit of measure.  Second, I had to take two measurements, subtracting one from the other to achieve the final figure.  I measured each one twice to verify my findings… they are very close, but could be off by a few hundredths. 

Overall height of the adapters ranged from 10.2mm to 15.8mm.  The 2” exterior barrel dimension ranged from 50.6mm to 50.8mm (50.8mm equals 2”).  The 1.25” bore of the adapters ranged from 31.80 mm to 31.90mm; most were oversized for proper clearance with the 1.25” (31.75mm) eyepiece barrels. 

For testing I decided only 4 eyepieces were needed.  But one, the Panoptic 24, was used three times; first, with a new barrel (beveled lower shoulder of the undercut), then with the older barrel that had 90 degree undercut, and finally, the older barrel again, but this time with copper foil tape filling the 90 degree undercut.  I used a Pentax XO-5 for its more shallow undercut, a Parks GS 30 for its smooth barrel, and a Sterling Plossl for its inverted taper design.  Below are photos of the six barrel styles that were used for testing:


TABLE B:  EYEPIECE WEIGHTS AND MEASURES


weight

oz.

undercut to stop (mm)

overall height (mm)

undercut width (mm)

undercut depth (mm)

barrel material

Panoptic 24

new bevel

7.8

2.9

74.5

6.2

0.36

brass/chrome

Panoptic 24

old undercut

7.8

2.7

74.5

6.6

0.38

brass/chrome

Panoptic 24

foil wrap

7.8

2.7

74.5

n/a

0.06

brass/chrome

Pentax XO5

shallow cut

3.0

1.9

45.1

6.0

0.29

brass/chrome

Parks GS 30

smooth

5.6

n/a

82.1

n/a

n/a

brass/chrome

Sterling 30

bevel barrel

3.4

2.0

76.6

10.1

+/- 0.7

anodized aluminum

In Table B, “undercut to stop” is the distance between the upper undercut shoulder and the    bottom  of the eyepiece housing which comes to rest against the top of the 1.25” adapter.  This short measurement is the width of 1.25” barrel that is above the undercut and is responsible for keeping the top of the barrel centered in the adapter.

The copper foil wrapped undercut was not perfectly level with the 1.25” barrel, leaving a very small gap (0.06mm).  But another wrap of the tape would have exceeded the 1.25” barrel      diameter, acting like a shoulder to create additional problems. 


TESTING

The first test was to determine the number of catches during insertion and extraction.  This is represented as two numbers (e.g. “9/5”), the first number representing catches during insertion, the second number for catches during extractions.  I quickly decided to restart the tests and include a second criteria that I called “bumps”.  I define a catch as a complete stoppage of insertion or extraction, where the eyepiece cannot move further without additional manipulation.  I define a bump as the eyepiece barrel or a shoulder making contact with another shoulder and slowing a smooth insertion.  Bumps are not as serious as catches because the eyepiece is directed into the adapter bore and seats properly, but the sensation of a bump is different than a completely smooth insertion. There was a range of severity regarding bumps; some were hard enough to move my alt/az mount; others were so light, they were barely perceptible.  Bumps of minimal severity are noted with an asterisk.  The second set of numbers below the first, represents bumps that occurred during insertion/extraction.  Each eyepiece was cycled 50 times in each adapter.  The adapter was held in a diagonal, in a refractor focuser, mounted and angled approximately 60 degrees up from horizontal.  The angle of the telescope remained the same throughout this testing procedure. 


TABLE C:  INSERTIONS/EXTRACTIONS WITH 50 CYCLES
(insertion/extraction catches above; insertion/extraction bumps below)


24 Panoptic

new

with bevel

24 Panoptic old style   undercut

24 Panoptic with

copper wrap

XO5 Pentax

undercut

Park GS

smooth

barrel

Sterling  inverted taper

Explore Scientific - CR

33/0

14/34

30/26

20/19

34/0

14/13

4/6

41/43

27/0

25/0

21/0

29/32*

Orion CR

0/0 catches

35/16 bumps

13/5

32/31

20/0

28/9

0/8

24/37

19/0

31/0

6/0

44/15*

Orion TS

0/0

2/0*

0/0

0/8*

0/0

0/0

0/0

0/0

0/0

0/0

0/0

0/0

Tele Vue Hi-Hat CR

23/0

24/35

10/31 catches

29/17 bumps

24/0

23/0

4/0

23/11

22/0

28/0

10/0

40/26*

Astro Tech CR-Modified

0/0

42/9

0/4

31/38

0/0

47/0

0/19

2/26

9/0

34/0

0/0

23/10*

Tele Vue

Equalizer CR

0/0

44/8*

0/38

40/10

0/0 catches

42/6 bumps

0/24

0/26

5/0

32/0

0/0

38/12*

TV Equalizer

CR-Modified

4/0

40/12*

0/7

11/36*

0/0

40/7*

0/0

12/50

2/0

26/0

0/0

32/8*

Taylor Made

SS - TS

0/0

0/0

0/0

0/4*

0/0

0/0

0/0 catches

0/0 bumps

0/0

0/0

0/0

0/0

Antares

Twist Lock

0/0

0/0

0/0

0/0

0/0

0/0

0/0

0/0

0/0

0/0

0/0

0/0

Blue Fireball

Twist Lock

0/0

0/0

0/0

0/0

0/0

0/0

0/0

0/0

0/0 catches

0/0 bumps

0/0

0/0

In Table C, “CR” stands for Compression Ring; “TS” stands for Thumb Screw

In Table C, * (asterisk) denotes bumps that were consistently very slight or barely perceptible

To read this table, select an adapter and read across to see how it performed with various   eyepieces; or, select an eyepiece and read down to see how it performed with various adapters.  Please be mindful of the two adapters that were modified before testing. 

The second two-part test was to determine if an eyepiece was securely held by the adapter when turned upside down.  For this procedure, I used moderate pressure to tighten the thumbscrew or collar of the twist lock adapters and held the outside of the adapter rotating it upside down.  All eyepiece/adapter combinations passed.  Then, holding only the adapter, I brought the adapter down sharply until my wrist stopped abruptly in my opposite hand (think of a clap).  This tested the gripping strength of the adapter under circumstances which are unlikely to occur; all adapters also passed this test.

The third test was designed to check the effectiveness of a barrel undercut at preventing an  unintentional eyepiece ejection.  I placed the eyepiece in a mounted diagonal/adapter, inserted and seated the eyepiece and then tightened the thumb screw to hold it in place… upside-down.

I marked the thumbscrew and the adapter for a registration point and then slowly turned the thumbscrew counter-clockwise to loosen it.  When the eyepiece released and dropped, I stopped rotation of the thumbscrew and used a protractor to determine the degrees of rotation, recorded in the boxes of Table D.  I performed 5 cycles for each eyepiece with the telescope in a horizontal position with adapter and eyepiece held vertically, pointing directly down.  I repeated the test with the telescope held at a 45 degree angle.  However, the eyepiece would release and slide to the end of the adapter where it stopped in most adapters (see FINDINGS for detailed explanation).  The degree of thumbscrew or collar rotation required to fully release the eyepiece at zero or 45 degrees was consistent.  Recorded degrees are an average of 5 cycles +/- 10 degrees.


TABLE D:  EYEPIECE BARREL UNDERCUT EFFECTIVENESS
(degrees of thumbscrew rotation required for eyepiece to slip out of focuser)


24 Panoptic

new with

bevel

24 Panoptic old style undercut

24 Panoptic with

copper wrap

XO5 Pentax

undercut

Park GS

smooth

barrel

Sterling

inverted taper

Explore Scientific CR

230

110

60

60

20

180

Orion CR

110

110

60

50

20

180

Orion TS

320

340

80

220

30

380

Tele Vue Hi-Hat CR

200

210

50

110

20

180

Astro Tech CR Modified

60

60

60

60

20

240

New TeleVue

CR Equalizer

200

210

60

160

20

240

TV Equalizer

CR Modified

210

220

60

40

20

180

Taylor Made

SS - TS

160

170

50

130

20

160

Antares

Twist Lock

20

20

20

20

20

20

Blue Fireball

Twist Lock

20

20

20

180

20

270

The numbers in this table are degrees of rotation of the thumbscrew or collar required to release an eyepiece; one revolution being 360 degrees.  Degrees were rounded to the nearest 10.  Numbers ranging from 100-340 indicate that an eyepiece barrel undercut was accessed by the thumbscrew or compression ring, allowing the safety feature of the undercut to be effective.  Numbers from 20-40 indicate that the undercut was not accessed, and therefore, served no purpose; except for the copper foil wrapped barrel, in which the copper tape was somewhat compressed, especially by the bare thumbscrew.  To figure out what fraction of a revolution the degrees represent, divide 360 by the posted number; to figure out what percentage of a revolution the degrees represent, divide the posted number by 360… and move the decimal point; e.g., 20 degrees is 5.5% or 1/18 of a revolution, before the eyepiece was released.  The Orion thumbscrew adapter utilized a very small thumbscrew with fine threads (probably 6-40 tpi or a metric equivalent) which required more rotation to move the screw, compared to all other screws, which ranged from 8-32 tpi to 10-24 tpi. 

Ergonomics are important when using equipment in the dark, so I conducted a short evaluation in a dark closet to test function of adapter styles; a thumbscrew/compression ring and the two twist lock adapters.  I only used one eyepiece during this trial with 20 insertion cycles for each adapter.  Then I tried the same thing while wearing some fleece gloves.  During this process I was struck by the difficulty I had in changing the eyepiece in the Blue Fireball adapter because it required 2-3 hand movements to lock or unlock the collar.  Why?  Because my fingers were only able to rotate the collar about 65 degrees each time I grasped it.  Remember that I found a distinction between the Blue Fireball and Antares twist lock adapters… the Antares model, which employs a steeper bevel angle, opened and closed with one twist… occasionally needing an extra short twist to lock the eyepiece.   The Blue Fireball requires at least 2 twists, sometimes needing a third.  This procedure was complicated with gloves, requiring more deliberate movement to be successful.  I preferred the Antares over the Blue Fireball mainly for this issue.  In practice, I use the Blue Fireball for only one purpose… to hold my heavy 1.25” Barlow; I never remove it from the Barlow.  For that purpose, it serves quite well.  Compared to a thumbscrew, the collar seemed a little more cumbersome, especially if wearing gloves. Of course, my years of experience with thumbscrews has probably tilted my bias on this issue… as they say, your mileage may vary.


FINDINGS

By the time I got about 2/3 of the way through the test for catches, I discovered that if I changed the altitude axis of the telescope and therefore, the angle of the adapter, I could change the number of catches or bumps.  Thankfully, I had kept the telescope at the same relative angle (about 60 degrees above horizontal) during my testing, so that influence did not skew results of my 3,000+ eyepiece insertions.  But here, you can interpret the information to mean that different telescopes may in fact yield significantly different catch results, simply because of how their   focuser is mounted or angled for use.  I found that if an eyepiece is inserted vertically (straight down, as if the adapter is on a table), there are fewer catches than if the adapter is horizontal or at a 45 degree angle.  My mechanical experience tells me that the weight and length of the  eyepiece should also influence numbers or severity of catches because of tilting the barrel.  There are lots of variables.

The function of grasping an eyepiece needs no explanation.  But how it is handled during insertion or extraction may play a role to cause catches.  Grasping an eyepiece from above or from the side, with the whole hand or just 2 fingers, causes different muscle interaction.  Holding an eyepiece one way may result in gross movement of the arm and hand for insertion; whereas, grasping it with fingers may use more finger movement during insertion.  Fine motor skills are also correlated to vision and depth perception, which is effected during darkness.  These factors could result in higher or lower numbers of catches between individual performance. 

The Explore Scientific had more catches than any other adapter.  One very likely answer lies in Table A, which shows that it has the biggest exposed shoulders (1.1mm) at the compression ring groove.  Its exposed shoulders are more than twice as wide as the next closest adapter, the TV Hi-Hat (.42mm).  The other 4 compression ring adapters have exposed shoulders ranging from .21 to .10mm and the number of catches they suffered was correspondingly lower. 

During initial testing of the Blue Fireball twist lock adapter, I detected many more “bumps” than the Antares twist lock.  I measured the inside diameter of the aluminum barrel below the plastic compression ring in both adapters:  Blue Fireball = 31.83mm  vs.  Antares = 31.99mm.  The closer tolerance to the eyepiece barrel diameter (less clearance) probably resulted in the eyepiece barrel making contact with the aluminum bore below the plastic compression ring in the Blue Fireball.  Later, I also discovered that the collar on the Blue Fireball was unscrewed much more than the Antares collar, allowing the compression ring to expand more than the    diameter of the lower aluminum barrel.  I considered the first test results of the two twist lock adapters flawed.  So I re-tested them for catches and bumps after adjusting their collars equally; after loosening the adapters sufficiently to remove the eyepiece, I opened each one an additional 180 degrees.  All insertion catches and bumps disappeared.  I considered the results of my first test to be the result of user error.  Table C was corrected to reflect the second test results.

I also found that the collet system has some limitations, such as, when holding dual-barrel eyepieces.  In all cases that I tried, the 2” skirt prevented the 1.25” barrel from inserting very far.  This reduced the surface area being gripped and created the need for additional focuser in-travel.  This seemed not to be a good match for long, heavy eyepieces in particular.  Using a 10mm Ethos, and tightening the collar as tight as I could, I could still pull the 1.25” barrel from the collet adapters… without using “brute” strength.  And, as eyepieces were each inserted 250 cycles, the Blue Fireball adapter accrued an accumulation of very fine, dry residue between the plastic compression ring and the anodized aluminum bevel.  It cleaned out with the sweep of a finger, but the residue was from micro-particles being abraded from friction between the plastic compression ring and the anodized bevel inside the adapter.  So, composition of the compression ring will be a factor concerning wear qualities.  The Antares and Blue Fireball twist lock adapters are on the least expensive end of collet style adapters (retailing new for about $30).

The Tele Vue Equalizer with a bevel on the lower shoulder of the compression ring when used with the new Panoptic barrel with a bevel had zero insertion and extraction catches; and the “bumps” were very minor.  The remedy works perfectly; but only when new barrels are used with new adapters.  When the new adapter was used with an old Panoptic barrel, or Pentax eyepiece with 90 degree undercuts, there were still many extraction catches.  That is because nothing was done to change the cause of extraction catches between the old style undercut and the upper shoulder of the new compression ring.  To make the new Tele Vue remedy work  properly, you must use new eyepieces or barrels and new adapters.  The fix definitely works, it’s just really expensive if you already own older models of Tele Vue adapters and eyepieces.  This remedy was developed to work specifically within the Tele Vue family of products; there is no guarantee it will perform the same with eyepieces or adapters from other manufacturers because there is no industry standard, that I am aware of, when it comes to undercuts, compression rings, bevels and chamfers. 

When I modified an older Equalizer on my lathe, adding a bevel to the lower shoulder of the compression ring groove, I also put a radius on the upper shoulder.  That radius reduced extraction catches in the older TV Equalizer from 38 to 7, using a TV eyepiece with 90 degree undercuts.  It was not a perfect solution, but it helped significantly to reduce catches when using an old style barrel. 

Tele Vue eyepieces use a slight (about 20 degree) bevel on the bottom of their eyepiece barrels with a very small chamfer on the outside edge.  Pentax eyepieces use a long 80 degree chamfer on the bottom edge of their eyepiece barrel, which slides past 90 degree shoulders most of the time.  Table C demonstrates the effectiveness of Pentax barrels at eliminating a large percentage of insertion catches compared to the Tele Vue eyepiece when used in the same, older adapters with compression rings.

The Pentax barrel undercut is not quite as deep as the undercut on a Tele Vue eyepiece (Table B).  It’s likely that the slightly more shallow undercut did play a part in reducing the total number of extraction catches when compared to the Panoptic 24 with 90 degree undercut.  It is a close call and a larger sampling is needed to know for sure.

Thumbscrew adapters without a compression ring (smooth inner bore) and twist lock adapters (which have a very smooth transition between compression ring and inner bore), were consistent in the elimination of catches, both insertion and extraction.  Why?  Because they eliminated opposing shoulders that cause the catch in the first place.   

Eyepiece barrel undercuts can possibly cause a catch during insertion, but ONLY if there is   sufficient clearance for them to tilt when their barrel is inserted 3/4 of its length into an adapter.  When the lower part of the barrel, below the undercut, is inserted that far, there is generally   insufficient clearance to allow the eyepiece barrel to tilt enough to cause a catch between the top of the adapter and the upper edge of the undercut.  If the compression ring in the adapter is catching on the undercut when the thumbscrew is fully released, then the compression ring is probably deformed and needs repair or replacement.  The brass compression rings must seat properly in their groove to avoid catches with an undercut.

The Parks GS 30 eyepiece with a smooth barrel has a 45 degree chamfer on the bottom of its barrel; the width of that chamfer is .96mm.  The Pentax XO-5 has an 80 degree chamfer that is 2.35 mm wide.  The Pentax provides a wider chamfer at a greater angle which slides past 90 degree shoulders more effectively.  Take a look at Table C and compare catches between these two barrel styles.  Please note that the catches were limited to insertion catches using the smooth barrel; the bottom edge of the barrel was catching on the lower shoulder of the compression ring groove during insertion.  Details such as the Pentax chamfer can play a significant role in reducing catches. 

The 3 year old TeleVue Hi-Hat with 90 degree compression ring groove, and captive aluminum thumbscrew presented a special issue that I discovered late in testing.  TeleVue is the only adapter that presents a captive thumbscrew, a “value added” feature that prevents losing a thumbscrew at night.  But the captive thumbscrew does not fully retract beyond the wall of the compression ring groove because it is annealed on its edges to prevent unscrewing beyond that point.  With the brass compression ring covering the end of the thumbscrew, the exposed shoulder of the compression ring groove is about 1/2 the width when compared to the same shoulder on the opposite side, where the split ends of the brass ring are located.  Removing the brass ring, I could feel the slightly raised end of the captive screw, even though the screw was fully retracted to its stopping point.  In the new Equalizer, that issue has been eliminated, with a non-captive screw which fully retracts from the groove.  Loss of the screw in that new Equalizer is subverted by the longer metal collar through which it must be unscrewed… requiring many full revolutions.  I believe this change to eliminate the captive screw was made so that the brass compression ring could set flush with the shoulder of the bevel, around the complete circumference of the compression ring groove.  If the captive screw remained, it would have forced the edge of the compression ring into the path of the eyepiece.

The third test I conducted was initially designed to test the effectiveness of barrel undercuts in preventing unintended ejections… which is their sole purpose.  It did show that they do their job, but only if the thumbscrew or brass compression ring actually enters the undercut.  And, therein, lies the problem.  Of the adapters I tested, only the Tele Vue compression rings and the two  single thumbscrew adapters actually seated in the undercuts of the 1.25” Tele Vue and Pentax eyepieces.  If you return to Tables A & B and look at the compression ring width compared to the width of the undercuts you will see the problem.  The Explore Scientific was close in width, but its placement inside the adapter is very slightly different than the Tele Vue compression ring.  In the Explore Scientific adapter, the top of the compression ring is 2.9mm from the top of the adapter.  In the TV adapter, the top of the compression ring is 4.0mm from the top of the adapter.  That 1.1mm difference means that only about 1mm of compression ring width is actually gripping the eyepiece barrel; the remainder of the Explore Scientific compression ring is at rest over the void of the eyepiece barrel undercut on Tele Vue and Pentax eyepieces.  Another example is reflected in Table D, as the Astro Tech thumbscrew required 60 degrees of rotation to release eyepieces with an undercut.  The width of its compression ring exceeds the width of the undercut, so it cannot grip the eyepiece where the undercut exists.  I suspect its compression ring was partially entering the undercut, forced slightly by tightening the thumbscrew.  When used with the smooth barrel of the GS 30, the Astro Tech thumbscrew only       required 20 degrees of rotation to release.  The Orion and Astro Tech compression rings spanned all undercuts, but their wide compression rings  provide slightly more contact area when compared to the Explore Scientific compression ring.    Their wide compression rings, however, defeat the purpose of the undercut. 

The undercut validation test vividly illustrated why catches occur between eyepiece barrels and compression ring grooves when the adapter was held at an upside-down 45 degree angle.  I did not report the results of thumbscrew release tests at 45 degrees because they were all so different.  When the adapter was held at an upside-down 45 degree angle and the thumbscrew was slowly released to reduce its grip on the eyepiece barrel, in the majority of releases, the eyepiece slid out until the bottom of its barrel came into contact with the compression ring inside the adapter.  Then the eyepiece would stop and would not drop from the adapter unless I purposely moved it or I tilted the telescope back up to zero degrees so that the adapter was once again, pointed directly down.  This sequence demonstrated, in reverse, how and why catches occur.  The more the eyepiece slid out of the adapter, the more it could tilt.  When the end of the barrel reached the compression ring, in nearly all cases, it stopped, with the edge of the barrel resting against the compression ring.  The lip of the adapter acted like a fulcrum; the extended weight of the eyepiece pulling down, lifting the end of the barrel inside the adapter.  This was the test I was actually looking for to prove the cause of insertion catches.  It just happens to be shown in reverse with this test.

The results of the 45 degree test were too varied for me to report with any confidence.  A few eyepieces did drop out in one smooth movement when used with some of the smooth adapters, but not all.  Some eyepieces hit the compression ring and popped out. I’m sure that the coefficient of friction between the eyepiece and the adapter played a part in the variety of results, with brass, polished chrome, machined stainless steel and plastic all playing their role.  

The modified adapters, TV Equalizer and Astro Tech, were modified on my lathe using carbide hand tools that I fabricated.  The modifications turned out well, considering I was not using a compound cross-slide tool holder.  I’m an experienced wood turner and I have spun non-ferrous metals by hand on my lathe.  In tests, the modifications performed about as well as the new TV Equalizer with the included bevel.  They are not a perfect solution for insertion catches, but they help to drastically improve performance by eliminating most catches caused during insertion and reducing the severity of those catches that persist.  This modification can be made at a  machine shop for a service charge.  The exposed shoulder can be eliminated with the bevel, but enough of the shoulder must remain to support and hold the compression ring in place. 

From a mechanical standpoint, the inverted taper of the Sterling eyepiece invites problems when used with most compression ring adapters that use a thin brass ring.  But in use, it works quite well as long as the thumbscrew is not over-tightened.  It did eliminate all extraction catches and was able to reduce the number of insertion catches over some other barrel types.  This eyepiece did not belong to me, so I was careful not to use much pressure on the thumbscrews, but pressure was sufficient to hold the eyepiece.  On the last test, to determine if the undercut prevented an unintended ejection, I found that the inverted taper did work as well as the 90 degree or bevelled undercut.  While it was upside down, I could see the eyepiece gently slide down along the taper as the thumbscrew or compression ring released pressure.  Three times during this test, while paired with the Blue Fireball adapter, the Sterling did not fall free of the adapter.  The eyepiece is very light weight and did not overcome the friction resistance of the plastic compression ring.  It is possible that the plastic used in the compression ring of the Blue Fireball adapter is more compliant than that of the Antares unit, allowing a slight or temporary deformation.  The Antares required only 20 degrees of rotation before releasing the eyepiece; the Blue Fireball required 270 degrees of rotation… a very significant difference, indicating that the Blue Fireball compression ring was probably forced into the inverted taper. 

The use of metal foil tape to fill the 90 degree undercuts on the Panoptic 24 was proven effective in eliminating extraction catches.  But filling the undercut also eliminates its only positive attribute… providing a safety mechanism for loosened thumbscrews.  If you do not care about the safety issue, filling the undercut works very effectively to eliminate insertion catches when used with compression ring adapters.  The 1/4” copper foil tape costs about $10-$15 per roll for enough tape to apply to dozens of eyepiece barrels.  Its durability appears quite good as long as it is not used with a plain thumbscrew.  Compression rings of all types seem to work very well with the tape filled undercuts.  I had to trim about 1/16” off of the edge to apply it to the Pentax eyepiece because of its more narrow undercut, but good sharp scissors are sufficient to cut the foil tape.  Application is quick, taking about 5 minutes per eyepiece.  Tape filled undercuts also eliminate the concern of mis-matched compression rings being deformed over partially covered undercuts.  The only concern about such a remedy is off-gassing from the tape adhesive.  Most metal tapes use acrylic adhesive; the metal foil averages 1.5-4 mils thick; the adhesive adds another 1.5 mils.  The amount of off-gassing released by such a small amount of adhesive should have no effect on an optical system.  And off-gassing primarily occurs during initial exposure to the air, when the tape backing is removed to expose the adhesive.  This is a very a trivial issue. 


CONCLUSIONS

The test for catches was quite revealing to me.  When a bevel was placed on the lower shoulder of the eyepiece undercut (extraction) AND on the lower shoulder of the compression ring groove (insertion), as demonstrated by new Tele Vue products, the problem of catches in general, was eliminated.  This was confirmed by the difference in performance with the three Tele Vue adapters in use with the various eyepiece barrels.  The older aluminum Hi-Hat with 90 degree shoulders on the compression ring groove, when used with 90 degree eyepiece barrel undercuts, suffered many catches. For certain, this Tele Vue remedy shows a remarkable improvement.  There was a sensation of a “bump” but it was very well controlled and lightly perceptible.  With unmodified adapters/eyepieces which have 90 degree shoulders, there were high numbers of catches and the bumps were much more severe.  And, on the two adapters that I modified before initiating the test (Astro Tech and the old Tele Vue Equalizer), the results were very    similar to those of the new-style adapters with a bevel.  But the Tele Vue remedy does not yet include older Tele Vue products; they have not yet offered new replacement barrels for older eyepieces.  And, to be completely effective for both insertion and extraction catches, both the eyepiece barrel and the adapter must be used together.

Some of the possible remedies for compatibility issues between eyepiece barrels and adapters have already been discussed.  This is a list of those possible solutions, but they all depend on your current equipment, your personal needs, budget and preferences… each of them relates to elimination of opposing 90 degree shoulders:

Insertion-Only Catch Remedies:

            1.  In your 2” to 1.25” adapter with a metal compression ring, a bevel can be machined into the lower shoulder of the compression ring groove, eliminating the 90 degree shoulder.  Very effective; moderate cost. 

            2.  When selecting eyepieces, ensuring that they have a large, steep bevel on the      bottom can greatly reduce or eliminate insertion catches.  Moderately effective; no cost

            3.  Most eyepiece barrels can be removed, taken to a machine shop and machined to create a steep, wide bevel on the bottom edge (similar to Pentax barrels).   This removes chrome finishes to reveal the base metal.  Moderately effective; moderate cost.

Extraction-Only Catch Remedies:

            1. Metal foil tape to fill barrel undercuts is inexpensive, easy to apply and very effective at eliminating extraction catches.  Filler tape should not be used with single thumbscrew adapters (those without a metal compression ring).  Very effective; inexpensive.

            2.  Existing eyepiece barrels can be machined to include a bevel on the lower shoulder of the undercut.  This removes chrome finishes to reveal the base metal.  Very effective;     moderate cost.

            3.  By machining a radius on the upper shoulder of the compression ring groove (just below the top of the adapter) it will help to eliminate many, if not most, extraction catches.   Moderately effective; moderate cost.

Insertion AND Extraction Catch Remedies:

            1.  Tele Vue has successfully modified their eyepiece barrels and adapters to incorporate bevels that eliminate insertion and extraction catches.  The cost is high to replace existing   eyepieces and adapters.  Purchasing just the adapter will eliminate insertion catches.  Purchasing only eyepieces will eliminate extraction catches.  They are designed to positively work only within the Tele Vue line of products.  There is no guarantee that they will work with other makes.  And, these improvements are currently only available in two models of the Hi-Hat adapter, one aluminum version and one bronze version (the Equalizer).  Tele Vue has not yet incorporated bevels in 2” diagonals, flat top adapters, or the Paracorr (neither 2” nor 1.25” adapter).  This remedy does not resolve issues for thousands of eyepieces and adapters already sold.  Very effective; very costly.

            2.  Using an old adapter with smooth inner bore and single set screw can eliminate both insertion and extraction catches when used with all brands of eyepieces having a smooth barrel OR an undercut.  It is simple and effective.  If an old adapter uses a metal thumbscrew, it can be replaced with a Nylon or plastic thumbscrew to prevent marring your eyepieces.  If needed, a second thumbscrew hole can be drilled & tapped.  Cost is about $15 for an old adapter on the used market and another $1 for a plastic thumbscrew.  Very effective; minimal cost.

            3.  Custom adapters can be made at a local machine shop to meet your own specifications.  If you need a heavy adapter to compensate for weight when switching from two inch,   24-oz. eyepieces to 2-oz. orthoscopic eyepieces, you can have an adapter made of bronze or stainless steel to meet your exact demands.  Lightweight adapters can be made of aluminum.  The cost of materials is nothing compared to the machinist’s time, so be prepared.  One-off  production comes at a price; think in the range of $200 to make one adapter.  Making 3 or 5 isn’t much more expensive and you might sell them to friends, reducing the per unit cost to $50.   Very effective; moderate cost.

            4.  Twist lock adapters can be used instead of thumbscrew adapters; they eliminate all catches and are compatible with all 1.25” eyepiece barrels.  Their collet style mechanism works smoothly and is strong.  They eliminate opposed shoulders and are simple to manipulate.  Look for twist lock adapters that work smoothly and close/open rapidly.  They are light weight and low profile, but their gripping strength is compromised with dual barrel eyepieces.  They range in price from $30 to $100.  Very effective; moderate cost. 

It has been suggested that manufacturers who produce eyepiece barrels with an undercut, supply a metal split ring intended to fill the undercut; those users who prefer the safety of the undercut could remove the ring; those who prefer to eliminate catches could leave the ring in place on the barrel.  This seems like a brilliant solution to eliminate extraction catches.  This  solution, however, has no bearing on insertion catches, which require a separate remedy if used with a metal compression ring adapter.

I do not think it necessary to rank the adapters or eyepiece barrel types; some combinations work together well, while others do not.  And each user has their own level of tolerance concerning catches or bumps.  I recommend you look at Table C and D to see what works best to suit your needs.  The tests were simple and repeatable.  You can try them yourself. 

Over the past decade, there has been much said and written about barrel undercuts; many  positive; many negative.  But there are few instances of complaints or compliments about metal compression ring adapters which appear to present more than half of the problems concerning catches.  My experience with this test has shown that eyepiece barrels and adapters must work together fluidly to present the best possible outcome.  Test results in Table C, show that some combinations do not meet any parameters for my use.  I think others might find these results useful, especially if considering a new diagonal/adapter.  At the very least, this report has provided information so that the right questions can be asked.  To fix a problem, you must first understand the problem.  I purposely did not test 2” diagonals.  But much of my findings can be extrapolated from 1.25” to 2” designs.  The same principles apply, although the remedies may be entirely different. 

I find that the historical progression of changes in eyepiece barrels and adapters has served only to complicate a simple mechanism that actually performed very well in the beginning.  Each new change, created to provide a “value-added” feature, resulted in more issues that needed to be solved… add an undercut to a barrel for safety then all thumbscrews must align perfectly with the undercut; add a compression ring to prevent marring, then all undercuts and compression rings must align and be of compatible size; prevent catches caused by the undercut or compression ring by adding bevels or chamfers; create a new style barrel to fix catches, but  ignore that the barrel is not compatible with common compression rings, then change the compression ring material so the barrel will perform, but without considering compatibility within the industry.  Clearly, there is need for industry standards.  The current, proprietary efforts do not span the industry and guaranteeing compatibility only within a manufacturer’s own line of products is an unsatisfactory solution for most consumers. 

During testing, nothing was superior to my sense of touch than the smooth barrel of the Parks GS 30 being inserted in the smooth barrel of the Orion (single thumbscrew) or the stainless steel adapter… no catches, no bumps.  But my tastes have always preferred simple over more complex designs.  This is opinion and can be overlooked.  But Table C does corroborate my preference, showing zero catches and bumps for the simple union between smooth barrel and smooth bore, even with an old, inexpensive Orion thumbscrew adapter.  It would be so easy to make and supply a quality adapter made in this fashion, perhaps, with a Nylon-tipped, metal thumbscrew as the only upgrade.  Simple insertion; simple extraction.  No undercuts.  No compression rings.  No shoulders.  No bevels.  No problems. 

This testing process revealed that eyepiece barrel undercuts and adapter compression ring grooves are responsible for extraction catches.  Eyepiece barrel ends and compression ring grooves are responsible for insertion catches.  Removing only the barrel undercut eliminates extraction catches.  But removing only the metal band compression ring eliminates both insertion and extraction catches. 

The new collet type adapters, often referred to as twist lock adapters, could transcend the metal compression ring of the past.  They eliminate internal 90 degree shoulders, grip an eyepiece well and are simply reliable.  In use, they render the barrel undercut a relic, removing any purpose it formerly served.  So perhaps, the undercut will also disappear one day.

My wish is that you use the information contained in this material to help find a combination that ends frustration and brings joy during your time under the stars.  Clear Skies!

REVIEW OF SUMERIAN OPTICS ALKAID 16” TRAVEL SCOPE

$
0
0

REVIEW OF SUMERIAN OPTICS ALKAID 16” TRAVEL SCOPE

You may not know it, but you, like me, are a minimalist. It seems like an absurd statement in a hobby like ours where you could probably bury yourself in a mound of gadgets, but deep down, you, like me, desperately love the simplistic nature of astronomy. For a long while I tried various telescopes (scopes) looking for my perfect match, and finally I think I’ve found one. I am a busy professional, and I don’t get much observing time in, but when I do, I like to be “wow’d”. I needed a portable medium to large aperture scope that is rock solid but very compact. The Sumerian Optics Alkaid is one slick animal, and ticked many of my requirement boxes. I own a 8” Nexstar and an 18” Obsession UC. Both are beautiful scopes, but I found the 18” was not getting much use due to its weight and size.

Ordering process:
The company itself is run by one man from what I know, and he was quick to answer most of my questions. After selecting several options, the scope arrived 3 months later in a well packed box. Everything was well packaged and protected. I got a nice follow up email from Sumerian checking all was in order. I like this kind of customer service.

The Scope:
The design and finish was top class. It really looked like a premium product. The scope and all its components except the truss poles fit into a box that’s 45 cm x 45 cm x 20cm. Amazing! When not in use it can really just slide under the bed or fit in a cupboard. It is surprisingly light as well, and the box can be lifted by just one person and carried about. For a 16” scope this is unheard of. The truss poles are split into two, and are covered in an insulating rubber – clever as with my obsession 18” UC, I found the poles got very cold and uncomfortable to hold and I suspect had slight changes in size due to this.


All Set up and ready to go!

Setup:
Ok so you’re ready to go: All I take is my eyepiece case, the Carry Box, and truss pole case. Its’ really that easy! Setting is a quick process: First the truss poles are threaded together, I suppose you could leave them connected but I live in a small flat so it’s just neater to keep separated. Next the box is unpacked with quick release clips, and out pops the primary mirror, upper tube ring and other bits, to which you attach the two altitude arcs. The poles are put into the primary base, and once the upper ring is connected and secondary attached, you are ready to collimate and observe. The whole process requires no tools and uses quick releases. Setup time is total 10 minutes, maybe less!

Using the Scope and travel:
The base has small threaded adjustments to level the base if the ground is not level. Collimation is made very easy by having the screws facing the upper cage. The movements of the scope are very smooth, and the tension strings are perfect for even very heavy eyepiece/barlow combos. The base of the scope has ingenious grids which make the scope very sturdy. Collimation holds very well, and I find I only need to check it every few hours. The Upper Ring has a feathertouch focuser which has a 4 point connection which eliminates any flex which sometimes gets ultra-light dobs in trouble. I also had a DSC and sky commander kit on the scope for added convenience. At zenith the eyepiece is at about 172cm so no step needed – one less thing to worry about! The rocker has 3 small fans built in and a dew heater is connected to the secondary. Sumerian Optics really thought of everything!

I took the scope on a trip overseas very easily. The split truss poles fit into an 81cm Luggage case. I removed the 16” primary mirror and put it into a specially designed plastic case that fits into my hand luggage. The main box also fits into the 81cm main luggage. The only problem was the weight- the 81cm bag (Samsonite inova) was now 16Kg which left me with 4 Kg to spare (total bag weight restriction on the airline I was flying was 20Kg). So I ended up buying another checked bag for my clothes. It worked out perfectly, and the scope arrived on the other side in perfect condition, and I was able to enjoy some amazing dark skies in Africa with a large scope.

Conclusion:
If you want a high quality scope that is also transportable then this is about as good as it gets. Honestly I have owned several high quality scopes and this is one of the most refined ones available. I use it more because it is so simple to use. I have been able to get it out to very dark skies that would have been impossible with my other scopes! If I was to find any weaknesses, I would say there should be a shroud that comes with the scope, I had to have one made for it. I also feel that more felt/velvet pads should be used to protect the wood from the metal surfaces. I ended up gluing a few extra on myself. Finally I would want the truss poles made out of carbon fibre to make it even lighter. I am overall very happy with this scope, and it is now my most used instrument.

Binocular Universe: Hunting Big Game!

$
0
0

Binocular Universe: Hunting Big Game!

December 2015


Phil Harrington

Over the last few months, we have explored planetary nebulae and galaxies hidden in the far southern sky. This month, we head back north to tackle others gracing the December sky that are sure test your mettle. Be forewarned, as the title of this installment says, we are going after some big game.


Above: Autumn star map from Star Watch by Phil Harrington.
Click the chart to open a printable PDF version in a new window.

Above: Finder chart for this month's Binocular Universe.

Chart adapted from Touring the Universe through Binoculars Atlas (TUBA)
Click the chart to open a printable PDF version in a new window.

Our first target is no less than M76, the Little Dumbbell Nebula in Perseus. This is a real toughie, and probably only in the realm of giant binoculars 70mm and more in aperture and 16x or more magnification. That's because this planetary nebula shines at only 10th magnitude (some references say it's as faint as 12th magnitude, but we'll be optimistic) and tiny! That makes it one of the faintest Messier objects. 

Here's how I have found it in my 16x70s, by using the stars of Andromeda as a guide. Scan along the Princess's stars northeastward from Alpheratz, the star marking the northeast corner of the Great Square, pass Mu Andromedae, to 51 Andromedae and Phi Persei, a pair of dim naked-eye points. Aim toward Phi, where you should see it and a dim, orange star immediately to its north. M76 completes a right triangle with these two stars, the orange sun marking the right angle itself.

Those 16x70s show M76 as a tiny, faint point of fuzzy light, which at first glance may look like an ordinary star. Moving up to my 25x100s, this so-called star "just doesn't look right." Instead, it looks slightly elongated approximately north-to-south. Some observers remark that it looks just like a celestial peanut! 

Discovered by Pierre Mechain in 1780, M76 is a classic example of what astronomers call a bipolar planetary nebula. In these nebulae, it is believed that a disk of obscuring dust not only hides the central star from view, but also channels material into two exhaust plumes rather than streaming away evenly. The result is a planetary nebula that appears to blossom much as a butterfly extends its two wings, which has led some to call them "butterfly" planetary nebulae. This two-part appearance also led to M76 being assigned two entries, NGC 650 and NGC 651, in the New General Catalog.

The distance to M76, like many planetary nebulae, is not well established. Estimates place it about 3,400 light years away, although published values range anywhere between 1,700 and 15,000 light years. If we accept the distance of 3,400 light years, then M76 spans about 4.5 light years.

As I mention in my book Star Watch, it's interesting to point out an important lesson here for all observers. Nearby M33, the Triangulum Spiral, is listed in most references as 6th magnitude, which sounds as though it should be fairly bright and easy to find. It is neither. Now, contrast that with M76, listed at magnitude 10-ish. Should be faint, right?  While it is, many observers report that M76 is actually easier to find than M33!  Why?  The answer is "surface brightness."  M76 has a brighter surface than M33, and is therefore actually easier to see. The point of all this is never be misled by an object's listed magnitude. In some cases, the listed magnitude makes an object sound much brighter than it actually appears, while in others, it misleads observers into thinking that an object is fainter.

As I was preparing to submit this installment for publication, I received an e-mail from a reader, Scott Harrington (no relation, that I know of anyway!).  He wrote that while trying to view M76 through his 8x56 binoculars, he stumbled upon a curious asterism of six 8th- and 9th-magnitude stars that collectively look just like a horseshoe.  It measures about 30 arc-minutes across and lies a few degrees north of M76.  He explained further that "I have to figure it must have fallen off Pegasus as he flies through the sky!"  I love it.  Scott e-mailed both me and Sue French to see if either of us had ever seen or heard of it before.  Neither of us has.  It's also not listed in the latest version of the Saguaro Astronomy Club's extensive database of asterisms.  So, good for you, Scott!  Let's call it Harrington's Horseshoe, but to be very clear, that's SCOTT HARRINGTON, not me.

Above: This chart, created and provided by Scott Harrington, shows the location of his Horseshoe asterism with respect to M76.  North is up.

If M76 was a bit much, then try your luck with Andromeda's NGC 7662, nicknamed The Blue Snowball. NGC 7662 lies in the western portion of the constellation. Scan the area for three 4th-magnitude stars: Lambda, Kappa, and Iota Andromedae. They a bent row lined up roughly north-to-south, some 16 degrees north-northwest of Alpheratz (Alpha Andromedae), the star shared by Andromeda and the Great Square of Pegasus. From Iota at the southern end of that row, you should spot 6th-magnitude 13 Andromedae about 2 degrees further west. NGC 7662 awaits less than half a degree to 13's south-southwest. While it will appear stellar through binoculars, its blue-green tint should make it identifiable among the other, mostly white stars. Defocusing ever so slightly often enhances its soft coloring.

On our way to M76, we passed north of the star Almach (Gamma Andromeda).  To the naked eye and handheld binoculars, Almach looks like a single star.  But with high magnification, its true nature begins to show.  Turning my 25x100s its way, I see what German physicist Johann Tobias Mayer discovered in 1778, that Almach is a binary star. And not just any binary star, but one of the most colorful pairings in the entire sky. The brighter in the pair, Gamma-1, is a yellow star, while its fainter partner, Gamma-2, is blue. Some 10 arc-seconds separate them.

Can binoculars resolve a pair of stars that close? It all comes down to magnification. The resolving ability of a telescope is dictated by aperture, assuming quality optics. The low magnification of binoculars, however, usually makes magnification more of the determining criterion. Assuming the observer has 20/20 vision, the minimum resolution value for a given pair of binoculars can be estimated by dividing its magnification into 240. Using this, we find that a pair of 10x binoculars has a resolution threshold of 24 arc-seconds, while 20x binoculars can resolve 12 arc-seconds, and so on. I can make out the duality of Gamma Andromedae in my 25x monsters, but not in my 16x pair. How about you? Can you better the "240 Rule?"

I've saved the toughest for last. NGC 891 in Andromeda is probably the most photographed edge-on spiral galaxy in the entire sky.  But it's very difficult to see visually, especially through common binoculars.  To give it a go, look for it just 3.5 degrees east of Almach.  That's where William Herschel was looking on October 6, 1784, when he discovered this gem.  As we gaze toward NGC 891, we are seeing what our own Milky Way would look like from a sideways vantage point 30 million light years away.  Like our galaxy, NGC 891 shows a pronounced central bulge and a distinctive opaque lane of cosmic dust encircling its outer perimeter. Those distinguishing features, so clear in photographs, remain hidden through binoculars. Indeed, simply find NGC 891 is difficult enough. It shines at 10th magnitude, but the fact that its light is spread over a thin, 13'x3' profile, which is then further diminished by the dark dust lane running its length, greatly complicates things. For me, it takes the magnification and light-gathering prowess of my 25x100s to confirm it.  But maybe you can do better!

Now if all this has proven just too difficult, take heart. Notice what is centered on this month's chart?  None other than M31, the Andromeda Galaxy!  I can't possibly talk about all the difficult targets scattered in this part of the sky and ignore this magnificent spiral.  Swing your binoculars its way and you'll immediately see a soft, oval blur highlighted by a prominent core. Only the central part is bright enough to pierce severe light pollution, but from a dark location, the full span of the broad spiral-arm disk becomes visible.  M31 spreads its arms a full 5° -- that's as wide as ten Full Moons stacked end to end! 

Also keep an eye out for its two neighbors, dwarf elliptical galaxies M32 and M110.  M32, the smaller and brighter of the pair, is a visible as a small, almost stellar patch of light due south of M31's core.  M110 is larger, but fainter, and therefore more difficult to see.  Look for it to the north of M31's core, about twice as far as M32. M32 looks almost perfectly circular, while M110 appears more oblate.

As you can see from the list below, there are many other targets in this corner of the late autumn/early winter sky to explore tonight with your binoculars.  Some are easy to see, some are hard.  Why not give each a try?

Questions, comments, suggestions?  Let’s talk!  Post them in this column’s discussion forum or please e-mail them to me using the link above. So, until next year, tell your friends that for stargazing, two eyes are better than one.


About the Author:

Phil Harrington is a contributing editor to Astronomy magazine and author of 9 books on astronomy.  Last month, his first book, Touring the Universe Through Binoculars, just marked 25 years in print.  Visit his web site at www.philharrington.net to learn more.

Phil Harrington's Binocular Universe is copyright 2015 by Philip S. Harrington.  All rights reserved.  No reproduction, in whole or in part, beyond single copies for use by an individual, is permitted without written permission of the copyright holder.

December 2015 Skies

$
0
0

December Skies

by Dick Cookman

12/11/2015

Highlights: Comet Journal, Martian Landers, Meteor Showers, December Moon

Focus Constellations: Camelopardalis, Ursa Major, Ursa Minor, Draco, Cepheus, Cassiopeia, Pegasus, Andromeda, Pisces, Perseus, Auriga, Taurus, Gemini

Comet Journal

20km. wide C/2013 US10 (Catalina) was in southern hemisphere skies when it reached perihelion (closest to the Sun) on Nov. 15th slightly inside Earth's May position in orbit. Catalina moved northward through the ecliptic on Nov. 26 and into eastern Virgo. It will continue northward, rising at 6th magnitude between Virgo and Bootes about 1:30AM EST on Christmas Eve and approaching Arcturus in Bootes at the end of December. It will remain in northern skies during the winter when it may reach naked eye visibility at 5th magnitude. The comet will be closest to Earth on January 17th and within 8° of Polaris on Jan. 31st. It is a long period first time comet from the Oort Belt, but gravitational influences during the passage through the inner solar system is accelerating it to solar escape velocity, never to return.

The array of two 1.8 m Ritchey-Chretien telescopes known as PanSTARRS which is located at Haleakala in Hawaii was commissioned by the US Air Force with a primary mission to detect near-Earth objects that threaten to impact Earth. It is expected to create a database of all objects visible from Hawaii (three-quarters of the entire sky) down to apparent magnitude 24. In 2014, Comet C/2014 S2 (PanSTARRS) was discovered with the array and is now at 9th magnitude and located in Draco. It is expected to pass through perihelion on Dec. 9th and will complete its circuit through Draco and head toward the cup of the Big Dipper during the winter.

A year ago, Comet C/2013 X1 (PanSTARRS) was discovered by the array and is now at 9th magnitude in Andromeda. It will reach Pegasus by Christmas then move into Pisces during the winter. The comet will be at perihelion on April 20, 2016 between Pisces and Aquarius and it will be closest to Earth in June when it may reach magnitude 7.5.

Mars Landers

Opportunity is in Marathon Valley to examine the phyllosilicate clay minerals which were discovered via satellite spectral studies. The rover has been stationary since Sol 4166 (Oct. 13, 2015) as it is now positioned at its winter haven on a north facing slope on the south side of the valley. From the 13th until early November, the rover’s activities were constrained by the winter power levels but despite limited power, it conducted a campaign of Panoramic (Pancam) Camera color imaging of Marathon Valley. Opportunity also is engaged in an in-situ (contact) science campaign at the current location. On Sols 4175, 4177 and 4180, Opportunity collected a 2x2 Microscopic Imager (MI) mosaic followed by the placement of the Alpha Particle X-ray Spectrometer (APXS) on a different surface target.

On Sol 4186 (Nov. 2, 2015), commands were sent to the rover to enable the use of Flash memory and to spend the week returning science data already in Flash memory. Although those commands were successful, the rover experienced an amnesia event on Sol 4186 (Nov. 2, 2015). On Sol 4187 (Nov. 3, 2015), the rover successfully mounted Flash and began the return of the science data. Opportunity has now traversed 26.48 miles (42.62 kilometers) over the Martian surface. Solar energy in the last month ranged from 332 to 344 watt hours per day.

Curiosity is climbing the lower slopes of Mt. Sharp over the sandstones of the Stimson Unit. The dark sandstone of the Stimson over which the rover has been traveling since August 27th displays some large scale cross-bedded layers typical of windblown sand deposited as dunes on Earth. In September, Curiosity followed a southward course parallel to the cross- bedded layers in order to reach an access location for drilling. The rock drilled at “Big Sky” turned out to be the very clean sandstone which mission scientists wanted to sample. They also drilled an adjacent outcrop (Greenhorn) which looked as though it had been altered by ground water containing abundant dissolved chemicals.

The next target for the rover is a large active dark colored dune in a nearby dune field. The rover has examined many sand ripples during its journey but has not observed an active dune. "Dune 1," which is as large as a football field and as tall as a two story building is actively moving downwind as sand is blown up the upwind side and slides down the southerly lee side. The dark color of the dunes is probably due to sand size grains of the mineral olivine, an iron-magnesium silicate found within dense igneous rocks such as volcanic basalt. The variety of dark and lighter colored areas may be due to density and/or size sorting by the wind or may result from differential alteration by water. Dunes on Earth exhibit different textures and much smaller surface ripples than those in the adjacent dunefield, possibly due to the lower air pressure on Mars or due to alternative causes which may be discovered during the pending observations.

Scientists from NASA's JPL and the California Institute of Technology recently determined mechanisms accounting for the low density of the Martian atmosphere. From data gathered in the past few years about evidence for an early warm Mars with abundant water, the atmosphere must have been much denser with sufficient levels of carbon dioxide to produce an adequate Greenhouse Effect. Levels of carbon currently stored in the Martian rocks can't account for the amount lost which must be due to carbon dioxide lost to space over the last 3.8 billion years due to bombardment by solar wind and solar ultraviolet radiation.

Meteor Showers

The Geminid Meteor Shower will light up mid-December night skies three days after New Moon. It will plateau at 50 to 130 meteors per hour in dark skies between the morning and evening of the 14th. The meteors will appear to emanate from a radiant in Gemini which will be overhead at 2AM EST on the 14th. The shower is caused by debris from former passages of the object 3200 Phaethon, an Apollo Asteroid that crosses the orbits of Mercury, Venus, Earth, and Mars as it circuits around the Sun.

The Ursid Meteor Shower peaks on the 23rd, two days before the Christmas Full Moon. The remnants of Comet 8P Tuttle which last passed Earth in 2008 and will return 2021 typically display about ten meteors per hour and occasionally produce up to 50 per hour when the comet is near. The glare of the gibbous Moon will overwhelm the shower this year.

The Phoenicid, Puppid, and Monocerotid showers on the 6th, 7th, and 9th are minor southern hemisphere showers.

Winter Solstice

The December Solstice on the 21st occurs at 11:48PM EST when Earth is at the position in its orbit where the polar axis is at maximum tilt away from the Sun causing perpendicular rays from the Sun to fall on latitude 23.5° S. At 45° N latitude, the noon Sun appears 21.5° above the south point on the horizon, its southernmost position of the year. The low angle forces sunlight to pass through much more atmosphere to reach the surface, greatly reducing its intensity. The coldest part of the northern hemisphere winter usually occurs during succeeding months due to the tendency for the Earth's surface to retain heat from the previous season. This year, that tendency is exaggerated by the El Nino effect whereby excessive quantities of heat have been stored in tropical Pacific water, delaying the onset of winter and possibly moderating its effects.

Planet Plotting

Saturn (+0.5 to +0.4) in Ophiuchus is a predawn planet in the last half of December, rising in the southeast just before the Sun. Morning planets also include Venus (-4.2 to -4.1) and Mars (+1.5 to +1.3) in Virgo, and Jupiter (-2.0 to -2.2) in Leo. which line up quite nicely above the southeastern horizon in early December.

Neptune (+7.9) in Aquarius and Uranus (+5.8) in Pisces are evening planets setting around midnight. Mercury in Ophiuchus sets slightly after the Sun in early December and appears higher in the sky each evening as the month progresses. It will be farthest away from the Sun on the 28th when it reaches its Greatest Eastern Elongation of 20°.

PlanetConstellationMagnitudePlanet Passages
SunOphiuchus, Sagittarius-26.8New Moon, 12/11, 5:29AM EST
MercuryOphiuchus, Sagittarius-0.8 to -0.6Max. East Elongation 12/28, 10:00PM EST
VenusVirgo, Libra-4.2 to -4.1 
MarsVirgo+1.5 to +1.3 
JupiterLeo-2.0 to -2.2 
SaturnOphiuchus+0.4 to +0.5 
UranusPisces+5.8 
NeptuneAquarius+7.9 

December Moon

Lunation 1150 begins with the New Moon of December 11th at 5:29AM EST. It ends 29.13 days later with the New Moon on January 9th at 8:31PM EST.

The Full Moon for December in Taurus is at 6:11AM EST on the 25th. It is called the "Moon before Yule" or "Long Night Moon". Colonial Americans named it the "Christmas Moon" and it was the “Oak Moon” to the Medieval English. It is the 13th Moon of 2015 due to two Full Moons in July and is designated by the Anishinaabe (Odawa and Ojibwe) of the northern Great Lakes as “Gitchi-manidoo-giizis" (Great Spirits Moon). Celts called it the “Cold Moon” while for the Chinese it is the “Bitter Moon.”

Apogee distance (maximum orbital distance) is 251,531 miles (63.46 Earth radii) from Earth on the 5th at 9:56AM EST. Perigee distance is 228,924 miles or 57.76 Earth radii on the 21st at 4:00AM EST.

PlanetConstellationMagnitudeMoon PassageMoon Phase/Age
SunOphiuchus-26.85:29AM EST, 12/11New ~ 0 days
MercurySagittarius-0.67.2°N, 9AM EST, 12/12Waxing Crescent ~ 1.15 days
VenusVirgo-4.20.7°N, Noon EST, 12/7Waning Crescent ~ 25.97 days
MarsVirgo+1.50.1°S, 10PM EST, 12/5Waning Crescent ~ 24.38 days
JupiterLeo-2.0
-2.2
1.8°S, 1AM EST, 12/4
1.5°S, 1PM EST, 12/31
Waning Crescent ~ 22.51 days
Waning Gibbous ~ 19.81 days
SaturnOphiuchus+0.43.1°N, 10AM EST, 12/10Waning Crescent ~ 28.88 days
UranusPisces+5.81.2°S, 8PM EST, 12/19Waxing Gibbous ~ 8.60 days
NeptuneAquarius+7.93.0°N, 3AM EST, 12/17Waxing Crescent ~ 5.90 days

Observer's Handbook 2016

$
0
0

Observer's Handbook 2016

Tom Trusock

December 2015

This is always a tough article to write.  Seriously, how do you sum up the RASC Observers handbook?  Yeah, it’s a little book.  BUT it’s about EVERYTHING in amateur astronomy.

The easy thing to do would be for me to say - if you’re an amatuer astronomer, you need this book.  So…

If you’re an amateur astronomer, you need this book.

Ok.  Done.

Wait...  What?

Y’all got questions?  Sighhh…. I knew that was too easy.  No, I guess I don’t really expect you to buy this on that kind of a statement.  Heck, I probably wouldn’t either.  And, well, I know me.  So, let me try for a summation.

There’s a sense of history lurking within the pages.  The first edition was published in 1907, making the Observer’s Handbook one of the oldest scientific publications in North America.  (Fitting, as the Royal Astronomical Society of Canada's roots date back to the 1800s.)  Since it’s inception, the RASC has striven to make it a handbook indispensable to the Amateur Astronomer, a challenge that in the age of the internet - takes a lot to make happen.

Now begin with dozens of contributors submitting tens of articles.   And big name contributors too - folks like: Alan Dyer, Fred Espenak, Geoff Gaherty, David Levy, Allan Rahill and Alister Ling.  

And the topics?  You’ll find selections on everything from Internet Resources and Education, to target lists for just about any style of observing.  Binocular, telescopic and even radio!  While it won’t replace your star atlas, there are constellation finding charts and a moon map.  You’ll find articles on aurora, occultations, comets and eclipses.  There are introductory articles on optics, binoculars and directories of weather resources.  These live happily alongside lists of star parties, recommended print and internet resources, and articles about light pollution.  Limiting magnitude, solar observing, martian surface maps and the moons of the gas giants.

I could go on all afternoon.

The Observing guide covers nearly the entire spectrum for the amateur astronomer.  

As an additional plus in today's electronic centric world,  it’s available in print.  No batteries (or data connection) required.  No worries about if your ereader or tablet is charged.  Best yet, it looks good on a bookshelf and makes an effective missile weapon against fauna looking to steal your Naglers.

So I’ve at least convinced you it sounds interesting, right?  What’s that?  You’re curious about the 2016 on the cover.  Is that just to denote the latest edition?  Or is it only for use in 2016?

While some of the information is indeed about celestial events occurring during 2016, there’s lots that will ensure the handbook's usefulness well beyond the next year.   (And, I suppose if you were to invent time travel, much of it would be equally applicable in the past as well.)

It’s a resource that would be much appreciated in any astronomers observing kit.


Haven’t heard enough?  Check out the RASC website for more information:

http://rasc.ca/handbook

Binocular Universe: Backyard Evolution

$
0
0

Binocular Universe:
Backyard Evolution

January 2016


Phil Harrington


Each academic semester, I teach a different undergraduate astronomy course at Suffolk County Community College here on Long Island. Often, when I am teaching the “Astronomy of Stars and Galaxies” course, a student will come up to me before the first class and ask me "so, what's this class all about?" My answer is always the same: "Orion!"

Above: Winter star map from Star Watch by Phil Harrington.
Click the chart to open a printable PDF version in a new window.

Above: Finder chart for this month's Binocular Universe.

Chart adapted from Touring the Universe through Binoculars Atlas (TUBA)
Click the chart to open a printable PDF version in a new window.

One of the key objectives in that course is for students to understand stellar evolution. I can think of no better way to illustrate the process from start to finish than with Orion, the Hunter. That entire topic can be condensed into that single constellation. There are bright stars and dim stars, hot stars and cool stars, and young stars and old stars. Orion is a "mine of wonders; this great constellation embraces almost every variety of interesting phenomena that the heavens contain," according to Garrett Serviss in his classic 1888 book Astronomy with an Opera Glass.  (Follow the link to view and download the full text from the U.S. Library of Congress.)

If you want to see star birth in action, look no further than the middle star in Orion's sword. That "star" is not a single sun at all, but rather a glowing cloud known as the Orion Nebula, M42, one of the sky's busiest delivery rooms. What may look like a dim, shapeless blur at first glance displays a wealth of subtle detail if you brace your binoculars against a rigid support to steady the view. The overall shape always reminds me of a cupped hand seen from the side that is seemingly grasping at two stars, Theta-1 and Theta-2 Orionis. 

Theta-1 is actually a family of four young suns neatly gathered in a trapezoid, called the Trapezium. Spotting all four stars through binoculars is a fun test.  But be forewarned, magnification and aperture are key here.  The Trapezium's stars are designated with letters (A, B, C, and D), ordered according to their location. The system's primary star, the brightest of the bunch at magnitude 5.1, is known as Theta-1C and marks the trapezoid's southern corner. The western star (Theta-1A) and the northern star (Theta-1B) are both known to be eclipsing binaries, with a smaller companion star alternately passing in front of and behind the larger primary star. These eclipses cause both stars to vary slightly in brightness, though they usually shine at magnitude 6.7 and 7.9, respectively. Theta-1D also shines at magnitude 6.7.

Also look for a dark, cigar-shaped cloud nicknamed the Fish's Mouth protruding against the brighter background clouds, just north of Theta-2 and east of Theta-1. There is also a little "bump" protruding off the north edge of the Orion Nebula. Although part of the same complex, Charles Messier cataloged it separately as M43.

M42 is just the tip of a huge nebulous "iceberg" known as the Orion Molecular Cloud that engulfs nearly the entire constellation. The cloud is between 1,500 and 1,600 light-years away, and is spread over hundreds of light-years. In addition to M42 and M43, the Orion Molecular Cloud also includes:

  • IC 434
  • Barnard 33 (Horsehead Nebula)
  • Barnard's Loop
  • M78
  • NGC 2024 (Flame Nebula)
  • Sh2-264 (Lambda Orionis molecular ring)
  • Orion OB1 Stellar Association, which can be further broken down into four parts:
    • Orion OB1a (the group of stars northwest of the Orion Belt stars, including 25 Orionis)
    • Orion OB1b (also known as Collinder 70, discussed below)
    • Orion OB1c (the stars in Orion's Sword)
    • Orion OB1d (the youngest stars in M42 and M43)

As this cloud wafts through the region from northwest to southeast, it leaves behind pockets of newly formed stars in its wake. The wave is currently cresting near the sword, but to the north, the clouds have parted to reveal a thriving open cluster of stars known as Collinder 70.  All three of Orion's belt stars, along with another hundred or so fainter suns, belong to that cluster. The Belt Cluster was not recognized as such until research conducted by the Swedish astronomer Per Collinder (1890-1974) showed that the stars were all moving in the same direction through our galaxy.

Most of the stars in the Orion Belt Cluster shine brighter than 9th magnitude, bringing them within range of 50mm binoculars from suburban skies. When you look their way, consider that those stars are probably less than 10 million years old. That's very young compared to our 4.5-billion-year old Sun, but much older than the stars in the Orion Nebula, which date back no more than 300,000 years.

Overall, Collinder 70 looks football-shaped, with the three Belt stars marking the ball's length. There is also a distinctive S-shaped chain of 11 faint stars that snakes from Mintaka, the Belt's western star, to Alnilam at its center.

Mintaka itself is a wide double star that, despite its large separation, can be a challenge to resolve with binoculars. That's because the bright component -- the star we see naked eye --shines at magnitude 2.2. But its companion is only magnitude 6.8, making it appear nearly 70 times fainter. So, despite the fact that they are separated by 53 arc-seconds, splitting the pair is tough due to glare. As a hint, look for the companion due north of the dominant star. Both appear pure white.

Mintaka, Alnilam, and many of the other stars within Collider 70 are either spectral class O or B stars. Astronomers use spectral classes (or spectral types, if you prefer) to sort stars according to temperature, size, and luminosity. Luminosity is a measure of how bright a star really is, while its temperature is a measure of the temperature of its visible surface. Knowing these two parameters, astronomers can classify stars according to spectral classifications. Stars are arranged from hottest to coolest using letters of the alphabet: O, B, A, F, G, K, and M.

Each class can be further subdivided into 10 sub-classes, numbered 0 through 9. By convention, the lower the number, the hotter the star in that particular grouping. For example, our Sun is classified as a G2 star. All class G stars share common spectral characteristics, yet a G1 star would a little hotter than our Sun, while a G3 (and G4, etc., all the way to G9) would be cooler.

The table here shows the spectral classes and visual magnitudes for the brightest stars in Orion.

Star

Spectral class

Magnitude

Betelgeuse (Alpha)

M2

0.45

Saiph (Kappa)

B0

2.07

Bellatrix (Gamma)

B2

1.64

Rigel (Beta)

B8

0.18

Alnitak (Zeta)

O9

1.82

Alnilam (Epsilon)

B0

1.69

Mintaka (Delta)

O9

2.41


Back in the early 1900's, Danish astronomer Enjar Hertzsprung and American astronomer Henry Russell independently began to look at these characteristics for a variety of stars across the sky. Specifically, they compared the stars' temperatures with their luminosities. Both astronomers plotted the star data on a graph. The graph's vertical axis (the Y-axis) was a measure of luminosity, while the horizontal axis (the X-axis) plotted the stars' spectral classes. Today, this graph is known as the Hertzsprung-Russell Diagram, or more simply, the H-R Diagram.

At first, they probably expected to find no correlation between a star's temperature and its luminosity, but in reality, there is a very distinct relationship. More than 90% of all stars lie along a curved line that stretches from the diagram's upper left corner to the lower right. This wide swath is called the "Main Sequence." Comparatively few stars are found in the other two corners of the H-R Diagram. Those that fall toward the upper right (that is, stars that have high luminous but are red in color, and therefore, quite cool) are called red giants or red supergiants.  In the opposite corner are white dwarfs, stars that are extremely hot, but are not very luminous because of their small size.

Let’s follow the trail of star formation northward to the Hunter's tiny, triangular head. The triangle's top star, Meissa (Lambda Orionis), is a Class O8 blue-white giant star that would appear in the upper left corner of the H-R Diagram. Its surface temperature is estimated to be 35,000 K, making it one of the hottest stars in Orion visible to the naked eye. Meissa, along with several dozen fainter suns within about 1°, all belong to the star cluster Collinder 69. Most binoculars reveal between 15 and 20 stars ranging in brightness from 5th to 9th magnitude. Studies also show that Collinder 69 is probably no more than 5 million years old.

A third Collinder cluster, Collinder 65, is large enough that some of its stars cross the border into adjacent Taurus. By adding a few non-cluster stars to the east and north, I imagine this cluster as a spear that Orion is about to heave at the Bull. "Orion's Spear" measures about 8° tip to tip, which makes it perfect for 7x and 8x binoculars.

So far, we have examined star birth and adolescence. What about the other end of the scale? For that, we need look no further than brilliant Betelgeuse, spectral class M2. While many of Orion's stars are quite young, happily fusing hydrogen into helium within their cores, Betelgeuse has been there, done that. The hydrogen supply in its core was exhausted long ago, causing the star to swell into an enormous red supergiant. Today, as heavier elements are undergoing fusion in its core, Betelgeuse is found in the upper right corner of the H-R Diagram, well off the Main Sequence. Eventually, that process will end and Betelgeuse will go out in an all consuming burst of glory as a type II supernova. For now, enjoy its brilliant ruby red color, which indicates a surface temperature of about 3,500 Kelvin.

Contrast that to Rigel, which is a Class B8 blue-white supergiant star. Rigel has exhausted all of the hydrogen fuel in its core, causing it to leave the Main Sequence. Rigel's surface temperature is estimated to be an incredible 12,000 Kelvin, which places it along the top of the HR Diagram. Rigel will continue to expand and brighten as it continues to slowly creep toward the upper right corner. Ultimately, it will also detonate as a type II supernova.

Indeed, Orion has it all. Your homework assignment this month is to view these objects on the next clear night.  If you are looking for some extra credit, here are many more targets in this month's Binocular Universe to ponder.

As you view these targets, consider what is going on behind the scenes of each.  And always remember that two eyes are better than one.  Class dismissed.


About the Author:

Phil Harrington is a contributing editor to Astronomy magazine and author of 9 books on astronomy.  Last month, his first book, Touring the Universe Through Binoculars, just marked 25 years in print last November.  Visit his web site at www.philharrington.net to learn more.

Phil Harrington's Binocular Universe is copyright 2016 by Philip S. Harrington.  All rights reserved.  No reproduction, in whole or in part, beyond single copies for use by an individual, is permitted without written permission of the copyright holder.


Night Vision Astronomy 2015: Three Perspectives

$
0
0

Night Vision Astronomy 2015: Three perspectives.
By:

Eddgie
Night Vision at Unity

Vondragonnoggin

I2 (Image Intensified) Astronomy in Heavy Light Pollution and the Smaller Scope
The Ardent
Night Vision with Large Aperture

Summary

Night Vision technology is a powerful tool to enhance observing. Like any observing method, it had its advantages and drawbacks. Three Cloudy Nights members offer their experience.

Night Vision at Unity

By Eddgie


The Oxford Dictionaries defines Unity as, 1: the state of being united or joined as a whole and, 2: the number one.

One of the most common concerns about using telescopes is the limit of the telescope to show a wide field. We buy ever wider field eyepieces or very small telescopes in an effort to be able to see larger and larger areas of the sky. Along the way to ever wider fields, what we encounter is larger and larger objects and no matter how big the field of our telescope is, we quickly realize that there is always something that our telescope is not quite large enough to frame. My chapter of the article on night vision is focused on using night vision for very low power (1x, which we refer to as "Unity" and fields generally larger than possible even with binoculars.

I live 3.5 miles from the center of Austin Texas, which is now the 11th largest city in the US. My observing conditions are far from great, and often during the summer, a thin haze makes even 3rd magnitude stars difficult to the unaided eye.

For extremely low power viewing, I use two different devices, a Night Vision Depot Micro monocular, and a PVS-7 "Goggle". The goggle is something like a binoviewer. It has one lens and one tube, and the light is split by an internal optical device called a collimator, which brings the image to the rear and splits the light path to two eyepeices. The monocular is as the name suggests, a device that uses one objective and one eyepiece.


The lens and eyepiece focal lengths are about the same, so the result is that when viewing, you are viewing at Unity (1x). I also use clip-on afocal telescopes in 3x and 5x. These are called "Magnifiers" and simply clip over the front of the lens on the night vision device so it makes it very easy to change power. Other chapters will cover the different uses of these extremely versatile and powerful devices, and this chapter focuses on the very low power end of the night vision for astronomy spectrum.

One of the most compelling benefits of unity or low power viewing is the utter simplicity. You can walk out of your front door, with a device, a clip on lens, and a couple of filters, turn on my device, and be observing in a few seconds. There is no tripod, no setup, no need to dark adapt, and no need to stay in one spot. This last point is important because from my back yard, my sky is obstructed by trees in all directions except the south, so with a traditional telescope I have a very narrow strip of sky in which I can observe targets. The night vision devices make it possible to move up and down the street in front of my house and this allows me to clear almost any obstruction in any direction so that I get views around much of the sky. If I want to peer deep into the heart of Sagittarius, or catch M45 when it just gets about the rooftops, I can simply reposition myself by walking a few houses over.

The next great advantage of night vision is that with a simple 610nm pass filter (passes 610nm and near infra-red but blocks medium red and the rest of the visible spectrum) light pollution can be greatly attenuated. Generation 3 night-vision tubes were designed to show near infra-red so that IR illuminators could be used in very low or no light environments to provide sufficient light to view the environment, but not give a position away. This same characteristic makes it possible to use H-alpha filters to observe emission nebula in a way that would be difficult with the unaided eye unless you were in very black and transparent skies. With night vision and an H-alpha filter, very large nebula are available for viewing even from locations with light polluted skies.

Finally there is the low power itself. These devices have a true field of about 40 degrees and an apparent field of 40 degrees, so this means that when you use the standard lens, you are viewing at unity, or one power. With the light intensification, this 40-degree field becomes an almost magical view of a sky so filled with large scale structure that it almost defies description. On nights with good transparency, the southern Milky Way resolves into a fantastic complex of dense star fields, dark nebula, and a stunning array of deep sky objects. While the power I use for this is very low, many of these targets are quite large, and the entire Sagittarius region becomes a glittering showcase of small, bright DSOs. With a 12nm H-alpha filter, the Milky Way comes alive with nebula. Even at 1x, the Lagoon nebula is quite large and striking, but at 1x what is more remarkable is that it can be viewed in the same true field as the Trifid, the Swan, and Eagle nebulas, along with the great Sagittarius star cloud, M7, M22, M11, and many more! And this is all in a single low power field of view! Nebula like the North American are amazingly detailed, and when viewed with the very delicate and complex of the Gamma Cygni, and once again, these two big, beautiful nebula are captured in the same true field. The 5x magnifier provides enough magnification to make these targets quite detailed and interesting.

Off the Milky Way, the 40-degree true field reveals many very large aggregates of stars that can't really be viewed in a standard telescope. The wider the field, the more these very large aggregates seem to spring forward. Traditional large clusters like the Hyades and M45 can be seen in the same low power field, and the context of the sky really changes when you see how magnificent and rich these very large scale objects are. In a traditional telescope, you often trade off light gathering for true field. You can see fainter stars in a target at the cost of losing the framing of the target, or you can frame a target using smaller scope, but this comes at the expense of losing the fainter stars. With night vision, you can frame entire constellations and the reach is quite amazing A typical field will be filled with many more stars than can be easily counted. Entire constellations combine together to make fascinating new structures that in the absence of night vision, can only really be seen by the naked eye when skies are very dark.

Evan at very low powers from my light polluted skies, Orion, Horsehead (though not enough power to see the horse itself) and Flame are easy targets, and at 5x with the H-a filter, Orion is fantastic. The extent of the nebula is greater than I have ever seen using traditional scopes even under dark skies. Seeing it at very low power you get the true sense of scale on this fantastic nebula that is hard to appreciate when using traditional scopes that limit your view to a (relatively) small slice of sky.

This brings me back to my opening where I used the definition of unity: the state of being united or joined as a whole. When I use night vision at very low powers, I feel far more connected to the whole of the Milky Way and the night sky than I ever have before. The large scale structure of the great river of stars that connects our horizons becomes something that is almost alive with a population of stellar creatures great and small, and seeing it at 1x using an image intensified eyepieces I now have a sense of Unity that I have never really experienced using traditional equipment. I don't feel like I am looking at the Milky Way anymore. I feel like I am a part of it and I see the fascinating complexity of its structure in a way that I never thought possible.

For observers with easy access to high elevation dark skies, night vision might seem like a toy. For many of us though, the cost, time, and expense associated with getting a big telescope to dark skies, or even using a small good quality telescope under so-so light polluted skies, night vision offers a compelling alternative or compliment to existing equipment. I know that people perceive the cost to be high, but it does not take a lot of money to move into a decent night vision device. In my opinion, it is worth selling off a two or three telescopes that sit unused, along with a half dozen eyepieces that are gathering dust to enter into a world where portability, simplicity, and low powers make night vision observing easier and more fun than most people ever realized.

It is different, and it is not for everyone. I even used to think that. Having entered into it, I now find myself using low power night vision more than any telescope I have ever owned before and that is the biggest compliment I can pay it.


I2 (Image Intensified) Astronomy in Heavy Light Pollution and the Smaller Scope

By Vondragonnoggin


I would like to start off with a brief background of my experience in Amateur Astronomy. In November of 2009, my then 8-year old son had been actively watching space programs and drawing pictures of galaxies and star fields. I had an old pair of Vanguard ruby coated 12x50 binoculars with bk7 prisms I had bought a decade earlier for $40. Never got much use until we both started to look up with them in 2009. My son desperately wanted a telescope to see more. I did too. His mother, remarried and living in another house let me know "I bought him a telescope for Christmas so don't buy him one". Being the avid researcher that I am, I looked at alternatives to keep peace and make my son a happy camper. Her pick - an EduScience 100mm reflector from Toys r Us complete with plastic tripod. My choice to not go against wishes of not buying him a telescope - Zhumell Tachyon 25x100mm giant astronomy binoculars on a heavy duty photo tripod.

We tried to get the scope working, but a shaky mess it was. Meanwhile the binoculars were a giant hit. We both wanted more. After joining Cloudy Nights in February of 2010, having been a silent lurker reading as much as I could, I bought an 8" Skywatcher collapsible dob. My son was perfect height standing to see zenith views. I took the scope out frequently with him. So much so, that I knew I was hooked on Astronomy and started an eyepiece collection.

After a year and a half, and many eyepiece purchases later, my son was tired of visual astronomy and I was not. He still is actively into astronomy, but more on the software side and using programs like Sandbox Universe to test gravitational theory and loves realistic space games that use real physics models. He is 14 at the time of this writing. We had taken the dob to dark skies and viewed nebulae, planets, galaxies, but my backyard location was a light polluted mess and galaxies or faint nebulae were not in reach. I also had three previous injuries to my back that were not liking the dob too much. I sold the dob and bought a Twilight II alt-az mount and an Explore Scientific AR127mm achromat. I began studying about filters. Filters for light pollution, filters for nebulae, filters for control of chromatic aberration in achromats. I loved that scope. It was very capable and to me the views were more pleasing than my dob. It had very steady views being absent of tube currents and quick to equalize.

I decided I wanted to see more. I looked into Astrophotography gear. I also read briefly on Astro Video and a brief report on the Collins I3 intensifier eyepiece. Also a report on the Binocular Photon Machine, a Gen 3 device with panoramic binocular eyepiece.

I decided AP was the way to go and promptly bought an EQ5P GEM, Modified Canon T3i, all the adapters, software, a netbook, etc.

I made attempts. I captured some bad moon shots, I tried focus tricks. I had a rough go of it. I missed my simple alt-az setup and silent viewing with no motors, wires, laptop, and polar alignments. I did not like GEM's!

I sold the scope, mount, camera, adapters, and all related gear to a friend who was very interested and needed good working equipment. The equipment was all good. I was the problem. It was too tedious to me just to see more in my light polluted location. I think I am the world's laziest astronomer!

I bought an iOptron 150mm mak-cass next and went back to visual observations.
I still used binoculars a lot and enjoyed two eyed views, having picked up several other pairs and a couple binocular telescopes in 70mm and 100mm sizes. I missed my refractor though. Saw a deal on an AT72ED refractor used and bought it. Great green color too. I bought better photo tripods with geared center columns and better fluid heads.

I began to research image intensifiers. I asked forum members about the BIPH Binocular Photon Machine. I asked a million questions and found the commercial astro offerings in intensified eyepieces were no longer available. I found out they cost quite a bit too, so I began taking advice on what to look for and started searching Ebay. In the meantime, I was pretty sure I was going to purchase a night vision device soon, so ordered a Skywatcher 120ST and a good dual speed focuser to hold heavy loads. Markus at APM of Germany set me up good. Installed my new focuser and shipped me my 120ST. I also ran across an Ebay deal from Ed Wilcox at Wilcox Engineering and Research for a Litton M942 Monocular with a Gen 3 tube in it, plus a whole bunch of extras like relay lenses for attaching to camera, adapters for SLR lenses, a 3x and 6x objective replacement lens and all for much less than a new Collins I3. I bought the package deal and put the c- mount adapter on after taking 1x objective lens off.

I then did as everyone on my forum suggested. Put on a 1.25" nosepiece and put it in my scope. I bought a few filters at recommendation of others. I bought a 7nm H-Alpha narrowband filter and also bought a 610nm longpass after seeing someone else buy a 695nm longpass. I thought the 610nm longpass would still allow me some hydrogen gas views while cutting light pollution to a reasonable level. I was right! It was brilliant to bring out contrast on clusters, edge on galaxies, globs, Milky Way sweeping.

Meanwhile my views of nebulae were nothing short of awe inspiring. With narrowband 7nm Ha filter, chromatic aberration was a non-issue in the achromat, as I suspected. I did not need to buy a color corrected Apochromatic refractor if only a narrow red notch at 656nm was coming through. Both AT72ED and 120ST were showing me views of Orion like I had never seen. I began to experiment with focal reducers too and found the Antares 2" .5x reducer eliminated vignetting in my device. I bought a used PVS-7 binocular, a military device much like a binoviewer. It was an older A/C housing that had a badly blemished tube ($800). I contacted Ed Wilcox again and asked if he had a Gen 3 MX10130/UV tube used he could sell me. He had one. I bought the tube ($1300) and replaced the blemished tube. From advice on my forum, I contacted Nightline Inc about a c-mount adapter for the PVS-7 so I could put a nosepiece on it. They had one left. I bought it and started using my PVS-7 as a binoviewer eyepiece in my scopes. I had been able to see in both devices, the horsehead and flame, but the Horsehead still required averted vision to see more than a dark shadow in my AT72ED. Much better definition in my 120ST, but still wanted more.

I bought a big Astro Telescopes AR152 F/5.9 achromatic refractor. Having the great results from filtering in my 120ST, I knew the big 6" refractor would give me the brighter view to see the Horsehead with some detail and no averted vision. I was right. I was using all three refractors on faint nebulae now.

Bought a Lumicon Night Sky H-Alpha filter also after looking at filter curves and getting the suggestion from another forum member. This one is a longpass 640nm filter and a little darker than the 610nm. I actually prefer it in the two larger scopes and prefer the 610nm in the smaller. More light on smaller scopes giving a smoother appearance in the intensifier. I found a 3nm Ha on Ebay new for $134 from a seller working for Omega filters. Normally they are very expensive at upwards of $900, but this one was worth the gamble. It is a frequently used filter in worst moonlight scenario. Not the toughest coatings like the $900 plus offering, but if careful with it, works great.

By this time, I am beginning to see a long list of faint nebulae having passed into Summer and beginning of Autumn. After reading a lot more and seeing some of the other forum members? devices, I decided to get a Gen 3 25mm device. A PVS-4 starlight scope. I found a T2 adapter on ebay. The objective catadioptric lens was replaced by the T2 adapter. This one gave me the wider views in my scope but was very large and heavy at nearly 3lbs. View was 65° vs 40° of the smaller 18mm devices I had. Variable gain too, but really only useful in biggest two scopes. The mak150 and AR152.

I tried many filters too. All visual filters for standard eyepieces (UHC, OIII, etc.) were disappointing besides the Baader Neodymium Moon and Skyglow filter. That one was decent for cutting light pollution, which gets amplified in the intensifier much like everything else and makes it a brighter green background and less contrast on astronomical objects, but not as effective as 610nm or 640nm longpass filtering.

I bought 35nm Ha and 685nm IR pass filters. Occasionally I use those as the 35nm Ha filter has a broad enough notch to allow more stars seen while cutting CA to pinpoint stars again. The 685nm is good for galaxy hunting but does not allow Ha to get through. Both get used, but infrequently. I bought an Astronomik 12nm Ha filter as well. By far, the most used Ha narrowband is my Baader 7nm filter, followed by 3nm anytime the moon is out. My 640nm and 610nm longpass filters get about equal time.

I later added a 4" wide single lens binocular eyepiece to my PVS-4 for some two-eyed wide views at low power. All scopes but MCT really operating at low power, but see a ton.

Oh yeah, onto what I have seen from heavily light polluted city backyard viewing!

Small list as example:
Lagoon, Triffid, Omega, Eagle, Cat's Paw, Gamma Ori Area Sharpless, summer globulars in stunning detail, too many Open Clusters to count, over 30 different galaxies, Rosette, California, North American, Pelican, Pac Man, Horsehead, Flame, Flaming Star, Lower's, Iris, Heart and Soul, Crescent, Eastern and Western Veil, NGC6974, NGC6979, Ced214, Cocoon, Cone, Elephant Trunk, Gamma Cygni, Butterfly, Dumbbell, Little Dumbbell, NGC7822, Seagull, Thor's Helmet, IC417, IC410, NGC7762, IC353, NGC2024, Barnard's Loop, NGC1975, numerous meteors, satellites frequently, and the list can go on.

I have seen more in the nearly two years of using Image Intensifiers than the previous 4 years without it. All very easy. All on easy to use Alt-Az mounts with no tracking. I continue to refine equipment, viewing techniques, filtering techniques, and keep asking a lot of questions. I am viewing 98% with I2 eyepieces. I have not lost any interest and it instead continues to grow in both seeing more, using better techniques, and learning about the technology.

I have been given immense help by members of the Cloudy Nights EAA forum the entire time. I try to give back what I can in advice and knowledge, as well as experiment and post results.

I usually start off without an observing plan, but have my smartphone running astronomy apps so I can identify what I find. It is such powerful technology even in small scopes, that the "stumble upon an object" way of acquiring targets for observation seems to work fine for me. I can identify on the smartphone and quickly look for other objects in the near vicinity and see if the intensifier picks it up. I continue to study the same objects a lot too, in order to pick up new details and better my observational skills. It does not do all the work for me! Sometimes the objects are still so faint as to need employment of special techniques like averted vision, scope tapping, peripheral movement detection, etc., to pick up the details. Sometimes, of course, they are just in your face like a photo too.

It has been the best decision in equipment to help really see more without needing to have a mess of wires or go-to tracking mount. I am a DSO fanatic and a Nebula nut. My favorite objects to look at. Planets and Lunar still get a chance with my MCT and standard eyepieces, but it is infrequently that I want to view them. So much to see!

My most used scope is the 120ST on photo tripod w/geared center column and a Stellarvue M2 mount. I use an adjustable observing chair with it.

I have found some great vendors in the business also. The following recommended:

Ed Wilcox - Wilcox Engineering and Research (tested tubes with sheeted specs) -

http://www.wilcoxeng-res.com

 Ken at NAIT - PVS-4 best T2 adapter I have tried, PVS-4's, PVS-7's, c-mount for PVS-7 B/D body. -

http://www.nait.com

Mo at AE Optics - PVS-4 parts. -

http://www.aeoptics.com

Night Vision Depot - one of the best companies to deal with for tubes, goggles, and the best monocular I have tried for astronomy - The NVD Micro Monocular which has a built-in c-mount and is adapted easily. -

http://nvdepot.com/

Glynn at OwnNight - devices, tubes, repairs -

http://www.ownnight.com

Bruce at Night Vision Universe - devices, tubes, parts, great pricing.

http://www.nightvisionuniverse.com

Nightline Inc - devices, parts, had my PVS-7 A/C c-mount adapter, great guys.

http://www.nightline-inc.com

RafCamera - ENVIS adapter for 1.25" filters

http://www.rafcamera.com/en/adapters

Agena Astro - adapters, threaded extensions, filters, etc -

http://www.agenaastro.com

Scopestuff - adapters, nosepieces, reducers, threaded extensions, etc -

http://www.scopestuff.com

Many more on ebay and many of these I listed had ebay storefronts.

Image Intensified Astronomy may not be to everyone's taste. There are naysayers apprehensive about green views, there are photon purists, there are those that simply want traditional methods, but it certainly fits for me.


Night Vision with Large Aperture

By The Ardent


This year I read some very interesting reports of night vision astronomy on Cloudy Nights. I decided to try it for myself. I?m a longtime visual observer and gear head. My city backyard prevents observation of most galaxies, nebulas, and dim planetaries. I can't see the Milky Way. While I make good use of what I have, it's frustrating to log yet another "not seen" target.

I purchased the PVS-7 night-vision goggle. It features a lightweight, waterproof, shockproof housing. 2 "AA" batteries provide weeks of use. Focuses like an eyepiece, no OCS or Barlow needed to reach focus. Two-eyed viewing with excellent collimation and no merging issues. C-mount adapter accepts numerous lenses and accessories. Works right out the box with supplied lens. Used with a dob, the goggles give a correct view image. This matches the view in my right-angle correct-image finder. It matches my star charts, my binoculars, and my naked eye view.

It does have some drawbacks: cost, green color, scintillation, narrow 40-degree field, 26mm eyepieces provide low magnification, not suitable for every telescope or target. Hexagonal "honeycomb" background pattern visible in bright environments.

The first night I used the PVS-7 with the supplied 1x lens and a Hydrogen-alpha filter. I saw the Gamma Cygni nebulosity, IC 1396, NGC 281, and best of all, the California nebula! I was hooked!

My main telescope is a Teeter 18" f/3.5 dobsonian. I couldn't wait to try the PVS-7 with the large aperture. Some accessories are required. The components of my night vision system:

PVS-7 NV goggle from NAIT with C-mount adapter.
http://nait.com/products-night-vision/night-vision-goggles/night-vision-goggles/

C-mount to 1.25" adapter/ or 2" adapter. The 2" has threads for both 2" and 1.25" filters.
http://www.scopestuff.com/ss_c2b1.htm
http://www.scopestuff.com/ss_c2bf.htm

Or C-mount to 1.25" adapter/ 0.63x focal reducer combo
http://agenaastro.com/agena-c-cs-mount-focal-reducer.html
The focal reducer almost doubles the field of view, but coma becomes noticeable with the focal reducer.

Astronomik 12nm Hydrogen Alpha filter, 1.25 or 2". This is critical for viewing nebulae, but strongly attenuates stars.
http://www.astronomik.com/en/photographic-filters/h-alpha-12nm-ccd-filter.html

Baader 35nm Hydrogen Alpha filter. Weaker nebulae response, but more stars visible. The Lumicon Night Sky h-alpha filter did not provide enhanced nebula viewing.
http://agenaastro.com/baader-h-alpha-35nm-ccd-filter-1-25.html

Baader 610 nm Longpass red filter. For removing sky glow and light pollution for viewing galaxies, clusters, and other non h-alpha targets.
http://agenaastro.com/baader-red-filter-1-25-fcfr-1-2458307.html

Just like in astronomical imaging and solar observing, Hydrogen alpha filters play an integral role with night vision. Normally invisible or impossible targets like Sharpless nebulae and PK planetaries are visible, depending on their H-alpha emission. Oxygen III won't help here, night vision responds poorly at this wavelength.

Viewing nebulae with the 18" scope:

M8, M20, M17, M16. These famous prominent nebulae are just magnificent with night vision. Add an H-alpha filter, and the view is comparable to a long exposure image. "Simply glorious" seems a lacking description.

Gamma Cygni Nebula (IC 1318): With 12nm H-a, extensive detailed nebulosity. Lots of dark lanes and dust blobs strongly silhouetted against the bright nebula. Spans several degrees. Very similar to long exposure images.

Crescent Nebula (NGC 6888) Unfiltered: Only brightest part corresponding to visual observations seen. With 12nm H-a: complete loop seen. Mottling visible, especially on eastern loop, like "leopard spots"

North American Nebula (NGC 7000) Only vague outline faintly visible unfiltered. With 12nm H-a, sharp detail of wisps and concentrations of nebulosity mixed with dark lanes. "Mexico" region like a long exposure image, contrasting with dark "Gulf" Lovely prominent double star Espin 1451 visible along brightest part.

Sharpless 2-88: bright and obvious with 12nm H-a. Separate bright nodule seen.

Sharpless 2-90: like a fat lopsided crescent moon. 12nm H-a

The Elephant Trunk (IC 1396) Large extensive nebulosity with dust lanes. The "trunk" directly visible directly with 12nm H-a

The Pac Man (NGC 281) Only tiny brightest part visible unfiltered. With 12nm H-a, bright with distinct edges and scalloping. An imaging buddy found the live view similar to his H-alpha channel.

The Bubble Nebula (NGC 7635) This was observed from home in the city, full moon, and thin cirrus overcast. Visual versus night vision compared.
13mm eyepiece and Paracorr : no nebulosity, just stars seen
13mm eyepiece, Paracorr, and Oxygen III filter: some nebulosity seen with averted vision, very faint.
PVS-7 unfiltered: small rectangular nebula touching bright star. Honeycomb background of image tube interferes.
PVS-7 with 35nm H-a: nebula clearly seen with structure. Bubble evident. No artificial background.
PVS-7 with 12nm H-a: Bright knots in rectangular nebula. Bubble clearly defined. Dark lane to north, then more nebulosity, a division similar to the Lagoon Nebula

Cone Nebula (NGC 2264) Immediately obvious with 12nm H-a! Last year we observed this under dark skies with a 30" dob. Only visible faintly, with a H-beta filter.

Hubble's Variable Nebula (NGC 2261) Bright and detailed with unfiltered view. Dim and attenuated with 12nm H-a.

Horsehead (Barnard 33 and IC 434) Easy and obvious with 12nm H-a.

Gamma Cassiopieae Nebula (IC 59 and IC 63) Not seen unfiltered. Only IC 63 seen with 12nm H-a. Large with irregular shape.

Planetary nebulae:

NGC 6842: Invisible unfiltered, faint ghostly disk with H-a.

The Ring (M57): Transparent disk unfiltered. Opaque ring structure with 12nm H-a.

Dumbbell (M27) Like the Ring, this bright planetary isn't really a candidate for night vision. It does show interesting structure however. Unfiltered just the dumbbell shape is present. This corresponds to the pink-red "apple-core" area seen in images. Many faint stars seen in the nebulosity, but the blue central star is difficult. With 12nm H-a, the "apple-core" overlays the round body of the opaque nebula. No embedded stars visible.

NGC 7048: Not seen unfiltered. Easily seen round disk with 12nm H-a.

NGC 7027: Bright oval nebula with hint of dark lanes unfiltered. Definite dark lanes separate the nebula into three unequal lobes with 12nm H-a.

NGC 7026: Tiny, two bright flat ovals separated by dark lane unfiltered. Nebula larger with 12nm H-a. Looks like images on Internet.

NGC 7662: Nice detail with spherical outline unfiltered. Bright figure-8 inside elliptical envelope with 12nm H-a.

Sharpless 2-188: invisible unfiltered. With 12nm H-a, obvious, nice fat crescent like a coarse brushstroke. Barely visible under dark skies with a 30" dob and normal eyepiece + OIII filter.

P 84.9+4.4 (Abell 71) Not seen unfiltered. Large ghostly round disk with 12nm H-a.

P 103.2+0.6 (Minkowski 2-51) observed during full moon and cirrus overcast skies, in the city. 13mm eyepiece with OIII filter: not seen (was previously seen, barely, under dark skies) PVS-7 with 35nm H-a: faintly seen with central star.
With 12nm H-a: Disk clearly seen but central star attenuated by filter.

P103.7+0.4 (Minkowski 2-52) observed during full moon and cirrus overcast skies, in the city. Same results as above, but much smaller disk with no central star.

Only about 1 in 5 PNG/PK planetaries observed with night vision were visible.

Galaxies:
Viewing galaxies was an unexpected bonus. Just a red filter in the city, or no filter under dark skies. A 2x Barlow helps with resolution. Like with normal visual observing, galaxies are much improved under dark skies. Surface brightness correlates with visibility.

NGC 7331: looks like a small M31. Four satellite galaxies visible in FOV.

Stephan's Quintet: all five visible from my light polluted backyard!!! I was sooo happy!

NGC 185 and 147: Satellites of M31 located about 5 degrees away in Cassiopeia. Not terribly bright, and 147 is difficult visually. Both are easy with night vision.

NGC 1275 (Perseus A) Easy with night vision, and about 15 other small galaxies seen in FOV, part of galaxy cluster Abell 426)
The fainter galaxies are challenging.

NGC 253 (Sculptor Galaxy) This bright target is stunning visually, even more so with night vision. Tiny, thin dust lanes visible around the core.

Not every galaxy works with night vision. Low surface brightness Barnard's Galaxy in Sagittarius and M33 aren't improved over visual.

In closing, the night vision experiment was far more successful than I expected. The view is upright and correct. No computer or cables required. Otherwise invisible nebulae and galaxies are visible, even from the city.

January 2016 Skies

$
0
0

January Skies

by Dick Cookman

01/8/2016

Highlights: Comet Journal, Martian Landers, Meteor Showers, Planet Plotting, January Moon

Focus Constellations: Camelopardalis, Ursa Major, Ursa Minor, Draco, Cepheus, Cassiopeia, Andromeda, Pisces, Perseus, Auriga, Taurus, Gemini, Cancer, Lynx

Comet Journal

The 20km. wide New Years comet C/2013 US10 (Catalina) passes by Arcturus in Bootes at the beginning of January and is approaching 5th magnitude. The comet will be closest to Earth on January 17th when it will be near the end of the tail of Ursa Major. It will be within 8° of Polaris on Jan. 31st in the constellation Camelopardalis. It can easily be seen with 7x50 or 10x50 binoculars and will remain quite bright until late February. It is a long period first time comet from the Oort Belt, but gravitational influences during the passage through the inner solar system is accelerating it to solar escape velocity, never to return.

Comet C/2014 S2 (PanSTARRS) and Comet C/2013 X1 (PanSTARRS) are both 8th magnitude comets in northern skies in January. The former is near peak magnitude in Draco below the cup of the Little Dipper. It passed through perihelion on Dec. 9th and will complete its circuit through Draco and head toward the cup of the Big Dipper during the winter.

The latter in southeastern Pegasus is still inward bound and will be closest to the Sun at perihelion on April 20, 2016 between Pisces and Aquarius. It will be closest to Earth in June when it may reach magnitude 5 or 6 and will be best observed at low latitudes or in the southern hemisphere as it skirts south of Capricornus and Sagittarius.

Mars Landers

Opportunity is in Marathon Valley to examine the phyllosilicate clay minerals which were discovered via satellite spectral studies. The rover has been slipping and sliding as it jockeys around on the steep north facing slope on the south side of the valley to position itself for its next rock grinding task with the Rock Abrasion Tool (RAT). This target may hold some of the clues as to the origin of the clay spectral signature detected in Marathon Valley.

From Sol 4166 (Oct. 13, 2015) until Sol 4227 (Dec. 14, 2015), Opportunity has moved only 0.3 km. around its winter haven. It has now traversed 26.5 miles (42.63 kilometers) over the Martian surface. Solar energy in the last month ranged from 376 to 419 watt hours per day.

The problems with Flash memory continue. It contains data stored which has not yet been transmitted to Earth due to rover resets and some transmission issues associated with the Deep Space Network station transmitter. The rover is still capable of operating on Flash memory despite the resets but needs to switch to Ram memory in order to safely move the robotic arm used to conduct its science activities. The switching back and forth has limited these activities.

Curiosity is climbing the lower slopes of Mt. Sharp over the sandstones of the Stimson Unit. The dark sandstone of the Stimson over which the rover has been traveling since August 27th displays some large scale cross-bedded layers typical of windblown sand deposited as dunes on Earth.

The rover is currently at Namib Dune, a large active dark colored dune in the Bagnold Dune Field on the northwestern flank of Mt. Sharp. Curiosity circuited the dune to observe the steep downwind slip face which rises at a 28° angle to a height of 16 feet. On Earth, the angle of repose of dry sand is steeper, at 32°, possibly because Earth's greater force of gravity which holds the sand grains together more tightly. Whereas the windward face of Namib Dune is a gentle slope characterized by many small cuspate ripples, the steep slip face has small parallel ridges and valleys trending downslope. The ridges result from grain flows formed as sand is blown over the crest of the dune, builds up in small hills, then avalanches down the slip face. The intervening valleys are simply the areas where grain flows did not occur. Namib Dune is an active dune estimated to be moving at a rate of 3 feet per year, primarily by means of grain flows.

Although most rocks studied on Mars have relatively low levels of silica, hydrogen rich, high silica samples were obtained on July 30th adjacent to the contact zone between the basal rock layer of Mt. Sharp called the Murray Formation and the base of the overlying younger Stimson Unit which the rover is now traversing. The samples contain abundant amounts of tridymite, a rare form of silicon dioxide (quartz) characterized by high temperatures during crystallization, conditions characteristic of some igneous and metamorphic rock in the Earth. The abundance of silica may be explained as a result of low pH conditions where acidic waters removed other elements from the rocks, intensifying the concentration of silica or high pH conditions where silica rich alkaline waters added silica to the rocks. Good examples of the latter condition include the high silica areas found since leaving Marias Pass. The fracture zone observation target examined at Greenhorn revealed high silica in the form of opal, a mineral composed of silicon dioxide with water included in its molecular structure. On Earth, opal is found in environments such as soils, sediments, hot spring deposits, and acid leached rocks.

The presence of tridymite further complicates the issue because the high temperatures required for crystallization necessitates hot environments such as those found at depth below the surface of the planetary body. Further, the relatively low levels of silica in volcanic rocks derived from magma rising from depth found so far on Mars suggests that either the silica may not be of volcanic origin or that there were igneous processes transpiring which concentrated the silica at depth.

The more we learn about the Planet Mars, the more we need to figure out and explain. The reward is a concept of how the planet evolved in very ancient times, a concept that may yield information about how our own planet evolved.

Meteor Showers

The Quadrantid Meteor Shower occurs between Dec. 28th and Jan. 12th. At its peak on the morning of the 4th it will illuminate January night skies a week before New Moon under the light of a waning crescent Moon. It may produce up to 120 meteors per hour in dark skies and has historically varied from 30 to 200 meteors per hour. The meteors will appear to emanate from a radiant in Bootes between Hercules and the end of Ursa Major's tail which will be high in the east in predawn hours. The Quadrantids shower is probably caused by debris from the destruction of Comet 2003 EH1, 500 years ago. Chinese, Japanese, and Korean observers in 1491 discovered a bright comet which had an orbit very similar to that of the Quadrantid debris stream and in 2003, Peter Jenniskens identified a minor planet, EH1, with the same orbit, another remnant of the comets destruction.

Other showers in January are relatively minor and restricted to the southern hemisphere.

Planet Plotting

Morning planets include Venus (-4.0 to -3.9) which moves through Scorpius, Ophiuchus, Sagittarius in January, Saturn (+0.5) in Ophiuchus, and Mars (+1.3 to +0.8) in Virgo and Libra. Mercury is buried in the glow of dusk and dawn all month and is at Inferior Conjunction with the Sun on the 14th. Depending on your horizon you may observe Mercury when it sets after the Sun in early January or when it rises immediately before sunrise at the end of the month.

Jupiter (-2.2 to -2.4) in Leo rises well before midnight and is in the southwestern sky in the hours before dawn. Neptune (+7.9) in Aquarius and Uranus (+5.8) in Pisces are evening planets which rise during the day and set before midnight.

Before dawn on Wednesday morning, Jan. 6th, a very thin and faint waning crescent Moon rises in the southeast and is soon joined by Saturn in Ophiuchus and Venus in Scorpius not far from Antares, its brightest star. In the south-southeast Mars and its slightly brighter companion, Spica, shine farther above the horizon in Virgo (source: Cosmos Celestron Navigator). Venus and Saturn in Ophiuchus present an impressive conjunction on the 8th when they are separated by less than 1° at 11PM EST. The ringed planet will pair with its much brighter companion in our skies as they rise before dawn when they are slightly farther apart but still a splendid sight.

PlanetConstellationMagnitudePlanet Passages
SunSagittarius, Ophiuchus-26.8New Moon, 1/9, 8:31PM EST
MercuryCapricornus, Sagittarius-0.4 to +3.1 to -0.0Inferior Conjunction 1/14, 9:00AM EST
VenusScorpius, Ophiuchus, Sagittarius-4.0 to -3.9Saturn, 0.09°N, 1/8, 11:PM EST
MarsVirgo, Libra+1.3 to +0.8 
JupiterLeo-2.2 to -2.4 
SaturnOphiuchus+0.5Venus, 0.09°S, 1/8, 11:PM EST
UranusPisces+5.8 
NeptuneAquarius+7.9 

January Moon

Apogee distance (maximum orbital distance) is 251,206 miles (63.39 Earth radii) from Earth on the 2nd at 6:53AM EST. Perigee distance is 229,671 miles or 57.95 Earth radii on the 14th at 9:14PM EST when the Moon makes its 2nd closest approach of the year to Earth. It returns to the apogee position in orbit on the 30th at 4:10AM EST when it is farther away at 251,377 miles or 63.43 Earth radii.

Lunation 1151 begins with the New Moon of January 9th at 8:31PM EST. It ends 29.63 days later with the New Moon on February 8th at 9:39AM EST.

The Full Moon for January in Gemini is at 8:46PM EST on the 23rd. It is called the "Moon after Yule" or "Old Moon." Colonial Americans named it the "Winter Moon" and it was the “Wolf Moon” to the Medieval English. The Anishinaabe (Odawa and Ojibwe) of the northern Great Lakes refer to it as “Gitchi-manidoo-giizis" (Great Spirits Moon). Celts called it the “Quite Moon” while for the Chinese it is the “Holiday Moon.”

PlanetConstellationMagnitudeMoon PassageMoon Phase/Age
SunSagittarius-26.88:31PM EST, 1/9New ~ 0 days
MercurySagittarius+3.12.1°N, 1PM EST, 1/10Waxing Crescent ~ 0.69 days
VenusOphiuchus-4.03.0°N, 7PM EST, 1/6Waning Crescent ~ 26.27 days
MarsVirgo+1.31.5°SN, 2PM EST, 1/3Waning Crescent ~ 23.69 days
JupiterLeo-2.41.4°S, 8PM EST, 1/27Waning Gibbous ~ 17.04 days
SaturnOphiuchus+0.53.0°N, Midnight EST, 1/6Waning Crescent ~ 25.77 days
UranusPisces+5.81.5°S, 1AM EST, 1/16Waxing Gibbous ~ 6.19 days
NeptuneAquarius+7.92.0°N, 10AM EST, 1/13Waxing Crescent ~ 3.56 days

Binocular Universe: South for the Winter

$
0
0

Binocular Universe:
South for the Winter

February 2016


Phil Harrington

This year marks the 30th anniversary of the passage of Halley's Comet. But the universe played a trick on us back in 1986. Instead of swinging past on the Earth-facing side of the Sun, as it did previously in 1910, the comet passed perihelion on the far side. Adding insult to injury, the best viewing opportunity was to be had from the southern hemisphere. Many amateurs traveled down under to see the comet at peak brightness. My plans, however, were far more modest. With our 18-month-old daughter in tow, my wife and I trekked to the Florida Everglades at 25° North latitude. We wouldn’t have a perfect seat behind home plate, but at least we were in the bleachers. 

Truth be told, I found Halley disappointing. Most people did. Even from those spectacularly dark Floridian skies, all that was visible was a modest fuzz ball with a hint of a fan-shaped tail. 

While Halley left me wanting, the surrounding southern sky...WOW! I had done enough reading and research ahead of time to know that there were going to be many fine sights awaiting me. But I was not prepared how amazing the view would be.

As I write this in 2016, the outside temperature is well below freezing and a cold wind is howling. But reminiscing about that trip to Flamingo, Florida, at the tip of the 'Glades still warms my heart.

If you also have a bad case of the "Winter Blues,” let’s take a trip south for the winter. It might be to this month's Winter Star Party in the Florida Keys. Or how about a stay on a Caribbean island? Then again, there is always southern California or Hawaii. The choice is up to you!

As you head south, everyday constellations rise higher above the southern horizon. Because their light is now piercing less of our earthly atmosphere, familiar objects take on an exciting, more spectacular appearance. At the same time, new and exotic star patterns begin to appear below. What wonders of the universe do these unfamiliar regions hold?

Here is a tour guide to some of these unsung southern beauties. While old favorites such as the Orion Nebula should be outstanding from southern vantage points, I have restricted the objects in this tour to between -35 degrees and -55 degrees declination. They represent the best of what the Deep South has to offer.

Above: Winter star map from Star Watch by Phil Harrington.
Click the chart to open a printable PDF version in a new window.

Above: Finder chart for this month's Binocular Universe.

Chart adapted from Touring the Universe through Binoculars Atlas (TUBA)
Click the chart to open a printable PDF version in a new window.

Let's begin at the brilliant star Canopus. Also known as Alpha Carinae, Canopus is a white-hot F0 supergiant. At magnitude ‑0.72, it holds the distinction of being the second brightest star in the night sky. Though normally considered a far southern target, Canopus can be seen from as far north as +35° latitude given an unobstructed southerly view. Astrometric data from the European Space Agency's High Precision Parallax Collecting Satellite (Hipparcos) space mission found that Canopus lies 313 light-years away. That's significantly farther away than Sirius, which is only 8.6 light years from our solar system.

Canopus' home constellation, Carina, is the southernmost of three separate constellations formed from the long-retired star group Argo Navis. Recall from your mythology lessons that Argo was the ship used by Jason and the Argonauts as they searched for the elusive Golden Fleece. The constellation Argo Navis dates to ancient Greece, but was scuttled by Nicolas Louis de Lacaille in 1763 when he divided it into Carina, the ship's Keel; Puppis, the Poop Deck; and Vela, the Sails.

Scattered amongst the stars of the Keel is a veritable treasure trove of stunning deep-sky objects. Our first port of call is NGC 2516, an impressive open cluster not far from Canopus. On dark, clear February nights, it is visible as a soft, gray smudge spanning about a moon's diameter. With the slightest optical aid, however, it erupts starlight! Seven-power binoculars resolve about a third of the 100 stars that make up NGC 2516. A trio of orange orbs dominate the scene of otherwise pure white stars. NGC 2516 spans better than 15 light years and is 1,300 light years from Earth.

Another stunning open cluster that most Northerners miss out on is NGC 3114. Three 6th-magnitude beacons rule over another 170 or so stellar citizens in this brilliant galactic blaze. NGC 3114 covers 35' of arc. I could only stare in silent awe when I saw NGC 3114 through my 11x80 when I first spied it thirty years ago.

You'll have to stay up late to catch our next Carinian targets, but they are well worth it. The Eta Carinae Nebula, NGC 3372, is one of the most amazing objects in the entire sky. For those heading south for the winter, it is a "must see!"  The view of this huge glowing cloud is exquisite even in the most modest optical equipment. Dark rifts divide the nebula into several distinct regions, with the most prominent patch clearly teardrop shaped. 

Entombed within this cloud is the namesake star Eta Carinae. Johan Bayer recorded it as 4th magnitude on his Uranometria star atlas of 1603. Edmund Halley was the first person to view Eta telescopically in 1677; he too estimated Eta as magnitude 4. By 1730, it had brightened to magnitude 2, but fell back to 4th over the next fifty years. It continued to fluctuate until 1843, when in mid-March, it suddenly soared to magnitude -0.8, brighter than Canopus. It quickly dropped below naked-eye visibility, but started to brighten around 1940. It peaked above magnitude 4.5 in 2014.

We now know that Eta Carinae is a stellar system containing at least two stars. The primary sun is a strange beast similar to a luminous blue variable (LBV). It once had a mass 150 greater than our Sun’s, but exhausted 20% of after losing hydrostatic equilibrium. This caused that sudden flare in brightness in the mid-19th century, an event now known as the Great Eruption.

Its companion is thought to be spectral class O and contain between 30 to 80 times the mass of the Sun. Those facts are somewhat tentative because the entire system is fully engulfed by the Homunculus Nebula, an expanding cloud of material ejected by the primary sun during the Great Eruption.

Studies, however, do reveal a great abundance of heavier elements in the primary star, leading many theorists to believe that this is a good candidate for the next Milky Way supernova. Exactly when that will happen remains unknown. It could be millions of years from now. Or it could be tonight!

Eta Carinae is the brightest member of the star cluster Trumpler 16. Trumpler 16 contains 90 stars hidden among the clouds of NGC 3372. No fewer than five additional open clusters are also seen superimposed onto the nebula. These include Trumpler 14 and 15, Bochum 10 and 11, and Collinder 228. All appear as tight clumps of few stars. Many fine open clusters surround the Eta Carinae Nebula. The close-up chart here spans just 10°, only a little more than the field of 7x50 binoculars.  Look at all there is to see!

Above: Close-up chart centered on Eta Carinae.

Chart adapted from Touring the Universe through Binoculars Atlas (TUBA)
Click the chart to open a printable PDF version in a new window.

Though it is difficult to say which one is best, many favor NGC 3532. Discovered by Lacaille in 1751, NGC 3532 is an outstanding gathering of stars clumped within 50' of arc. Over 60 cluster suns are bright enough to be seen through 7x50 binoculars, with more than 150 visible giant binoculars. En masse, the cluster appears wedge shaped elongated east to west, with many of the stars set in long intertwining lines and curves. One visit to NGC 3532 and you surely will feel as John Herschel did when he described it as the most brilliant cluster he had ever seen. No one can argue with that!

West of the Eta Carinae complex is another standout open cluster. NGC 3293 is a tightly-packed swarm of 90 stars from 6th to 13th magnitude. Most binoculars show only the brightest ten or so surrounded by the gentle glow of unresolved starlight. Photographs show a vivid cloud of nebulosity engulfing the group. Seeing it visually, however, requires great skies and great eyes.

Here's a full list of the objects plotted on the Eta Carinae chart above.  Click the list to open a printable PDF version in a new window.


Sailing onward, we will next examine Vela, the Sails. The brightest star in Vela is Gamma Velorum, a fine multiple star made up of at least four suns. Binoculars reveal the system's "B" star, a 4.2-magnitude type-B sun, about 41" to the southwest of Gamma A, which shines at magnitude 1.7. Both of these stars are spectroscopic binaries. While far too close to split individually, Gamma A is comprised of a blue spectral class O supergiant and a massive Wolf-Rayet star. Although they were once classified within spectral-class O, Wolf-Rayet stars are now separately noted as spectral-class W. They are well known for their high intrinsic luminosity.

Two other suns are believed to be gravitationally linked to the Gamma system. Gamma C, at 7th magnitude, lies 62" to the southeast of the primary, while Gamma D is 9th magnitude and is separated from Gamma A by 93" to the southeast.

Drop 3° southward from Gamma to find the open cluster NGC 2547. Over 110 stars make up this dazzling cast, with more than a dozen shining brighter than 9th magnitude. Many of the suns appear to form lines and curves; all told, they strike me as a crooked cruciform lying on its side.

Just north of Delta Velorum is another beautiful open cluster. IC 2391 can be seen with the unaided eye on a good evening, and is easy in binoculars. My 11x80s show a large, coarse gathering of many bright stars, including several doubles. Its brightest sun, 5.5-magnitude Omicron Velorum, looks like a brilliant sapphire set among a glistening backdrop. Binoculars are definitely the instrument of choice since the cluster spans the equivalent width of two Full Moons.

Scan about a degree due east of IC 2391 to find yet another open cluster. NGC 2669 contains about 90 stars, with the brightest half dozen forming a trapezoidal pattern. On its own, NGC 2669 is not especially impressive, but add to it the magnificent environs, and you have a ringside seat to a wonderful star-studded show for binoculars.

I'm not sure what I miss most about the 1980's -- it certainly isn't the mullet haircut! -- but as far as discovering undiscovered astronomical treasure, my trip to see Halley's Comet had to be the highlight. Armed with binoculars, that experience fueled my passion and certainly cemented in my mind the idea that "two eyes are better than one!"


About the Author:

Phil Harrington is a contributing editor to Astronomy magazine and author of 9 books on astronomy, including Touring the Universe Through Binoculars.  Visit his web site at www.philharrington.net to learn more.

Phil Harrington's Binocular Universe is copyright 2016 by Philip S. Harrington.  All rights reserved.  No reproduction, in whole or in part, beyond single copies for use by an individual, is permitted without written permission of the copyright holder.


Discovery 17.5” Split Tube Dobsonian Telescope

$
0
0

Review of Discovery 17.5”
Split Tube Dobsonian Telescope

My name is Clay, I live in Memphis Tn, I am originally from Columbus, Ohio, I am 46 years old and I own... my first telescope, a 60mm refractor, a 6 inch reflector that I built through a telescope making class back when I was 15 yrs old, a 12 inch Zhumell, and my most recent purchase, this discovery telescope.

My Experience With Discovery (Bill)..

Bill seems like a really nice guy, throughout the whole experience, which was lengthy, communication never broke down, which was appreciated. Deadlines came and went, projected dates for this and that slid on by, but he always returned my call if he didnt answer the phone, and I only left a total of two messages, the first on my initial inquiry, and one other time at the 4 month point. My call was returned promptly by the next day. My scope was 4 months past due from the “typical” 3 month delivery time. Bill really needs to give a 6 month “typical” delivery time. If it werent for the thread here on Cloudy Nights, I would not have already prepared myself for a probability of a 6 month wait, so 7 months was not so bad. Bill at one point let me know that quartz took more time because of it being so hard, and I would be rewarded with a virtually set up and observe scope with almost no cooling time (more on that later)....sounded good to me. The scope did ship the day he said that he shipped it, and I was glad about that, seeming how I had become suspect of everything he had to say at that point.

Shipping/Packing...

The scope came quick, packed well in 4 boxes. There was no expanding foam which I was weary of, remembering what another reviewer had said, that it took him 2 hours to get the scope out of that and what a mess it made. I was pleased with the sheets of styrofoam that packed the scope well.

First out was the primary...a thing of beauty, with one exception, my centering circle was not in the center, it had slid to the side or something, it was obvious, and I could see some sticky residue from whence it came, not a big deal, I took care of it. Each piece I brought into the house, my wife kept looking at me not saying a word, just shaking her head, this scope is enormous! It is definitely a man's scope!


Assembly..

This scope goes together very quickly once you get used to it, I mean really quick. Once the bottom is in the base,

 
you just line up these three post on the bottom..
 
 
to three of these on the top, and tighten down the three screws, making sure the two tubes are flush.
 
 
I am so proficient at it 2 weeks in, it is a breeze, and it is not as heavy as I was afraid of it being, the heaviest is the lower half with the mirror, it is stated to be 96lbs, the base is 62lbs, and the top half is 36lbs. I am 5 ft 9 180lbs and I handle set up take down loading and unloading with ease...careful ease that is.

 
This fold up dolly from Lowes is rated for 150lb, and it makes moving the base with bottom half of the scope a breeze.

I thought It was going to be a while before taking it out to a dark site, but I have been out to my green zone (1hour away) twice already. Surprisingly....pleasantly, this scope holds collimation extremely well. I collimated the scope at my dark site, broke it down at the end of 4 hours, drove home, left in my wifes suv because it was 3am. The next day I procrastinated until the evening, when I just so happened to notice it was clear, I should be so lucky, headed right back out to my green zone, unloaded, set it up, and it was off by a smidge, one slight turn of one wing nut, and I was off into the Cosmos for another 4 hours. This was the night when I got a perfect star test, because the scope does have to cool, (even with the quartz) and because it was in the garage all night and the next day it was just right. 

Images...

images are a real treat, I could see spiral structure in m77 in cetus, Stephan's quintet was there! Couldn't miss it, the only thing I regret about looking at the quintet, was the drive-by of ngc7331 and 3 other galaxies in the field of view that I didn't take the time to enjoy because I was in such a hurry to see the quintet! But there will be plenty of time for everything. Let me tell you that the Andromeda galaxy looked pretty close to 3d! For the first time I felt I was looking across a galaxy instead of at a galaxy, it filled the 30mm es, two dark lanes, and a bunch of background stars....wow! And if Andromeda was almost 3d, the great Orion nebula WAS 3d, 6 stars with plenty of separation in the trapezoid, nebulosity every which away, with texture depth and green color, and bright as all get out. The pinpoint star field is really something I enjoy, some bit of flaring on the extreme outsides, but I noticed it changes with the rotation of my head  so it may be from the 100deg fov, but those 100 degree explore scientifics are magnificent!

Scope Handling....

Outstanding, this is truly my kind of scope. Rotation is smooth, axis movement smooth, and it stops and stays where you put it. The movement on my zhumell was buttery smooth, but so smooth that when I exchanged eyepieces, the scope would move and that caused a problem when viewing at higher powers it actually made it a bit frustrating because of the reduced field of view, not this beast! I can bump it climbing up my home made observing seat, I can prop my foot on the top of the base when I am at the highest post, i can have one hand on the top handle, and the other clinching the top of the tube (that has become normal), and it is steady, a really solid telescope!

Issues!!!!!!.......

First light was a nightmare!! I already mentioned about the setting circle being off. The first collimation was dreadful my beam from the collimator was barely on the primary (extreme lower left) What the heck?!! there is no way this scope was just star tested a few days ago. Collimation was so far out whack I couldn't adjust it to save my life, three hours of frustration before I decided to compare things with my 12 zhumell ( a small bit of irony, it being mass made and all...) when I finally figured out, the beam was not in the center of the secondary, it was at the very tip at the bottom, how could this be? To get the beam centered in the secondary I had to shimmy spacers, actually it ended up being a nut, and a spacer on one side to compensate for the secondary having an issue. But I got it there, and I was able to achieve perfect collimation. I called Bill at discovery, and he offered to do whatever was necessary to rectify the problem, he said the secondary was the problem, offered to reimburse my shipping cost for me to send it back, he would get right on it, and overnight it back to me. Well........seeming how I had just waited 7 months, shipping the secondary back was going to be an absolute last resort. He assured me what I did to correct the problem would in no way degrade the images the telescope would produce, and based on the star test he was right.

Next issue, my es20mm100 would not focus, but the 30 did. My focuser was racked almost all the way in on the 30, and there wasn't enough room to focus the 20, I didn't even try the 14 or the 9 since they were all 100deg eyepieces I assumed the others wouldn't focus either. I found out the next night that the 14 and 9 would focus, it was just the 20, so I had to move the primary up 1 inch to give the focuser more room, and it worked great.

Moved the primary up an inch, not too big of a deal. That green laser makes locating objects effortless

My observing seat that gives me the 88” I need at zenith, which has gotten a real work out these last two weeks.

Conclusion...

I love this scope, I knew it was what I wanted the moment I saw it. Not a bunch of poles to put together, collimation holds, no stray light in the optical path, dew is not an issue, and it is just a base and two pieces, 3 minutes and I'm together, another 2 minutes tops and Im collimated. The weight for me is not an issue at all. The price at 3000.00 was an absolute steal of a deal, I got free shipping and a quartz primary and secondary! This is one solid piece of equipment, and at the same time a pristine optical instrument, and in my opinion a solid investment if you want to get into the BIG DOB arena...this is the way to go! As long as you prepare yourself for the wait time, again mine was 7 months, you wont regret it!

Clay

February 2016 Skies

$
0
0

February Skies

by Dick Cookman

02/6/2016

Highlights: Comet Journal, Martian Landers, Meteor Showers, Christians, Candles & Groundhogs, Planet Plotting, February Moon

Focus Constellations: Camelopardalis, Ursa Major, Ursa Minor, Draco, Cepheus, Cassiopeia, Andromeda, Perseus, Auriga, Taurus, Gemini, Cancer, Lynx, Leo

Comet Journal

Both Comet C/2013 X1 (PanSTARRS) and Comet C/2013 US10 (Catalina) are on the edge of naked eye visibility at magnitude 7 and can be easily observed with binoculars. The latter is south-southwest of Polaris in the Little Dipper in the early evening and moves away from Polaris through the constellation Camelopardalis in February. The former is between Pegasus and Pisces in early February and by month's end will pass into the circlet of Pisces — also known as the head of the Western Fish. The comet will get progressively brighter during the Spring and may approach naked eye visibility at magnitudes 4 to 5 when near perihelion in June.

Comet C/2014 S2 (PanSTARRS) is at 9th magnitude and circling through Draco in February and early March and will head through the cup of the Big Dipper in April.

Catalina and C/2014 S2 (PanSTARRS) have both passed through perihelion and are dimming as they return to the depths of space. Catalina has an hyperbolic orbit which will carry it out of the Solar System and S2 will orbit back to the inner solar system in slightly more than 2200 years.

Mars Landers

Opportunity is in Marathon Valley to examine the phyllosilicate clay minerals which were discovered via satellite spectral studies. The rover has been slipping and sliding as it maneuvers around on the steep (~30°) north facing slope on the south side of the valley to position itself to take panoramic images of its surroundings and close up images of targets which are selected for rock grinding tasks with the Rock Abrasion Tool (RAT). The samples produced may hold some of the clues as to the origin of the clay spectral signature detected in Marathon Valley.

From Sol 4229 (Dec. 16, 2015) until Sol 4275 (Feb. 2, 2016), Opportunity jockeyed back and forth collecting multiple images and extensive Microscopic Imager (MI) mosaics of the surface targets "Pvt. John Potts" and "Joseph Collin." Each was followed with a unique placement of the Alpha Particle X-ray Spectrometer (APXS) for elemental identification. A series of Panoramic Camera (Pancam) and Navigation Camera (Navcam) panoramas were collected of "Knudsen Ridge," the upper part of the south slope of Marathon Valley.

Opportunity performed a steep climb of just less than 16 feet (5 meters) toward "Knudsen Ridge" on Sol 4269 (Jan. 26, 2016) . On the next sol, the rover ascended further up slope about 14 feet (4.4 meters). It has now traversed 26.5 miles (42.65 kilometers) during the 12 years that it has been on the Martian surface. Solar energy improved in the last month ranging from 449 to 498 watt hours per day.

Curiosity is climbing the lower slopes of Mt. Sharp over the sandstones of the Stimson Unit. The sandstone of the Stimson over which the rover has been traveling since August 27th displays some large scale cross-bedded layers typical of windblown sand deposited as dunes on Earth.

The rover is currently at Namib Dune, a large active dune in the Bagnold Dune Field on the northwestern flank of Mt. Sharp. Curiosity is investigating the dune to determine its rate of movement and the nature of sand grains making up the dune. These studies include the composition, sizes, shapes, and distribution of the grains, relationships to the sedimentary structures exhibited by the dune, and potential sources of the sand. The sand making up the dune is unusually dark when compared to dunes on Earth and to much of the sediment and sedimentary rocks analyzed so far on Mars, providing another interesting puzzle for mission scientists and planetary scientists.

Samples collected so far have been sieved to isolate the sand and silt sized particles which make up the majority of the windblown dune and to eliminate coarser granules and finer clays which may result from other processes.

Meteor Showers

The Alpha Centurid Meteors make up the only significant meteor shower in February. It occurs on the 8th but is limited to southern hemisphere skies. Light produced by meteors is not limited to the glowing sand and silt sized particles but is also produced by incandescent air heated by the plunging particles.

February skies are visited by sporadic (ave. = ~7 per hr.) Fireballs, partially compensating for infrequent meteor showers. Fireballs are meteors brighter than Venus. Although fireballs in February occur no more frequently than in other months, there are more bright fireballs which can last as long as 5 to 10 seconds and probably result from relatively slow moving boulder size meteoroids ranging from one to thirty feet in diameter. When fireballs shoot through the sky behind observers, they turn around to look because they see brilliant light reflected from trees and other objects in front of them.

The February fireballs may result from old untraceable showers that are no longer recognized.

Christians, Candles & Groundhogs

The Christian liturgical calendar celebrates February 2nd as "Candlemas," the day of the "Redemption of Mary" and the "Presentation of Jesus." The event is derived from Jewish tradition as specified in the "Law of Moses" from the "Torah" –– the five books of Moses which comprise the chapters of the Old Testament.

According to Leviticus, Chapter 12, new mothers are to have firstborn male offspring circumcised after the seventh day following birth. Mothers must then refrain from touching "hallowed things" and attending sanctuary for thirty three more days. On the fortieth day male children are presented at the temple and the mother's purification is fulfilled.

In the Christian Church, these ceremonies occur on the fortieth day of Christmas known as "Candlemas" because priests utilized a utensil called an aspergilium to bless beeswax candles for use in the Church and homes of the faithful.

Candlemas almost coincides with the midwinter cross quarter day (half way between the December solstice and March equinox) and has long provided an opportunity to predict the arrival of Spring as expressed in the Old English verse:

"If Candlemas Day is clear and bright, winter will have another bite. If Candlemas Day brings cloud and rain, winter is gone and will not come again."

The origin of Groundhog Day can be traced to James Morris, a Pennsylvania storekeeper who reported local hearsay in 1841 that according to German folklore: "the Groundhog peeps out of his winter quarters and if he sees his shadow he pops back for another six weeks nap, but if the day be cloudy he remains out, as the weather is to be moderate."

Planet Plotting

The morning planets arrayed in the southern sky before sunrise include Mercury (-0.0 to -0.3) & Venus (-3.9) which move through Sagittarius and Capricornus in the southeast in February. In the south, look for Saturn (+0.5) in Ophiuchus and Mars (+0.8 to +0.3) in Libra. Jupiter (-2.4 to -2.5) dominates the western sky in Leo. Mercury is 26° away from the Sun on the 6th at its maximum western elongation and is quite close to the horizon. Depending on your horizon you may observe when it rises more than an hour before sunrise.

Neptune (+8.0) in Aquarius and Uranus (+5.9) in Pisces are evening planets which rise during the day. Uranus sets in mid-evening and Neptune is in conjunction with the Sun on the 28th and may be viewed after sunset in early February.

PlanetConstellationMagnitudePlanet Passages
SunCapricornus, Aquarius-26.8New Moon, 2/8, 9:39AM EST
MercurySagittarius, Capricornus-0.0 to -0.3Max West Elongation 2/6, 8:00PM EST
Venus, 4°W, 2/12, 10:00PM EST
VenusSagittarius, Capricornus-3.9Mercury, 4°E, 2/12, 10:00PM EST
MarsLibra+0.8 to +0.3 
JupiterLeo-2.4 to -2.5 
SaturnOphiuchus+0.5 
UranusPisces+5.9 
NeptuneAquarius+8.0 

February Moon

Lunation 1152 begins with the New Moon of February 8th at 9:39AM EST. It ends 28.97 days later with the New Moon on March 8th at 8:54AM EST which blocks the Sun and produces a total solar eclipse in Sumatra, Borneo, Sulawesi and locations in the Pacific ocean.

The Full Moon for February in Leo is at 1:20PM EST on the 22nd. February's Full Moon was referred to as the "Trapper's Moon" in Colonial America. Celts referred to it as “Moon of Ice” and Chinese call it “Budding Moon." To Medieval English it was the “Storm Moon” and Anishnaabe (Chippewa and Ojibwe) of northern Michigan celebrate it as the “Namebini-giizis” (Sucker Moon) in the western dialect and Mkwa-giizis (Bear Moon) in the eastern dialect.

Perigee distance is 226,403 miles or 57.13 Earth radii on the 10th at 9:41PM EST. The Moon is at the apogee position in orbit (maximum orbital distance) at 251,894 miles (63.56 Earth radii) from Earth on the 26th at 10:28PM EST.

PlanetConstellationMagnitudeMoon PassageMoon Phase/Age
SunCapricornus-26.89:39AM EST, 2/8New ~ 0 days
MercurySagittarius-0.10°N, Noon EST, 2/6Waning Crescent ~ 27.65 days
VenusSagittarius-3.94.0°N, 3AM EST, 2/6Waning Crescent ~ 27.27 days
MarsLibra+0.83.0°N, 4AM EST, 2/1Waning Crescent ~ 22.31 days
MarsLibra+0.34.0°N, 1PM EST, 2/29Waning Gibbous ~ 21.14 days
JupiterLeo-2.51.7°S, 11PM EST, 2/23Waning Gibbous ~ 15.56 days
SaturnOphiuchus+0.53.0°N, 2PM EST, 2/3Waning Crescent ~ 24.73 days
UranusPisces+5.91.7°S, 9AM EST, 2/12Waxing Crescent ~ 3.97 days
NeptuneAquarius+8.02.0°N, 7PM EST, 2/9Waxing Crescent ~ 1.18 days

Toasty Dew Heaters

$
0
0

Wait – don’t throw out that old toaster!

Lurking within every toaster is about 20 feet of potential dew strip in the form of the elements it uses for burning your bagels.

These elements have a resistance of about 0.3-0.4 ohms per foot, which when connected to a 12V (or similar) power supply can provide gentle heating for your scope optics and accessories. If your toaster had a fancy bagel or one-sided setting, there will be a couple of different heating elements used with lower resistances. As you can see in this first pic, two toasters gave me quite a range of resistances to choose from.

Just take apart the toaster (a fascinating study in production engineering) and keep the mica insulating boards with the elements wrapped around them until you’re ready to take the elements off and make use of them. You’ll need to get hold of a multi-meter and measure the resistance and length of your element(s). This will tell you what the resistance is per inch.

As a general rule of thumb, you need the following wattages for dew control.

10” SCT         16-19W

8”SCT            12-15 watts

6”SCT            8-12 watts

Eyepieces     2-3 watts

Diagonal       2-3 watts

Finder            3-4 watts

It is better to err on the higher side as there is more heat loss with this home brew design than with some of the commercial dew straps. Also, as your battery voltage declines with use, so does the wattage produced.

This is how you figure out what you need.

After measuring the length and resistance of one of my elements, it measured 36.2ohms and was 93in.long. This gave 0.39ohms per inch. (36.3/93)

To go around my 9-1/2” diameter SCT tube would require ~ 30” (π x D) which then gives us 30” x 0.39 = 11.7ohms total resistance.

My power supply is 12V, so..

Wattage = V2 /Ohms - so 12V x 12V/11.7ohms = 12.3W – just about right for an 8” SCT. (It could have been a bit higher but that’s how the available resistances worked out..)

Current = V/Ohms or Watts/V – either one gives you 1.025A (you can use this to find out how long a battery would last powering it)

If you have a choice of resistances from your toaster sacrifice, using a higher resistance would drop the wattage in the same length. Using a lower resistance element would up the wattage for the same length.

You can also double up the length by going twice around your tube for 1/2 the wattage (but avoid uneven heating caused by too much overlap or gaps around the periphery).

Using two elements in parallel will half the resistance – but make sure that they are insulated from each other.

You can also use a higher (more watts) or lower (less watts) voltage supply.

So there’s some wiggle room available by juggling the variables.

Some general construction notes:

1.     Cut the nichrome wire to length with side cutters or tin-snips. It’s tough stuff, but avoid over-flexing the folds where it went around the mica forms. Too much flexing will break the elements.

2.     The nichrome ribbon used for the heating elements is impossible to solder (the factory used spot welded terminals), so mechanical crimp connections have to be used.

Standard quick connect crimp connectors like you use for trailer wiring work fine. Just fold the heater element in the crimp tube to make sure you get good electrical contact. I show an un-insulated crimp terminal for illustrative purposes only. Use the insulated versions for your actual build.


3.     If you need more length than one element can provide, join them with a crimp butt splice. You don’t need to leave the plastic sleeve on because it’s going inside the following…

4.     To insulate the element, thread it through a length of heat shrink tubing. (Do this before attaching end crimps.)

Heat shrink is rated for 300-600V levels and is tough stuff, so it’s a good thing to have between the heating element and your telescope. You don’t have to shrink it afterwards. A certain amount of shrinkage will happen over time, but you want it to remain flexible and a skin-ight outer sheath would not be.

Depending on the length, you may have to poke some stiff wire thru first and then attach the element to this and pull it back thru.

5. The ends of the completed strap can be connected by a stout elastic band to provide tension and keep the strap in place.

Note: there is nothing fancy about these heaters. They are always ON or always OFF (unplugged), but if dew is a problem, you want them always ON anyway. A little bit of extra warmth will have far less of an affect on your observing session than a fogged up corrector/lens will…

As an aside, if you do have dew controller, it will work with these elements – your controller doesn’t care if it is switching a fancy self-regulating carbon matrix or nichrome toaster wire, resistance is resistance.

To find out how long your battery will last, you need to know what the Amp/hr rating of your battery is (sometimes expressed as watt/hours). Once you know this, divide your battery rating by either the current (for amp/hr) or wattage (for watt/hr) to find out how long it will last.

So with a 5A/hr battery, our 12.3W heater would last 4.87 hours. Using the 1.025A current instead gives the same result (5A/hr / 1.025A). Slight differences are due to rounding errors.

Strangely, toaster designers did not have the amateur telescope community in mind when they chose the element resistances for incinerating things for breakfast…..so you may not be able to find a combination of length/resistance for your particular requirement at 12V– but it’s worth a look because fancy dew heaters and controllers can set you back some serious $$$$, and at the end of the day, a watt is a watt.

So have fun experimenting and keep your optics ‘toasty’.

Annals of the Deep Sky, Volumes One and Two

$
0
0

IMG_1236 cropped.jpg

Annals of the Deep Sky, Volumes One and Two

Jeff Kanipe and Dennis Webb

Willman-Bell, Inc. 2015

$24.95 each

This past summer (2015) saw the release of the first two volumes of an ambitious new astronomy series written by Jeff Kanipe and Dennis Webb, the authors of the well-received book, The Arp Atlas of Peculiar Galaxies: A Chronicle and Observer's Guide. The series carries the lofty title of Annals of the Deep Sky, and has already been compared favorably to the much-loved Burnham’s Celestial Handbook. I first learned of these books here on Cloudy Nights, where they were praised as a “stunning new celestial companion,” before they were even released. Such pre-publication hype left me both interested and a little skeptical. (At the time, I was not familiar with The Arp Atlas or with its authors, and so the reason for the optimism was lost on me.) When the books became available locally, I decided to see for myself, and my initial impression led me to buy and immediately read both volumes.

These books are meant, by the stated intentions of the authors, to enlighten both observers and imagers regarding the nature of the objects they view, and to provide a broader general knowledge of astronomy and astrophysics in the process. The objects selected are discussed in terms of the most recent astrophysical data available on them.  Comparisons with Burnham’s work are inevitable, and not entirely inappropriate; the authors of Annals of the Deep Sky clearly share the love and enthusiasm Burnham had for his subject. The focus on the science of astronomy and astrophysics is sharper, however, than Burnham’s, and there is much less of the anthropological and archaeological material Burnham added to so many of his discussions. Instead, the reader is offered a healthy dose of science history. The pathways astronomers have followed to reach our current understanding are retraced using historical overviews that illustrate how the science of astronomy has evolved. The tales of discovery include biographical information of the principle investigators involved. The history of astronomy is a fascinating story in its own right, and melding it with the picture of the universe that developed as a result of that history, definitely adds to the appeal of these books. All of this information is presented in a writing style that presents the data and concepts discussed in a straightforward manner, while still conveying the enthusiasm of the authors. As a result, these books go beyond merely providing information, and are a pleasure to read.

The books are organized by constellation, in alphabetical order. The discussion of objects in a given constellation starts with prominent stars or stars of particular scientific interest, and then proceeds outward to ever more distant deep sky objects visible within the official boundaries of that constellation. At the end of each constellation section, charts are included that illustrate the three-dimensional aspect of the slice of sky involved. The objects discussed appear to have been chosen partly for their popularity with observers and imagers, but also in some cases to illustrate concepts of astrophysics. As a result, some objects are covered that would not necessarily make excellent targets for a backyard telescope, but make for fascinating reading all the same.

In these opening volumes of the series you find a couple of features of special interest. Volume One starts with a pair of chapters (120 pages of the book) covering astronomy and astrophysics (“An Introduction to Basic Astronomy” and “Descriptive Astrophysics” respectively). The latter was especially useful to me, since my study of such matters has always been a bit informal, and I needed a concentrated dose (so to speak) to get the most out of the material that followed. The end of Volume Two includes a seventy-three-page glossary of “Essential Terminology” that could best be described as comprehensive. (Volume Two also begins with a dedication to the late Robert Burnham Jr.) Fortunately, I looked both books over before beginning to read, knew the glossary was there in Volume Two, and could put the material to good use in Volume One.

The physical quality of the books deserves some mention. The print style and white (instead of cream-colored) paper makes them easy to read for those of us in the bifocal brigade. The illustrations are clean and well-defined, all of them in black-and-white, but none with the muddy quality you sometimes see when B&W is used as a cost-cutting measure. These are paperbacks, however, and while well-bound and with sturdy covers, don’t lend themselves to be opened flat or exposed to dew. Used as ordinary reference books, however, they should have a long shelf life. This isn’t to say you can’t use them at the eyepiece, but for my purposes and preference they work best at the desk as handy reference material, or in the easy chair for reading pleasure on a cloudy night.

These are not, strictly speaking, observing guides. There isn’t much information on locating objects, although there are Telrad finder charts included, nor are there any long descriptions of what you are likely to see in the eyepiece, as you would find in a work by French or O’Meara. The density of other types of information – and the authors do pack a lot of information into these books – was such that I didn’t realize the above until I read Alan MacRobert’s review in the December 2015 Sky & Telescope. While it’s true these books are lacking in this regard, I can’t say it really matters, given their general purpose.

There were, in the first volume especially, some awkward editorial blunders, the sort of thing a copy editor really should have caught. I’m talking about misspelled words, mostly, with a few word usage errors. These stood out the way they did because everything else was such a smooth read. (They are also being corrected in future printings, according to a comment on Annals of the Deep Sky Facebook page.)

These first two volumes worked for me on more than one level. They served as a refresher course on some basic matters of astrophysics and astronomy history. They provided new insights into stars and objects I thought I knew well, and they introduced me to a number of new objects and concepts. On their Facebook page for these books, the authors state that there will be “at least” ten volumes needed to cover all the constellations. Exactly how many there will be is apparently still an open question, depending presumably on the amount of material the authors find for their work, and how much of it they manage to squeeze in.  The third volume (according to Alan MacRobert’s S&T review of these books) is due out in January 2016. Whenever that actually happens, I’m looking forward to it, and to however many more volumes are yet to come.


Review: davejlec's Paralellogram Mount

$
0
0

About me:

I’m a 50-something amateur astronomer. I started with my first telescope, a 2” reflector, in my pre-teens. I’ve been an active amateur astronomer for all but an eight to ten year period when my responsibilities as a young parent and my military career made it all but impossible to be active in astronomy. I currently own an 11” SCT, a 4.7” Short Tube Refractor and a 4” Long Tube Refractor.

A few years ago, back surgery forced me to modify my astronomy routine. I didn’t feel up-to-the-task of setting-up an 11” SCT daily. As a military member up for transfer every few years, the transient nature of my life didn’t allow for an observatory. As such, I integrated binocular astronomy into my routine. I currently own approximately one dozen binoculars, from hand-held 35mm binoculars to two 100mm models.

I live in southeast Virginia, east of Richmond, VA. My primary observing location is my home – located in what I would call a semi-rural area (a subdivision located on what was formerly farmland). There is a very distracting streetlight out front, but otherwise I feel lucky to have a fairly decent dark sky with a 5.5 limiting magnitude.

The following review is based upon my experience with a custom parallelogram I purchased on CN Classifieds. I want to be clear: I paid full-price for the parallelogram and I have no financial stake in the device. There has been no quid pro quo between the designer/builder and myself.

About the parallelogram:

I first became aware of this particular parallelogram from the 2015 Stellafane Convention web page. I was too ill to attend personally this past summer, but I saw CN member “davejlec” featured on their web page after the convention. He had entered his parallelogram in the “Mechanical” category and won “Second Place Special Award”. After a few months, I saw the parallelogram advertised on Cloudy Nights Classifieds, the other astro-classified site, and even the popular online auction web site. Several months ago I was in the market for a parallelogram and, after exchanging a few messages, I purchased his product.

Rating Scale:

My rating system will be on a 1-10 scale, with the higher number indicating a better rating. I will rate the parallelogram in each category and I will simply add up the results of the categories at the end for an Overall Rating.

Unboxing:

This rating includes packaging, padding, and organization of the items when they arrived to me.

The parallelogram arrived in two boxes. I opened and assembled the parallelogram in my garage.

Everything was extremely well padded. Each piece of the tripod and parallelogram arms were padded and individually wrapped in packing paper to ensure there would be no nicks, scratches or damage of any kind during shipment.

The designer/builder took the time to think of “the little things” – like including and taping two allen wrenches to the inside of the smaller box.

I unwrapped everything & laid-out the parts in an organized manner to assemble the parallelogram. The hardware was labeled and arrived in multiple plastic zip-type bags.

Unboxing Rating10 of 10

Assembly:

This rating includes the documentation included with the parallelogram and the ease of assembly.

The parallelogram arrived with some written instructions but no pictures, no diagrams, nor an overall Packing List.

Admittedly, I’m not the most mechanical person. I like and need pictures or diagrams when I assemble something. People who know me would likely say that I rarely, if ever, read directions. That’s not true – I look at the diagrams & pictures of the items I’m assembling, then and only then do I read the instructions after I get stuck! But in this instance, I had nothing but basic typed instructions to guide me through the assembly process.

When I began assembly, I queued-up every picture I could find online of the assembled product (from all posted ads as well as the Stellafane web site). This helped significantly. However, during and after the assembly process I emailed davejlec to ask a few questions and to verify my assembly was correct. To his credit, he was extremely quick to respond. Once he even gave me his phone number and asked me to call him.

I gave davejlec some feedback during and after the assembly process (and he subsequently told me a computer literate friend of his was going to help him create improved assembly instructions to include pictures). As I mentioned previously, I am not a mechanically inclined person. As such I feel I should grade and rate this category on a slight curve. However, pictures, diagrams, and/or more thorough instructions to include a Packing List would have helped me tremendously.

My rating: 7 of 10.

Here is the assembled product.

Attention to Detail:

This category is based upon the thoroughness & thoughtfulness of the design [and designer] and how well the parallelogram is engineered.

The designer/builder definitely thought about the small things.

The fact the designer/builder included extra hardware is commendable (how many times have we all gone to assemble something and we found one less screw or other missing hardware omitted from the box?). He even included an extra knob/wing nut and extra bearings for all of the connection points. I definitely have “spare parts & hardware” should I ever need it in the future.

There is also a small chain on the tripod head and a metal ring on the bottom of the binocular arm of the parallelogram. This is a safety to keep both arms stationary (and to stabilize the tripod) when adding weights to the arm. If you connect the arm to the tripod head through the hook and chain, there will be no unexpected movement that could harm the parallelogram and your expensive optics.

If you look closely, you might be able to see the gold ring under the binocular mount. The chain is on the side of the tripod head facing away from the photographer and is not visible in this photo.

Even the reflective tape helped me tremendously on several instances. Lastly, the tripod head has a bubble level to ensure proper set-up.

My rating: 10 of 10

Customer Service:
This category is self-explanatory: how well did the designer/builder support & help the buyer.

I have nothing but positive things to say about CN member davejlec’s customer centric attitude. Not only did he provide me his phone number to have questions answered as mentioned previously in this review, he also provided me pre-purchase customization.

I have a pair of 1980s vintage Celestron® 14x100 Binoculars. These 7.3 lb. binoculars do not have a center post. They were sold and packaged with a large metal tripod mount (see below).

As you can see, that’s a large binocular adapter! Davejlec asked me to send him this picture before he shipped the parallelogram. He then designed a special parallelogram-to-binocular mounting solution that is as long as the center of the 14x100’s adapter plate. His specially designed mounting solution essentially has three contact bolts that provide extra stability to the binoculars.

My rating: 10 of 10

Weight Balancing System:

The builder offered me two weight balancing options with his parallelogram. He could supply the weights (at an additional charge plus additional shipping), or the buyer/user can supply his/her own. I chose the latter (he told me that it’s not cost adventageous for him to supply the weights because shipping is more expensive than the value of the weights).

The counter-weight arm was designed to fit commercially available steel weight plates (not the thick, plastic weights). I already owned steel weight plates in 2.5 lb, 5 lb, and 10 lb increments that would fit the balancing arm. (see below):

Having 2.5 lb, 5 lb, 7.5 lb and 10 lb increments., I have considerable flexibility to support the balancing arm in multiple combinations. And yes, I can support 10 lbs on the balancing arm and my 10.3 lb. 25x100 binoculars on the optics end of the arm. I’m not aware of a weight rating for this parallelogram, but I’m confident I could support (but not exceed) 12.5 lbs on each end of the arm. However, my 10 lb weight plus a 2.5 lb. weight would be too thick to secure and to thick to lock-down with the standard size locking mechanism. I have no reason to balance more than 10 lbs.

Note: The design I purchased will not support a Binocular Telescope. However, the designer/builder recently told me he is customizing a more robust mount to support a 17 lb. Binocular Telescope for another CN member.

I do have one small problem with my counter-weights. The 2.5 lb weight, even with a spacer that was made for me, cannot be locked-down. I have a 3.1 lb. Pentax 20x60s that I’d use a 2.5 lb. weight.

Considering the fact I’m using my own weights and the system wasn’t necessarily designed for my specific TSA branded weights, I can not hold the builder responsible. If I can find large enough washers online, I plan to glue or expoxy several together to make a one-piece spacer that I can use with the spacer the builder made for me.

My rating: 10 of 10

Practical Application:

Now, the road test!

For the record, this is my second parallelogram purchase. I bought a parallelogram from a different source that was supposed to support my 10.3 lb 25x100 binoculars. But after owning and using that, I found that in reality I can’t go beyond 5 lbs. (a 70mm binocular) – that’s quite a difference. Since that first paralleogram under-performed my needs, it gave me a reason to consider and eventually purchase this parallelogram.

I have used a half dozen different binoculars on this parallelogram raging from 3.1 lbs to 10.3 lbs. You’ll notice from the pictures included with this review that my 14x100s are in every photo. Due to substantial and copious dew in my area, I decided to take all of my review photos over a brief period so I could promptly promptly store my camera.

I feel the practical operation of the this parallelogram is simple and straight-forward. For those without experience using one, within a few minutes you’ll feel like an experienced pro.

The tripod and parallelogram are extremely stable. I haven’t encountered any vibration issues in the 3-months I’ve owned it.

The movement is sillky smooth. And when changing altitude, the parallelogram works. I can raise or lower the parallelogram, once locked-on to a target, and the traget remains in the center of the FOV.

The builder also provided me two interchangable parallelogram-to-binocular mounting brackets: a center post adapter and one that attaches to the adapter screw of a binocular. Both tightly secure your optics. And both have silky smooth altitude movement.

Frankly, I could not be happier with how the parallelogram functions. A 10.3 lb. 100mm binocular performs flawlessly just like a 3.1 lb. 60mm Pentax.

Note: Make sure you become familiar with attaching your counter-weights. I initially thought I had lock-down problems with multiple increments. My only problem was not practicing first in the daylight!

My rating: 10 of 10

Quality & Workmanship:

This category is simply based on the quality of the product including the machined components & hardware, the quality of the workmanship, and the perceived durability of the unit.

As I have previously stated, I’ve only owned this custom parallelogram for 3-months. But I can readily tell this unit should last the rest of my lifetime.

The tripod is a heavy-duty - but not too heavy to move - wooden surveyor-type tripod. It has a large, heavy-duty head with a bubble level and sturdy legs. The 3-point tripod has a rope connecting each leg to make leveling a bit easier.

All of the knobs are large and ergonomically easy to adjust.

The parallelogram, like the tripod, is also made of wood. The parallelogram has finely machined metal components. Every joint or moving part moves silky smooth. Each arm has recessed metal washers and thus the joints never loosen nor does over-tightening of the bolts cause damage to the wood.

My only slight complaint: changing the binocular mounting solutions – the center post adapter and the binocular screw adapter components are difficult to insert, remove and swap. The fit, with the plastic bearing, is very tight no matter how loose the knob is. However, I’d rather have a tight connection than a loose connection.

My rating: 10 of 10

Summary:

It’s time to total the ratings.

Overall rating:

Unboxing:10 of 10
Assembly:7 of 10
Attention to Detail:10 of 10
Customer Service:10 of 10
Weight Balancing:10 of 10
Practical Application:10 of 10
Quality & Workmanship:10 of 10
 ------------------------
Total:67 of 70
 (96% or a 9.6 avg. Rating per Category)

Conclusion:

I believe the numbers speak for themselves. CN member davejlec designed and built an excellent product. His price was extremely reasonable (especially compared to the commercially available options for 10lb. capacity parallelograms), and he went above and beyond to support me – the buyer.

If you are looking for a parallelogram for 100mm binoculars and below, look on the CN Classifieds (or other source) and contact CN member davejlec before you buy anything commercially available. If you need something to support a heavier weight, I’ve already mentioned he is currently customizing a more robust parallelogram to meet the needs of a 17 lb. Binocular Telescope. In fact, as I was preparing this review he told me that each of his sales has involved some sort of customization, thus no two parallelograms are exactly alike though they do share the same DNA.

There is one last thing I want to stress: CN member davejlec is currently building his parallelograms to support fellow amateur astronomers. He builds these in his basement workshop and they are definitely not a mass produced product. With each build, he customizes and improves the design based on the feedback of each buyer. Having the ability to buy a quality yet customized binocular mounting solution for a reasonable price is great for the binocular community.

Clear skies to all of the amateurs out there – and thanks for reading my first Cloudy Nights Review!

T.V.R.

(CN Member “H-D Moose”)

A Novel Alt-Az Mount for a Rich Field Telescope

$
0
0

A Novel Alt-Az Mount for a Rich Field Telescope

Most of us have had the desire to take a break from using the average telescope with its relatively high power and concomitant narrow field of view and difficulty in finding targets. The so- called rich field telescope or large binoculars seem to fill the bill with their low power and wide fields. The question then becomes how to mount the thing for comfortable, extended viewing. Binoculars with their ability to use both eyes seem attractive until you consider the elaborate pantograph type mounts required to hold them in front of your eyes. I wanted a design that limited the eyepiece movements to a minimum so I could remain seated in one spot for an extended period of time.

The design I hit upon is shown below.

It was designed for a 5” F/5 refractor. You will notice that the tube is attached to the mount at a point far from its balance point necessitating the counterweight. This is to place the eyepoint on the vertical azimuth axis giving a small excursion of the eyepiece without having to use too heavy a counterweight.

Using standard 2”Sch 40 pipe fittings meant ease of assembly and kept the price down. This is a good size to use as they are more common than 1 ½ or the more expensive 3”. They can often be found used at plumbing shops. It also meant that there was only 4 machined parts. These are the tees that are the bearings and their mating nipples that rotate inside them that form the alt – az axles. The rest of the mount is pretty much self explanatory. Machine the nipples first, shaving off just enough to create a smooth round surface leaving as much of the threads as possible. They might leak if filled with water under pressure but who cares? Measure and bore the tees leaving much of the internal thread to retain grease. To make the pier I welded the pipe flange holding the Az axis to an old 6” pipe which was then welded to a used disc blade. It makes a stable pier if properly set. A more elaborate setup would be to sink the pier in concrete and build a rotating chair arrangement that could circle the pier as the telescope moved in azimuth. I have just never got around to doing this but it would be worth doing I think. It was built more than 20 years ago and has been out in the weather ever since (as you can tell from the grunge) and still functions as it did when first made.

A word about the telescope might be in order. At 625mm fl it has a 32mm fl military Erfle giving 19x with about a 3.5 degree field and 5mm exit pupil. It has an Amici prism instead of a diagonal giving a right side up and left to right field while folding the rays 90 degrees. I did this because I could then compare the field directly with star charts. It is quickly attached and detached with two captive bolts that are wing nutted to the piece of 5” aluminum channel.

Other than the rotating chair idea this mount leaves little to be desired for casual sky gazing or determined comet hunting.


– Jan Bentz -- mrtoad33@gmail.com

Explore Scientific AR 102

$
0
0

Explore Scientific AR 102

By Paul Temple

As a guy with a robotic telescope that primarily does variable star photometry I actually miss looking through a telescope sometimes! Staring at a monitor from your warm house is a plus but as I get older I long to grab a scope let the photons roll into the Mark 1 eyeball! So a couple of months ago I began to think about a “grab and go” scope.

In my storage area was a 8” F/5 Astrograph that I no longer used. So I decided to sell it and use the proceeds to buy the “grab and go” scope. Luckily, I had a friend looking for this kind of scope and sold it to him. There is also a Celestron GT mount in the storage area that I have never used that would probably work as a mount for a light refractor.  The remaining question was what to buy?

As a life-long astronomy buff I have a lot of telescopes. My first real scope was a 60mm Sears refractor. I used this for years until it got broken while I was cleaning gunk off of the lens. In my current “stable” of scopes is “ The Bargain Bucket” a 8” homemade F/5 Dobsonian, “Little Eye” a Meade ETX 90mm, “The Beast” a Celestron 6” F/8 refractor, Temple 28 a Celestron 11” CPC roboscope and a Meade LX200 8” roboscope. One of my favorite scopes  is “ Dimestore,” my Meade 60mm, “junk” telescope. I got tired of listening to APO and ED Refractor users complaining about the venerable 60mm scopes so I bought one on EBay for 21 dollars delivered. I used it in it’s stock condition to view Mars at the last good opposition. I did a color sketch with watercolor pencils that got used in a montage of images from the Mars opposition and made one of the “image of the day” websites! After doing the sketch, I upgraded the focuser and use it for a “grab and go” scope. However, there’s just not enough aperture and though the Alt/Az mount is Ok, it could be better!

With $300 (US) to spend, my first thought was to buy the 72 mm ED from Astro Tech. All of the products that I have ever bought from them, including the 8” F/4 astrograph that was sold, have been great. The reviews on that scope were terrific, however, it just seemed to be a little on the small side. Though 72mm is way more scope than the 60 mm, I just wasn’t sure I wanted one that small, especially since it was over the budget by $75. Unfortunately, larger ED’s or APO’s were out of my price range. Just about everything else I looked at had some major flaw (bad focusers primarily) or was out of my price range. After perusing Astromart and seeing only one scope that I was interested in and it was over $450, I decided to check out slightly larger achromats. Better “bang” for the buck!

As mentioned earlier, “The Beast” is my 6” achromatic F/8 refractor that sits on a Sirius mount with a extension pier. Since it is over 100 pounds set up it is definitely not a “grab and go” scope! The optics are excellent though and the Chromatic Aberration is surprisingly well controlled for a scope like this. Plus, the Celestron Minus V filter (Same as the Baader Fringe Killer) does a good job on the CA and doesn’t change the color of the view much. With the experience of using “The Beast” I felt like a short Achromat would be a good telescope for me and even give me a bit more aperture for the money.

I looked at the High Point Scientific website to check out the AR series optical tube assembly from Explore Optics. These are nice looking scopes that come in 102mm, 127mm and 152mm diameter lenses and F/6.5 focal ratio. By the way I am not affiliated with HighPoint Scientific or Explore Scientific in any way! However,  Highpoint has been extremely helpful in all my dealings with them. The 127 caught my attention first but the price was over my budget. Plus the weight and size seemed to be going the wrong way for a “grab and go” scope. So I began to seriously consider the AR 102.

Email was sent to Highpoint and they responded quickly with links to reviews. Most of the reviews praised the build, optical quality and size of the scope. There was not a negative review that I could find on the internet or in their links. That is very unusual for just about any product. The only negative was the CA inherent in the short focal ratio but every review commented that it was not as bad as expected, nor did it hinder the quality of the views.  So I pulled the trigger and ordered the scope. Did I mention that it went on sale a day or so before I ordered it? Did I also mention that I got an open box unit for a 30 dollar discount under the already lowered price of $299 US.  It also came with a 25mm, 70 degree Bresser 2” eyepiece that wasn’t even mentioned in the ad!

Included in the purchase price is a 2” dielectric diagonal, finder scope and two speed focuser. After using “The Beast” for a while it became obvious that it needed a $200 dollar focuser upgrade just to make it usable for CCD imaging. Visual focusing was pretty rough as well. So when you add the $100 eyepiece, the $100 dollar 2” diagonal and a $200 dollar, 2 speed focuser with the AR 102, the telescope ended up being free! Over all the fit and finish is outstanding. Light weight, but well built. The focuser is very smooth and sensitive. This is important in short focal length telescopes since focusing is much harder to get right with the shorter focal length. The rings and dovetail are very sturdy and supply a handle to carry the scope with. The interior of the rings are covered with felt to keep the tube from being scratched. Clamps help to make sure the scope is oriented the way you want it.

The scope comes packaged in a double box with plenty of internal support. It arrived in good condition and quite fast. I also purchased a 5x Barlow lens and it was packed in a box and placed with the other accessories. Assembly  primarily was taking off the rings and stripping off the protective foam, then putting it back together. At 11 pounds it is easy to transport and as was mentioned earlier, the built in handle really helps to make it an easy carry.

I mounted the optical tube assembly on my old Celestron GT mount. This set up has flimsy tripod legs and lots of backlash but it is light and easy to use. With a 4,000 object database it will take you to most of the brighter optics a 4” scope can see. It also has a Baader dovetail clamp attached. This means anything with a vixen style dovetail can be mounted on it. Even with all the issues, it does track well and puts most objects near the field of view. Sometimes you have to use the finder but it is usually right on the edge of view in the eyepiece.

Now what about the optics? All of these fine features are of no avail if the optics are substandard. It has been a difficult task to test the optics this winter due to the bad weather. We live between two 10,000’ plus mountain ranges so the conditions are usually less than optimal, but this year has really been bad for astronomy. With a quick look at the ¾ moon in twilight (clouded up at dark!) I was impressed. There was a bit of purple fringing around the limb of the moon but not really any worse than “The Beast.” I used the 25mm, 70 degree, 2” eyepiece first just to check it out. This only gives you 26x but man what a field of view! The view was crisp and the face of the moon was very contrasty and showed rich detail. As expected, focusing was a bit more demanding but the 2 speed focuser made that chore much easier. The next time I got out the scope, I looked at Capella and did some basic star tests. At high power (165x) the diffraction rings looked good on both sides of focus. This test was a bit tricky since the conditions were so bad. There were high clouds and even stars overhead were twinkling. So the next time it was out, there were high cirrus clouds but a much steadier atmosphere. The moon was full so any CA would really show up. Using a 8.8 mm Meade 82 degree eyepiece and the Celestron Minus V filter there was only a hint of CA around the moon. When I switched to the 25mm, 2” eyepiece there was some purple fringing around the edge but I did not see it as being objectionable. It definitely did not affect the detail visible on the face. Before the sky was completely covered with a layer of thicker clouds I slewed to M 42 in Orion. Wow, even through clouds I could see the Trapezium clearly with the 8.8 mm and the 25 mm. It was much harder to differentiate the 4 stars at 26x with (25 mm) power but very easy at 75 (8.8 mm) and even easier at 188x (used at 2.5x Barlow with the 8.8 mm). When you add magnification, the views look very much like views with the 6” F/8, just a bit dimmer. So even with the short focal length, the scope takes magnification well and focusing is quite easy due to the 2 speed focuser. This was a concern with me since I did want to look at the planets from time to time. This scope is not maximized for planetary observing but still does it well.

The weak link to this set up is the Celestron GT mount, not the AR 102! Even with foam in the tripod legs, tightened up bolts, wooden blocks to force the legs out and bungie cords around the bottom of the tripod to help with vibrations it still jiggles a lot. Oh don’t forget the 11 pounds weight on the tripod tray. Even with all this it still has about a 5 second settle time and shakes with any breeze or touch. This scope on the Sirius mount would be amazing but again not very “grab and go.” So in the future will be a purchase of a manual Alt/Az mount. Still as jiggly as the mount is, it is still portable and gives acceptable views.

My overall impression is outstanding! It is a great deal for the money, even at the non-sale price of $399. At the current sale price of $299 it is almost a steal! The optics are very good, the fit and finish are outstanding and it is light and portable.  Overall, it is a real bargain. My only complaint is very minor. All the screws and fittings on this scope are metal except for 6 screws on the finder scope. Four out of the six screws on the finder rings are plastic and the two screws that hold the finder assembly on the optical tube are also plastic. It would seem to me that the dollar or so that is saved on the price of the screws isn’t worth it when compared to the total price and quality. However, they do work and hold the finder quite steady regardless of the nature of the screws, so I guess it is not really all that important. You could always replace them yourself if it bothers you that much.

Overall, I would highly recommend this scope as a low cost alternative to a more expensive ED or APO scope.  I can live with a bit of purple in an image as long as the image itself is still clear and color free. This the AR 102 admirably does!

Telescope Series Explore AR Air-Spaced Doublet
Telescope Optical Design Refractor
Refractor Design Achromat
Number of Refractor Elements 2
Telescope Aperture 4"
Telescope Focal Ratio f/6.5
Telescope Focal Length (mm) 663
Optical Coatings Explore EMD
Limiting Stellar Magnitude 12.5
Diagonal Included? Yes - 2" Star Diagonal
Telescope Eyepiece(s) Included? No, Sold Separately
Finder Included? Yes - 8 x 50 Finder Included
Focuser Style Crayford/Crayford Style
Focuser Size 2"
Focuser Speed Dual Speed
Telescope Mount Type No Mount - OTA Only
Telescope OTA Diameter (in.) 3.96 (100.7 mm)
Telescope OTA Length (in.) 25.5
Telescope OTA Weight (lb.) 11.3

THE BAADER BBHS-SITALL SILVER DIAGONAL

$
0
0

The Baader BBHS-Sitall Silver Diagonal

by: William A. Paolini, February 13, 2016

Fig 1: LEFT - Baader 2" BBHS Silver; CENTER - Astro-Physics 2" MaxBright Dielectric; RIGHT - Baader 2" Zeiss Prism.


1. Overview


The new Baader Broadband Hardened Silver (BBHS) diagonal, available as both non-T2 (pictured) and T2-threaded in 2" and as T2 in 1.25" sizes, promises to bring Silver back to the mainstream for diagonal mirrors.  Silver has always been an excellent coating for mirroring surfaces, better than aluminum having higher reflectance across the visual spectrum with better transmission in the red color spectrum over aluminum.  In addition, both silver and aluminum are easier to maintain a flat wave front since they have less layers compared to full dielectrics (even the tightest coating tolerances can become problematic when 100 or more layers are deposited as with dielectric mirrors).  The disadvantage of silver however is that it is subject to tarnishing if not protected very well from moisture; but the new BBHS technology purportedly overcomes the tarnishing issue through the use of a dielectric overcoat to create a durable protective layer for the silvered mirror.  With this dielectric overcoat the BBHS silver diagonal is purported to have the same life expectancy as high quality protected aluminum when cleaning is performed with the same care and attention recommended for all precision optical surfaces.


In addition to the use of silver for the mirroring, the Baader BBHS also uses Sitall glass for the mirror's substrate.  Sitall is a crystalline glass-ceramic possessing ultra-low thermal expansion properties and a coefficient of thermal expansion of only 0±1.5 x 10⁻⁷/°C in the temperature range -60 to 60°C.  Sitall has been used in the making of primary mirrors for the Russian Maksutov telescopes, was selected by Lytkarino Optical Glass Factory (LZOS) for the manufacture of the 91 primary mirror segments of the Southern African Large Telescope (SALT), and was used for the primary and secondary mirrors of the VLT Survey Telescope.


Baader claims their BBHS diagonals offer peak reflectivity over a much extended spectrum compared to conventional dielectrics.  The typical premium-level dielectrics, like the Astro-Physics MaxBright diagonal and Baader Maxbright star diagonal, claim peak reflectivity in the visual spectrum from approximately 400nm to 700nm.  The new BBHS technology claims extending that performance far into the infrared with peak reflectivity extending further into the visual spectrum past 700nm to far outside the visual up to 2000nm.


Diagonal

Size

Type

Reflectivity Claim

Wave Front Claim

Body Build

Baader BBHS

2"

Silver Mirror

Not specified

Not specified

Diecast and CNC Machined Magnesium

Astro-Physics MaxBright

2"

Dielectric

>99%


Inconsistent*

CNC Machined

Baader Zeiss Prism

2"

Zeiss Specification** Prism

Not specified, (Baader Phantom Group Coatings)

Not specified

CNC Machined

Fig 2: Comparative diagonal features.

* -    Marketing on AP website makes no wave front claim.  Reference to 1/10 to 1/20 wave over the portion of the mirror in the light path apparently based on forum conversations.  No specification in these claims if this is before or after dielectric coating.

** -   Per Baader Planetarium, many production divisions of the former government owned Carl Zeiss Jena have been privatized.   The Zeiss core enterprise today concentrates on production of finished ultra-high end optical and medical devices.  Many of the thousands of standard components are delivered to Jena "just in time" like any car factory works today.  The opticians and skilled people that once made up the company are still alive (and kicking) and as a result many highly capable optical companies have developed in this region, still producing optics in the old Zeiss tradition.  Baader has people employed who formerly worked at Zeiss Jena and they still use their contacts to existing optical shops there for the production of their prisms and all optical components for the Mark V binocular,  all produced to the original exacting Zeiss specifications and processes.


2. Build, Form Factor and Features


The Baader BBHS diagonal's all metal construction, which is magnesium for lighter weight and faster thermal acclimation, feels robust with excellent fit and finish.  The 2" nose has a very shallow and narrow undercut and at no time did I experience any difficulties when removing it from the focusers on the Takahashi, Vixen, or APM/Lunt telescopes I used for testing.  The Baader Clicklock mechanism provided outstanding operation, easily proving to be the most ergonomic method I have ever used to secure eyepieces into a diagonal.  With a very short twist of the Clicklock mechanism eyepieces were securely held or effortlessly released. 


      Fig 3: Bottom view.


From a weight perspective, all three diagonals had a similar heft.  I did not have a precision scale to do exact weightings, but their feel was very close with the Zeiss prism perhaps being slightly heavier than the other two.  Internally, the Baader BBHS diagonal uses flat black micro baffling for light suppression in the nose piece, with side walls in the interior housing smooth and flat blackened.


Fig 4: Top view of the Baader BBHS diagonal


The BBHS diagonal I used for this test was not their T-2 version, but what they call the BBHS-Sitall Zenith Mirror diagonal (Baader product # 2456115).  It comes standard with the 2" Clicklock mechanism at the eyepiece end and a 2" nosepiece for the focuser.  While the nosepiece unscrews and uses threading like their other T-2 diagonals, the 2" Clicklock adapter does not attach using T-2 threads but is held in place by six small hex key set screws that secure themselves to a non-threaded housing.


Fig 5: Disassembled for cleaning.


Light path measures reveal the Baader BBHS, as configured, was the longest of the three diagonals (note that its light path length is approximately the same as the Baader Maxbright Dielectric as measured in my 2014 article: "Mirror vs. Dielectric vs. Prism Diagonal Comparison").  While longer, observationally I encountered no issue with running out of infocus using any eyepiece or with binoviewers with the optical corrector accessory (OCA) attached.


Diagonal

Measured Light Path (mm)

Baader Zeiss 2" Prism

100

Astro-Physics 2" MaxBright Dielectric

103

Baader 2" BBHS

112

Fig 6: Diagonal light path measures.


3. Observational Field Tests


Fig 7: Baader BBHS diagonal on Lunt 152 ED-Apo with Pentax 30mm XW eyepiece.


Observational testing was conducted in a suburban location in Northern Virginia, west of Washington, D.C., where the light pollution level varies, depending on the particulates and water vapor in the atmosphere, between light to moderate. Limiting magnitudes at this location vary on Moonless nights from magnitude 4 to magnitude 5.5.  For this review the diagonal was tested in three telescopes over the course of several months:

  • Lunt152 f/7.9 ED-Apochromat refractor
  • Takahashi TSA-102 f/8 Super Apochromat refractor
  • Vixen 81S f/7.7 Apochromat refractor


In the above telescopes, the primary eyepieces used for observing were the Pentax XW line and the Baader Morpheus line.  The Baader Zeiss prism diagonal and the Astro-Physics MaxBright dielectric diagonal were included for comparison purposes as these two diagonals were used in the original diagonal comparison report in 2014 of twelve different diagonals, Mirror vs. Dielectric vs. Prism Diagonal Comparison


3a. Thermal Acclimation


Since my tests were conducted in the winter, my initial tests were related to thermal acclimation time.  In my 2014 comparison of various diagonals, I noted that some diagonals exhibited astigmatism while they were cooling to the ambient outdoor temperatures.  With a temperature delta of 28º F (i.e., indoor temp of 74º F and outdoor observing temp of 36º F), the time to acclimate where the on-axis image showed no levels of astigmatism were as follows:


Diagonal

Time to Acclimate

(minutes)

Baader 2" BBHS

7.0

Baader 2" Zeiss Prism

9.5

Astro-Physics 2" MaxBright Dielectric

11.5

Fig 8: Diagonal thermal acclimation times for a 28º F temperature delta.

When the diagonals showed astigmatism while cooling, stars could not be brought to precise focus and the slightly defocused star showed the characteristic oval that changed orientation by 90º when defocusing between slight in-focus to slight out-focus.  With its magnesium construction and virtually zero-expansion Sitall mirror, the BBHS showed the quickest cool down characteristics of the three diagonals.  Interestingly, the amount of astigmatism during cool down was also comparatively small in the BBHS and Zeiss prism compared to the Astro-Physics MaxBright dielectric.  As a result, both the BBHS and Zeiss prism showed the least amount of star point deformation during cool down.  Of course, all scopes were fully acclimated showing perfect star points and airy disk patterns with no diagonals in the train before this test was conducted.


3b. Stray Light Control and FOV Illumination


As noted in my 2014 test of various diagonals, not all diagonals maintain a fully illuminated field of view (FOV) when using a 2" eyepiece that has a field stop that renders the maximum true field of view (TFOV) capability of the 2" barrel.  For this test, I used the Pentax 40mm XW with a field stop of 46.5mm.  All diagonals presented a visual FOV that appeared well illuminated with no detectable vignette of the FOV or dimming near the field stop.  The field stop also showed sharp and distinct with all diagonals.  At no time were any stray light artifacts observed during the testing.


3c. Scatter


In my 2014 diagonal comparison, I assessed that the Baader Zeiss prism diagonals tested and the Vernonscope Silver diagonal were the ones that showed a markedly less amount of scatter compared to the dielectrics and aluminized diagonals tested.  While the premium dielectrics like the Astro-Physics MaxBright and Baader Maxbright dielectrics were better relative to scatter than other dielectrics, they still showed more scatter than the Baader Zeiss prisms and Vernonscope silver.  Using the same Astro-Physics MaxBright diagonal from that test in this current test, the Baader BBHS visually showed a level of scatter that was slightly less.  However, the Baader Zeiss 2" prism diagonal still slightly less scatter than the BBHS.  As example, scatter halos around stars and planets showed slightly less extent and slightly less brightly in the BBHS compared to the dielectric.  This difference was close, but still visually detectable.  And where the scatter difference apparently had more impact was in observing close double stars.  Using the 81mm Vixen 81S Apo with a low power eyepiece so the split of Rigel was more difficult, through the dielectric the separation was just observable with a very slim line of gray-black separating the two stars.  With the BBHS the visual of the split appeared very different, with the gray-black region between the stars being more fully black and also thicker, making the split observation all the easier. Moving to some closer doubles in Orion, the results were consistently similar.  One one double in Orion that was too close to split at the magnification I was using so that it appeared as just a non-descript elongation of a single mass through the dielectric, with the BBHS this same double showed instead as two distinct touching balls.  This improved performance was very exciting to see.  My presumption is that this performance difference was due to narrow angle scatter differences nearest the stars, but it could very well be other factors that are involved.  Regardless of what the main driver for the difference is, scatter or some other attribute, what was important was that the BBHS was more effective at splitting close doubles and provided a more enjoyable observation as a result.


3d. Faintest Stars and Nebula


For this test I approached it two ways: first I observed clusters with faint stars to see if any of the faintest threshold stars showed in one diagonal any better than another, and secondly I observed the greatest extent of nebula that were visible (i.e., did any diagonal show nebula extending to a further extent).  Many amateurs in casual discussions usually refer to differences like this as being due to transmission differences.  However, although transmission may indeed be a player, it must be realized that other factors can also contribute, such as contrast and scatter.  So rather than getting bogged down in trying to determine the optical or manufacturing drivers behind any observation outcome difference, it is best in my opinion to just focus on the observations.


Looking for faintest stars, I observed the Double Cluster, the Orion Nebula, and the open clusters in Auriga.   I was not expecting much of any differences relative to seeing faintest stars as all the diagonals were top shelf equipment.  To my surprise however, I discovered differences immediately.  When observing the Double Cluster, the faintest stars that were at the threshold of vision and only detectable with adverted vision in the BBHS and Zeiss prism, were completely invisible in the Astro-Physics dielectric!  This performance difference was repeated observing other open clusters and was repeatedly encountered when observing the Trapezium in M42, where the F component remained illusive in the dielectric but was plainly visible in the BBHS and to a slightly lesser extent in the Zeiss prism. 


Moving to M42 and M43 to observe any differences in the extent of their nebulosity, the BBHS and Zeiss prism both showed more of the wings of M42 extending into the distance, and more pronounced and brighter nebulosity around M43.  The caveat relative to nebulosity though is that when the magnification was lower and exit pupils larger, all three diagonals appeared to perform the same.  So it was only when more magnification was employed that the performance differences presented themselves.  In the case of the Orion observation, the nebula looked visually the same when operating at an exit pupil of 1.25mm using a 10mm XW eyepiece (120x in the Lunt 152 and 82x in the TSA-102).  However, when I switched to a 5mm XW with a resulting 0.63mm exit pupil in both refractors, the nebulosity of M42 extended notably further when observed through the BBHS or Zeiss prism than through the Astro-Physics dielectric.  The Zeiss prism showed the furthest extent of the nebulosity, but it was only very slightly more.


3e. Rendition of Colors


Initially I had not planned for any testing of how colors were portrayed by any of the diagonals.  My presumption was that they should all be relatively the same so I doubted there would be any notable differences to warrant a test.  This all changed when I began my planetary testing observing Jupiter.  On my first evening out observing Jupiter, I used the Astro-Physics dielectric diagonal first. The observation was excellent with Jupiter giving up a ton of details through the Lunt 152 Apo.  The GRS was also well in view in all its swirling glory.  When I switched to the BBHS diagonal, I was shocked as the view was obviously different, and the GRS appeared markedly more saturated displaying a beautifully bright and rich red-pink color!  This richer color of the GRS was not slight at all, making it appear surprisingly more contrasted and colorful against its surroundings.  In comparison through the dielectric, the GRS looked lackluster and pale in comparison and much less contrasted to its surroundings.   I switched diagonals several times, and repeated the observations on other evenings and the difference remained.  The BBHS silver mirror was definitely showing colors more vividly than the dielectric, and even a little better than the prism as well.  After seeing this performance relative to colors, on other evenings I decided to observe several clusters that contained orange-red stars, like those within M37 as example.  Now attuned to look for how vividly colors are shown, it was apparent that the silver diagonal was doing an exceptional job compared to the dielectric as all the clusters I visited showed their orange and red stars much more vividly.  Seeing all these star colors so much better then reminded me of a quote from Vincent van Gogh where he said, "The night is even more richly coloured than the day…  If only one pays attention to it, one sees that certain stars are citron yellow, while others have a pink glow or a green, blue and forget-me-not brilliance. And without my expiating on this theme, it should be clear that putting little white dots on a blue-black surface is not enough."  Sometimes we get so caught up in the details, we forget about the colors.  Using the BBHS definitely reminded me just how colorful many targets can be when all components of the optical train are up to the task.


3f. Image Crispness


My final tests were relative to how sharp or crisp the views were between the diagonals, and if there were any differences readily visible between them.  For these tests I limited them to lunar and planetary (Jupiter) observing only to make the assessment.  Overall, all three diagonals produced what I felt were equally sharp and distinct views with no notable differences.  Aside from differences in contrast and color saturation, all diagonals showed sharp and crisp views from low to higher magnifications of approximately 250x.


4. Conclusion


Fig 9: Image inset: Jupiter; NASA, ESA, and A. Simon (Goddard Space Flight Center)


The purpose of this evaluation was to test the performance of this latest offering from Baader relative to the diagonals I previously tested in my 2014 report, Mirror vs. Dielectric vs. Prism Diagonal Comparison.  In that previous comparison there was a silver diagonal that proved to be exceptional, but with a prohibitive cost, the Vernonscope 1/20th wave quartz star diagonal.  The new Baader BBHS technology was therefore intriguing as it promised the performance of silver without the purported longevity worries and at a price commensurate with the non-silver competition.


Overall, all three diagonals provided superlative results with earned reputations.  However, the Baader BBHS dielectric protected silver diagonal distinguished itself by pulling in fainter stars, showing minimal scatter, and presenting colorful stars and planetary features more richly colored, with its silver technology besting the defacto standard for high performance dielectric diagonals.  Its Clicklock mechanism provided a level of ergonomic ease far surpassing other locking technologies I have used.  It clearly demonstrated low levels of perceived scatter, the ability to bring into view the dimmer of stars in clusters than the other diagonals, the ability to make more authoritative double star splits, and the ability to show the faintest extents of nebula.  All these attributes were highly welcomed and they clearly enhanced my observations.  Most surprising however, was how brightly and vividly the BBHS technology portrayed the colors of stars and of planetary features, showing colors more richly saturated and more beautifully bright than even the best dielectric technology diagonal could muster.  The views through the BBHS of brightly colored stars accentuated in familiar clusters, and of a richly colored GRS coursing its way across Jupiter were nothing less than truly memorable. 

~ ~ ~

About the Author

William "Bill" Paolini has been actively involved in optics and amateur astronomy for 45 years, is author of the desk reference on astronomical eyepieces: Choosing and Using Astronomical Eyepieces which is part of the Patrick Moore Practical Astronomy Series published by Springer of New York, has published numerous product reviews on major online amateur astronomy boards, and volunteers with public tours at a famous vintage Clark refractor site.

Bill's professional background is as an officer in the U.S. Air Force and as a computer scientist, holding a Bachelor’s degree in Computer Science and a Master of Science in Education. He has worked for the U.S. Department of Defense, the U.S. Department of Commerce, the Federal Trade Commission, the Federal Reserve, the World Bank, and a variety of commercial corporations in the information technology, information technology security, and telecommunications industries.

Bill has been observing as an amateur astronomer since the mid-1960's, grinding mirrors for homemade Newtonian telescopes during the 1970's and eventually owning, using, and testing several hundreds of eyepieces in a wide variety of telescopes from Achromatic and Apochromat refractors to Newtonian, Maksutov-Cassegrain, and Schmidt-Cassegrain designs. Today he enjoys observing and testing new equipment from his suburban home west of Washington, D.C., where his primary amateur astronomy pursuits are lunar, planetary, bright nebula, open cluster, and globular cluster observing.


***

This article is placed in the public domain with no use restrictions when presented in its entirety.  Quoted excerpts are permitted without request with the citation: "William Paolini, The Baader BBHS-Sitall Silver Diagonal".

Images without credits are by the author and © William Paolini, 2016.  All rights reserved.

Please direct all questions or requests for permission to use images to the author at wapaolini@hotmail.com.

INTERSTELLARUM DEEP-SKY ATLAS (FIELD EDITION) R...

$
0
0

INTERSTELLARUM DEEP-SKY ATLAS (FIELD EDITION) REVIEW

interstellarum Deep Sky Atlas (Field Edition)

Ronald Stoyan and Stephan Schurig, authors

Published by Oculum-Verlag; English-language editions produced and distributed by Cambridge University Press

MSRP: $244.99

The author is an Oregon-based deep-sky observer with three decades' experience at the eyepiece and a semi-Luddite approach to observing—wires make him very, very nervous. He has no connections to the authors or publisher of the work under review.

Background

Unlike many CloudyNights members, it seems, I’m not normally one to embrace new technology—I own five telescopes, ranging from a 12.5" Dobsonian to a 70mm achromat—but my use of electricity in the field is usually limited to anti-dew devices.  More recently, I’ve started using an iPad in the field, but even that is in a low-tech manner; I generally use only the Tri-Atlas app for astronomy, which is basically a paper atlas on-screen.  (I have Stellarium and Sky Safari, but haven’t really used them yet at the eyepiece.)

Since 1988, my main atlas in the field has been Tirion’s deluxe Sky Atlas 2000.0.  With the first edition, I completed the Messier catalogue and stepped out into the NGC (mostly planetary nebulae and globular clusters) from my horribly light-polluted Cincinnati suburb.  Sky Atlas 2000.0 is of a decent size and scale, is easy to take and keep scope-side, had the right amount of detail for the scope I had at the time (an 8-inch SCT), and still worked well when I went up an aperture level.  With the second edition, I completed the AL’s globular cluster program and began pushing the envelope of what I could find with my 12.5” Dobsonian from a Bortle green zone, moving into Hickson groups and Arp galaxies.  I’ve used a copy at my scope for almost 30 years.

I also own both editions of Uranometria 2000.0; the first edition occasionally ventures out into the field with me, and has an ideal depth in terms of deep-sky objects.  The second edition of U2000.0stays at home, as it seems almost sacrilegious to take it out into 90% humidity night after night.  It’s a beautiful piece of work.  It has one major drawback for me, though—it has thousands of non-NGC galaxies (many of which are within range of my scope), but almost nothing to distinguish them from brighter galaxies.  On its own, this wouldn’t be a huge flaw, but in the field, with only a very dim red light to read by, it would be a hassle to weed through the tiny labels and symbols if I decided to take a side trip from a previously-selected object.  Ideally, the brighter objects (mainly the galaxies) inU2000.0 would’ve had some way of indicating which objects are more obvious in the eyepiece and which were barely detectable.

Enter Ronald Stoyan and Stephan Schurig’s interstellarum Deep-Sky Atlas [hereafter iDSA].  Originally only a German-language edition published by Oculum, the iDSA was picked up by Cambridge University Press and translated into English.  Available as a paper Desk edition or a waterproof Field edition, the English version of the iDSA was released by Cambridge in late 2014.   Designed specifically as an observer’s atlas, the iDSA covers the middle ground between Sky Atlas 2000.0 and U2000.0, adding a host of observer-friendly features, solving a few issues other atlases have, and staking a claim as possibly the last great print atlas.

Physical aspects

The iDSA consists of 114 double-page charts, organized by declination.  The charts measure 10.2” x 11.0” (26 x 28 cm) per page, covering the sky at a scale of 1.5 cm per square degree.  Each of the double-page charts covers two hours of right ascension and 15 degrees of declination. The center-point of each chart is indicated on the charts’ edges, and each strip of declination is identified on the edges of the pages for easy indexing in the field.  There are six index charts (one for each celestial pole and four seasonal indexes) toward the beginning of the atlas.  In addition, crowded fields of sky are shown on 29 detailed charts of varying scale; these are indicated on the main charts themselves (although the detail charts don't indicate on which "main" chart they can be found—this would have been useful).  These detail charts are arranged at the end of the atlas, after the main charts; a grey strip running along the length of the detail-chart pages allows for them to be flipped to fairly easily under red light.

At the back of the atlas is a 15-page index of all deep-sky objects contained within the atlas itself.  These are organized by object class.  This is fine if you know the class of an object, but might be problematic if you don’t know anything about an object beyond a catalogue number.  (Adding a general index would, of course, add another fifteen pages to the index, which would probably be impractical.)

The atlas is housed in a black polypropylene cover with silver lettering; it’s a classy-looking package, and comes housed in a cardboard slipcase.  The slipcase isn’t waterproof, but is sturdy enough to transport the iDSA.  Pages are spiral-bound with a coated wire. I’d be concerned about preventing rust here, as it might bleed onto the pages should the wire get damaged and wet (one CloudyNights user has reported that the wire binding broke in his copy of the atlas).  A polypropylene card containing the atlas legend is included in a clear plastic pocket in the inside cover of the atlas; my atlas came with the side of the pocket torn by shifting of the card during transit.  The legend card is a nice feature, but sits loosely in the pocket—be careful that it doesn’t fall out unnoticed while using the atlas.

One of the notable features of the iDSA Field Edition is that it’s not printed on standard paper; it’s printed on a matte-finished plastic paper-like material (Polyart) that is ostensibly completely waterproof (the atlas’ webpage mentions that the iDSA is perfectly unharmed by dunking in an aquarium; given one CNer’s experience [see below], I’m not likely to test this).  The iDSA website refers to this material as a plastic “foil.”  It has a kimdura-like finish and feel.

The “foil” material can indent slightly with a fingernail but is fairly tear-resistant (I didn’t try too hard to rip it, but exerted enough pressure to tear regular paper easily).  My copy had a few pages with small wrinkles in them from (I suspect) being run through the printing press.  These wrinkles had a minimal impact on the atlas’ usability and only a very minor impact on it aesthetically, although they really shouldn’t be there at all.  The matte finish of the material makes it a bit of an issue to get the pages all jogged up evenly so that the atlas can fit into the slipcase.  I also found the pages to be slightly tricky to grip and turn with cold fingers.

My copy of the iDSA has a printing issue: some of the star symbols (and a few of the constellation lines) got an extra-heavy ink load, and soaked through the page slightly.

Images from charts 67 and 68.  On the left, Chart 67 shows extra-heavy ink coverage on the stars Nu Scorpii, Beta Scorpii, and Sherbourne 213; this can be seen in the image as high reflectivity of the star symbols under a light held at the correct angle.  (The star symbols appear black and normal when viewed directly.) On the right, Chart 68 shows where the ink bled through the page from Chart 67; ghost images of Nu Scorpii, Beta Scorpii, and Sherbourne 213 can be seen.

This is a problem, but not one for which I was willing to return the atlas overseas (it was shipped from England). However, had it been more widespread or distracting, I would certainly have returned it.

The charts run straight to the edges of the pages; there are no gutters here.  The makers of the atlas did this to maximize the amount of overlap among the charts.  To me, however, it makes the atlas look slightly unfinished, with printing running straight up to the holes through which the spiral binding runs and to the edges of the pages, with labels and symbols cut off abruptly.  I’d have preferred a border or gutter around each page, simply for aesthetic reasons.

Contents

So what’s actually in the iDSA?  Well, it’s a substantial step up, deep-sky content-wise, from Sky Atlas 2000.0.  The iDSA plots and labels the following deep-sky objects:

(Object-class breakdowns were unavailable for Sky Atlas 2000.0.)

Stars are shown to magnitude 9.5.  In theory, this should be deep enough, but in practice it isn’t enough for detailed star-hopping.  It’s a difficult trade-off: increasing the magnitude depth would’ve made the atlas even more useful, but it also would’ve made the charts more cluttered with stars.  (By comparison, U2000.0 goes to magnitude 9.75 and adds over a third more stars… and even it isn’t quite enough for detailed star-hopping.)

A number of less-known deep-sky object catalogues are represented.  The iDSA especially shines on open clusters, including the complete Basel, Bochum, King, Stock, Tombaugh, and Trumpler catalogues, as well as a number of even more-obscure targets.  Among globular clusters, all of the Terzan and Palomar globulars are included, along with Whiting 1, the Koposov clusters, an obscure cluster in Pegasus (Balbinot 1), and the recently-discovered globular cluster in Crater (which may eventually turn out to be something other than a globular).  Clusters of both types are labeled in yellow, using the same symbols as in Tirion.  Asterisms are a nice addition to the atlas, and one that no other major atlas plots in such quantity; they’re marked here with a dotted circle, which at first glance is a bit difficult to differentiate from the open-cluster and galaxy-cluster (q.v.) symbols. 

Diffuse nebulae are plotted with their visible extents marked, rather than what is extrapolated from photographs.  This is apparent in comparing the outlines of Simeis 147 (in Taurus) from the iDSAand the Jumbo Pocket Sky Atlas:

Simeis 147 as rendered in the iDSA (left) and the Jumbo Pocket Sky Atlas (right).  Note that the print quality of both atlases is much higher than indicated by these low-quality scans.

This is particularly helpful, as it provides a better representation of what may reasonably be seen in the eyepiece.  Additionally, nebulae are labeled on the chart with a small box indicating which type of filter may be of greatest use on each nebula.  I compared those filter recommendations in the iDSA with those of CN’s David Knisely, a respected filter guru; of 55 nebulae, the iDSA disagreed with Knisely only nine times, with only two of these disagreements being instances where Knisely referred to the iDSA’s recommended filter as being “not recommended.” [1]  (In five instances, the iDSAlisted a given nebula as a reflection nebula and offered no filter recommendation, whereas Knisely did recommend a filter, due to the nebulae being a combination of emission and reflection types.)  Diffuse nebulae are colored red here, rather than green, as is often the case; reflection nebulae are marked in blue.  (It’s nice to see an atlas that indicates the distinction on the page.) Dark nebulae—including the entire Barnard catalogue—are plotted here also, in dotted outlines filled with black or grey [see below].

Planetary nebulae are plotted in green, including the entire Abell catalogue.  It’s nice to see an atlas that uses labels other than the outdated PK or the current PN designations, as these are less commonly used by amateurs.  One of my gripes with Uranometria was that the PK numbers were used on the charts in the 1st Edition, so that finding a planetary by an alternate name required using the Deep Sky Field Guide—then, when they issued the 2nd Edition of Uranometria, they used the PN numbers, relegating the PK numbers to the “Alternate Names” column in DSFG and ignoring the other catalogue names entirely; if you wanted to find Jones-Emberson 1 and didn’t know the PK number, you had to use the 1st and 2nd Edition DSFG to find JE-1 in the 2nd Edition Uranometria.  TheiDSA wisely circumvents this.

Galaxies, like reflection nebulae, are drawn in blue.  The entirety of the Arp and Holmberg catalogues, as well as those objects that are members of the Local Group, are plotted in the iDSA.  Also included are all Hickson groups and a few of the Shakhbazian and Klemola groups, as well as all Abell galaxy clusters with members brighter than 13th magnitude. (Oddly, NGC 3290 is charted separately from Arp 53, when in fact the two are one and the same.)

Double and variable stars are plotted with standard symbols.  Tick marks indicate separation distances, magnitude differences, and position angles in double or multiple stars.  Many doubles are marked with their Struve/Otto Struve numbers, unlike in the Tirion atlases.  All of the doubles in the Astronomical League’s Double Star observing program are included in the iDSA (although N Hydrae isn't identified as such; it's labeled as 17 [Crateris] and Hill 96 instead), although this is likely a coincidence.  Variable stars are marked with circles and dot sizes indicating their maxima and minima.  Carbon stars are not labeled or given a symbol as such; this is an unfortunate omission.  52 of the 100 stars on the Astronomical League’s Carbon Star Observing Program are nonetheless included among the variables plotted in the iDSA. It should be noted that while the Pocket Sky Atlas specifically labels carbon stars, it only does so with 55 of them—not much more than the iDSA, although the latter doesn't assign them a special symbol.

Stars with exoplanets—those discovered before April 2013—are labeled with an oval drawn around the star symbol.  Indicating stars with exoplanets is curious for an atlas with a visual emphasis, as exoplanets aren’t exactly a visual target for amateurs.  While it’s certainly of astrophysical interest—and the iDSA is the first atlas I know of to indicate exoplanet-bearing stars—I’d have preferred to have carbon stars marked instead, as it would be of greater observing interest.

The use of nicknames for deep-sky objects is a bit problematic.  Sure, there are the common ones (Lagoon, Trifid, Swan, Dumbbell, etc.), but there are also a number of less-accepted or unfamiliar ones that add clutter to the charts (Patrick Starfish, the Condom Nebula)—perhaps these are used more in Europe, where the iDSA was first created and marketed.  (In one instance, the nickname “The X-Rated Galaxy” is ascribed to the wrong object—NGC 5557, instead of the NGC 5544/45 pairing that usually gets the nickname. Do yourself a favor and DON’T do a Google Search for "X-Rated Galaxy.") I understand that nicknames can’t achieve common status without being used repeatedly, but some of these probably shouldn’t be used in an atlas that will outlive the references. There’s also at least one typo among the nicknames, as NGC 4627—The Cub or The Pup—is referred to as “The Club.”

Unlike the Tirion atlases, the iDSA draws lines to outline the figures of the constellations.  This might also be problematic for some users, who adhere to certain constellation outlines; a glance through the index charts, though, shows that the iDSA uses constellation figures that are pretty recognizable, if not entirely universal.  A few constellations—eg. Puppis, Pisces Austrinus—are a bit unusual at first glance, but there’s nothing here that’s totally unreasonable as a constellation figure.

One element that’s missing from the iDSA that’s present in Sky Atlas 2000.0 is Milky Way isophotes, marking the extent and density of the Milky Way as seen in the sky.  This isn’t a major drawback, although I’m sure a number of users will wish they were present in the iDSA.  As the iDSA uses red, green, yellow, blue, and black/grey for deep-sky objects, it’s hard to envision how the isophotes could have been represented anyway, without making the charts confusing or hard to read.  (I somehow don’t think purple or orange isophotes would have cut it.)

The main innovation of the iDSA is the manner in which it denotes an object’s visibility.  Using an extensive list of observations—the basis for the Eye & Telescope software, on which the iDSA itself is based—the authors have sorted all of the deep-sky objects in the iDSA into four visibility classes: objects visible in 4-, 8-, and 12-inch telescopes, and a selection of targets for telescopes larger than 12 inches.  Visibility is indicated by the font size and weight of the object’s label, the line weight of the object’s symbol, and the density of the color used in the symbol. (The legend card inside the front cover can be used as a reference, if needed.) This system is intuitive enough that it quickly becomes second nature, although the symbols for asterisms, star clouds, groups/clusters of galaxies, and open clusters in the 12”+ class can be rather easily confused at first (and sometimes second) glance. Objects' visibility was determined by the authors using skies of 6.5 NELM and/or SQM 21.3 mag/arcsec^2 as a benchmark.

Some reviews of the iDSA have criticized these visibility classes as being a gimmick, or as something useful only to beginners.  Both criticisms are unwarranted, implying as they do that needing such information in the field is a sign of inexperience, poor research, or a lack of observing skill.  Yes, the visibility classes would be helpful for beginning observers (although they're less likely to shell out $200 for their first star atlas).  In many instances, though, a spontaneous observing session is either a necessity or a pleasant change from routine for a seasoned observer, and knowing which objects might be suitable targets for a given scope simply by looking at the chart can make such spontaneity productive, efficient, and enjoyable.  And for those who work from an observing list, it can be helpful to see at a glance what potential targets might lie within a few degrees of a recently-found object.

In assigning objects to their visibility classes, the authors have opened themselves up to a great deal of nitpicking and second-guessing, but their methodology seems to have paid off, judging from the initial reviews and comments from users.  Not everyone is going to agree on the visibility of every object, given the variables involved. Stoyan and Schurig should nonetheless be commended for bringing a new level of usefulness to the millennia-old science of uranography.

In the field

With all this buildup, how does the iDSA actually work in the field?

Initial concerns about the use of red light with the iDSA's color coding are pretty much for naught.  All of the object symbols are readable in red light; emission nebulae (printed red in the atlas) and open and globular clusters (yellow) turn varying shades of light orange, while galaxies, reflection nebulae, and planetary nebulae (blue, blue, and green, respectively) are varying shades of blue when lit by red light.  If you depend on the color coding to determine object types in the field, you might be somewhat less happy with the colors printed here, but between the colors and the symbols, there shouldn't be any confusion. The iDSA loses none of its usability when read by red [2].

The atlas definitely works better laying flat than being held at the eyepiece.  The spine of the atlas is creased so that it can be folded back on itself, but I found it a bit awkward to comfortably hold that way.  It's not impossible, but certainly not as easy as with, say, Erich Karkoschka's Observer's Sky Atlas, Peter Birren's Objects in the Heavens, or the ubiquitous Pocket Sky Atlas (even the new Jumbo version), all of which are smaller, lighter books. CloudyNights user Carol L recommends putting the iDSA on a music stand, which is an excellent idea.

Some commenters have indicated that they found the fonts used for right ascension and declination (if not those used for object labels themselves) to be too small for easy reading in the field.  While this wasn't my experience, I can certainly see how it would be for many observers. Very small type is appropriate for the faintest objects in the atlas, but less so for important general information. Future editions of the iDSA might do well to take this into account. 

The visibility classes seemed to be fairly consistent with my own experience under similar skies to those of the authors, at least in the 8" and 12" classes.  I did find the visible extents of some of the nebulae to be a bit ambitious as drawn in the atlas, but this certainly requires more testing than I was able to give it.  I've had the atlas for nearly a year as of this writing, but have only had a couple of chances to use it in the field (2015 was a miserable year for observing!).  In working through some crowded galaxy fields (e.g. Abell 347 in Andromeda), though, I found the iDSA's symbology to be pretty much on the money with what I observed under average conditions.

In some crowded fields, it can be difficult to discern which label goes with which symbol, as in the case of the NGC 2462 group in Lynx:

The field of NGC 2462 as seen in the iDSA (Chart 17). Note that the print quality of the atlas is much higher than indicated by this low-quality scan.

The trade-off here is between keeping the labels directly next to their object symbol or working around the star symbols in the area.  Indicator lines could have connected labels with their corresponding symbols, but these, too, could contribute to crowding and clutter.  I'm not sure there's a compromise that will appease a majority of users.

One criticism of Uranometria 2000.0 is that, while it has an exceptional amount of depth with regard to deep-sky objects, it lacks sufficient stars for star-hopping.  The same is true with the iDSA: it's certainly fine for using patterns and geometric figures to close in on a target, but there simply aren't enough stars for star-hopping from an eyepiece.  This is a logistical trade-off; having enough stars in the atlas for such detailed hopping would make the atlas, at this scale, so dense with stars as to be unreadable.  For deep, very detailed star-hopping, either a planetarium program or something like the TriAtlas app (with stars to 13th magnitude) will be needed to supplement the iDSA.  Those who are comfortable star-hopping with less-detailed charts, however, will find the iDSA perfectly adequate for the job.  In many instances, I found that the iDSA was plenty "deep" enough for hopping through moderately-crowded fields.

The most serious criticism of iDSA (the Field Edition) has been leveled by a fellow CloudyNights user whose atlas had pages stick together after getting wet with dew and being left to dry for several weeks; ink had peeled off one page of his atlas and transferred to the facing page. [3]  In searching on the Internet, I haven't yet found any other cases like this one being reported, so perhaps this was an isolated occurrence with an early printing of the atlas. (A couple of other users have reported sticking pages, but the problem has gone away once the pages have dried, and they had no issues with peeling ink.) This is the worst possible flaw a waterproof atlas could have, so it's worth taking seriously.  I'm not inclined to leave anything to chance, given that the iDSA Field Edition is a $200 book, so mine stays in a clear turkey bag when out in the field to keep the dew and frost off of it.  It's also recommended that pages be wiped off after use and that the atlas be dried out at home after a session before being put away—all good advice, although I'm sure many will find that such caution somewhat defeats the purpose of having a waterproof atlas.  Again, though, only one instance of this problem has been reported so far.

Conclusion

So, all things considered, would I recommend the interstellarum Deep Sky Atlas?  The answer would be a mostly-resounding "yes."  As the user of a 12.5" scope, I find that the atlas provides an appropriate depth of coverage in terms of what I might expect to see, and, backed up with the TriAtlas and/or Sky Safari, I could identify any objects in a given field that are not labeled in the iDSA. The atlas is extremely user-friendly aside from its size, which largely precludes being hand-held at the eyepiece, but is more convenient than strictly using a tablet in the field; the small size of some of the type is a minor inconvenience at worst.  The only hesitation that I have regarding the iDSA is the sticking pages/peeling ink issue, which may well prove to be a single-occurrence "outlier" among the body of iDSA users; as the atlas becomes more popular, this may turn out to be an isolated unfortunate instance, and it may in any case be preventable with the kind of care one takes with one's optics after a night's observing.

Stoyan and Schurig have produced an atlas that, while not perfect, may be the most user-friendly field atlas available to amateur astronomers with moderate-sized telescopes—an atlas that might stand as the apotheosis of the printed atlas in a day and age dominated by astronomy apps and planetarium programs.

--Andy Edelen, A.K.A. KidOrion

[1] David Knisely's filter recommendations for various nebulae can be found at  http://www.cloudynights.com/page/articles/cat/user-reviews/accessories/astronomical-filters/filter-performance-comparisons-r1471

[2] It should be noted that the author has issues with colorblindness in the red end of the spectrum, so others may see these colors somewhat more or less strongly.

[3] The account of this can be found at http://www.cloudynights.com/topic/488677-interstellarum-oculum-deep-sky-atlas-it-is-here/?p=6462792

Viewing all 245 articles
Browse latest View live